


Adding Studs To Clothing: An Easy Step By Step DIY Guide


Adding studs to clothing offers a powerful way to inject personality and achieve a distinct custom style, appealing to many within DIY fashion and established brands alike. However, for a small clothing business aiming to produce unique, high-quality apparel, the method of stud application is as crucial as the design itself.
Simply adding studs isn’t enough; doing so incorrectly can lead to issues like lost embellishments, damaged garments, or an unprofessional finish that undermines brand value. Achieving durability and professional results requires understanding the right techniques and materials.
This guide provides detailed instructions and expert insights into the process, covering everything from selecting appropriate studs and tools to mastering application techniques on different fabrics like denim and leather. By following these steps, you’ll gain the skills and confidence needed to apply studs effectively, ensuring your custom apparel boasts lasting style and quality craftsmanship.
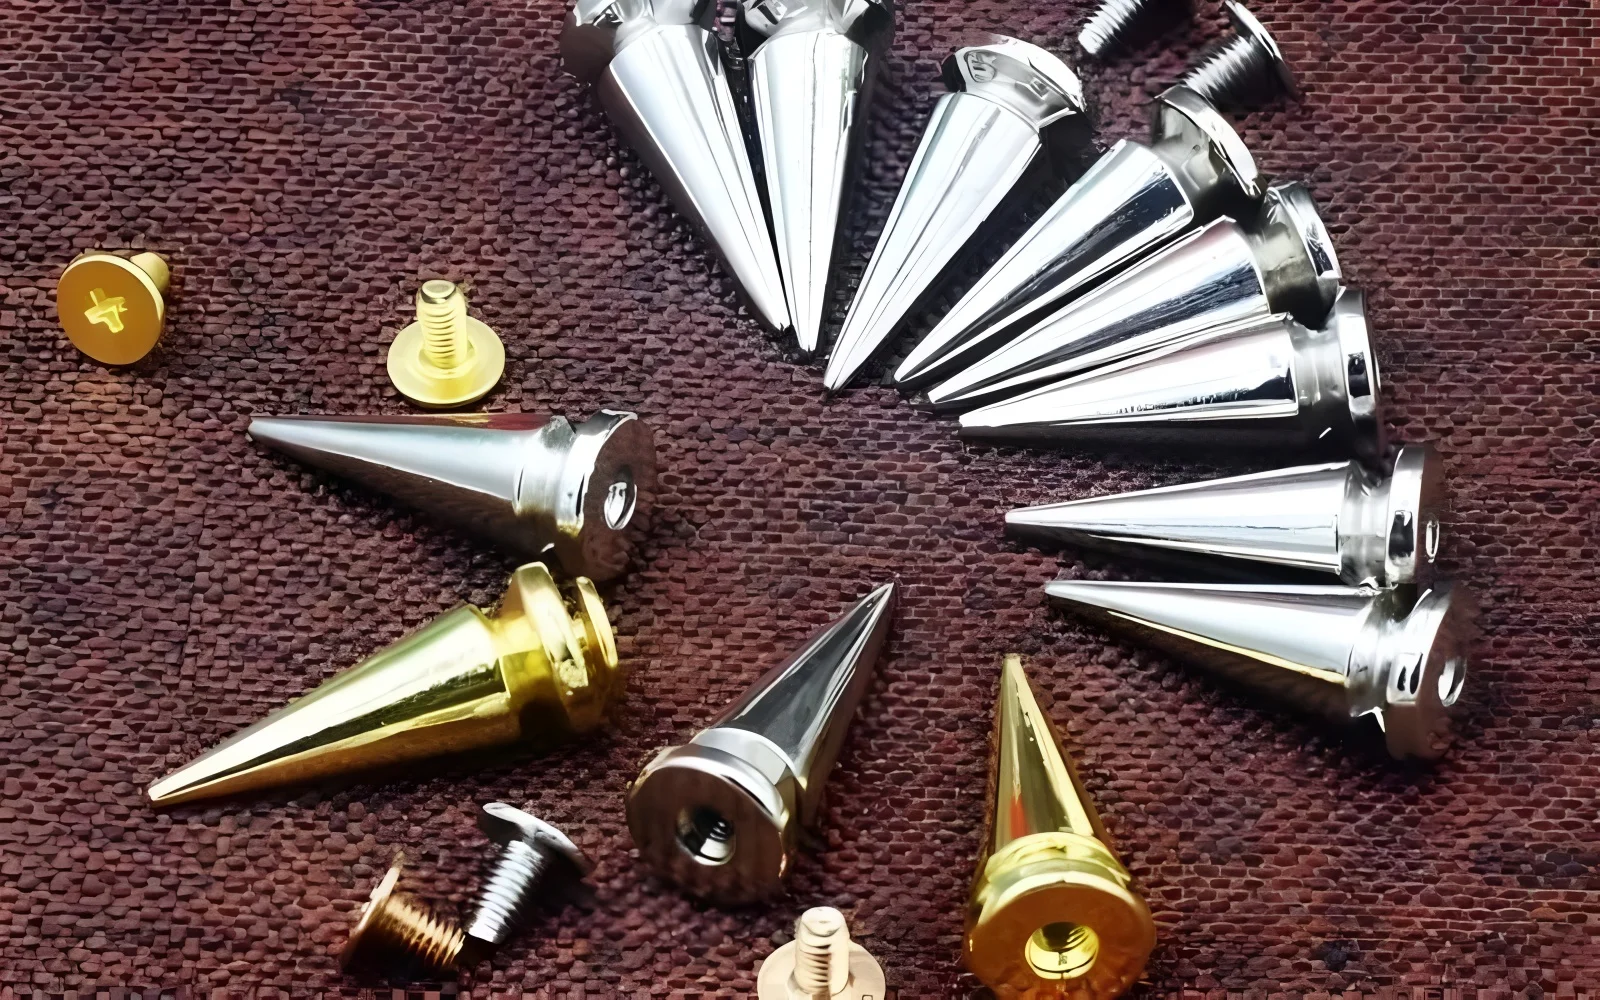
1. Choosing the right studs for your project
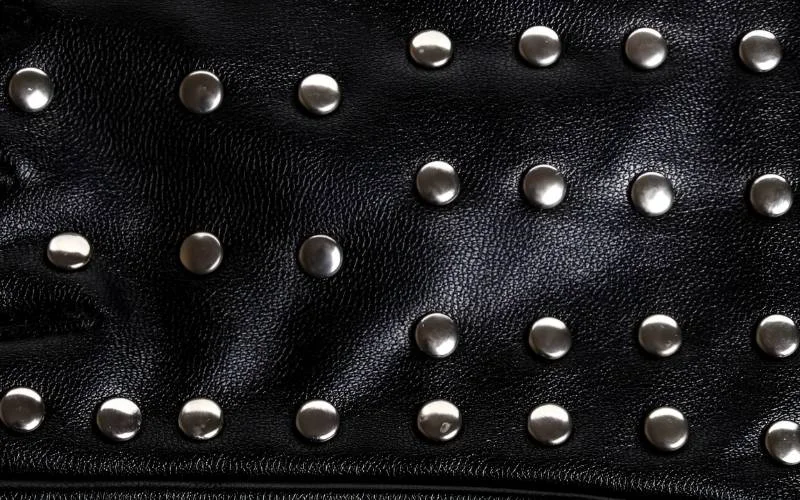
Selecting the appropriate studs is fundamental to both the aesthetic outcome and the longevity of your design. The most common type for direct fabric application are pronged studs. These metal studs feature small prongs on the back that pierce the material and are then bent flat on the underside to secure them.
Popular styles include:
- Pyramid studs: Characterized by their four-sided pyramid shape, these are iconic in punk fashion and lend an edgy look.
- Cone studs: Tapering to a point, cone studs offer a sharper, often more aggressive appearance frequently seen in metal fashion.
Beyond style, consider the materials and sizes. Opt for good-quality metal studs; cheaper alloys might bend or break easily during application, tarnish quickly, or even rust, damaging the garment. The stud’s size significantly impacts the visual weight and the spacing required in your pattern. Larger studs make a bolder statement but require more space, while smaller studs allow for denser, more intricate designs.
While pronged studs are the focus here, be aware of screw-back studs. These consist of a decorative head attached to a threaded post and a separate screw-on backing. They require pre-made holes (often punched) and are typically used on thicker materials like belts or dense leather, or where a smoother internal finish is paramount without bending prongs. Application is a different process than detailed in this guide.
For businesses, sourcing studs of consistent quality and finish is vital. Variations in size, color, or prong strength between batches can lead to inconsistencies in the final product. Establishing a reliable supplier ensures uniformity across your apparel line.
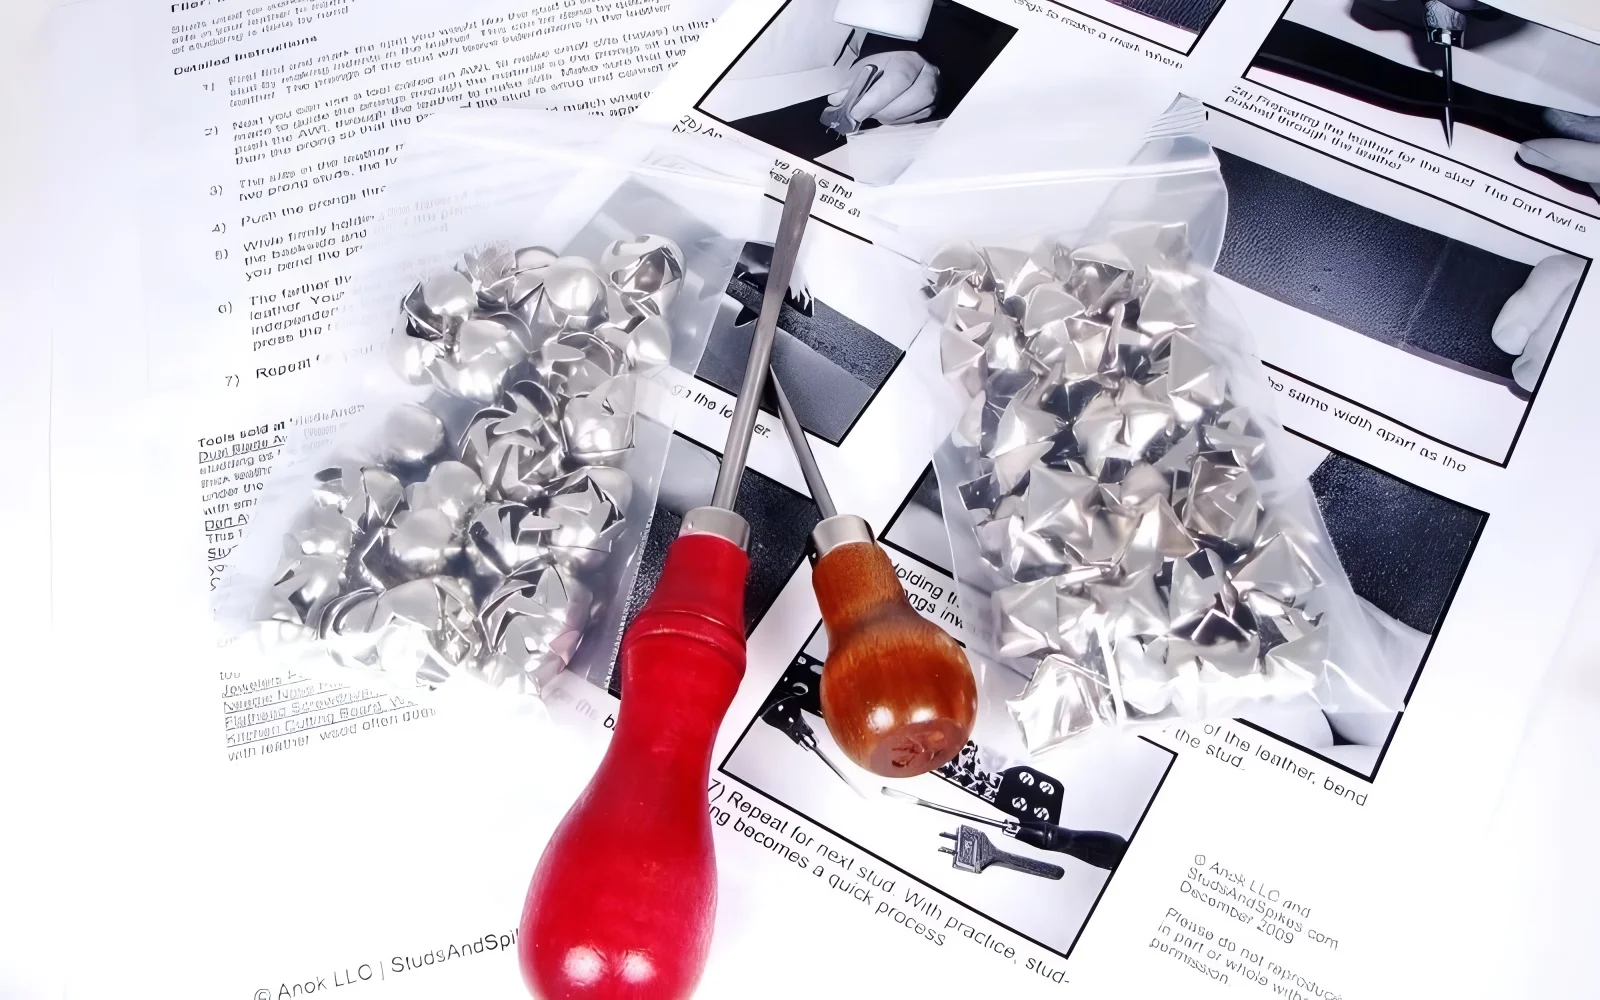
2. Must-have tools for precision studding
Achieving a clean, professional finish when applying studs requires the right tools. Using appropriate equipment not only improves accuracy and efficiency but also enhances safety. Here are the essential items for precision studding:
- Jewelry pliers (specifically needle-nose pliers): These are critical for bending the stud prongs. Needle-nose pliers offer superior control compared to standard pliers, allowing you to grip each prong firmly and bend it flat against the fabric without slipping or damaging the surrounding material.
- Fabric piercing tool (awl or sharp tweezers): An awl is ideal for creating precise openings in most fabrics. Its sharp point allows you to gently separate the fibers (like in denim) or create a small, clean hole (like in leather) just large enough for the prongs. Sharp, pointed tweezers can sometimes serve as an alternative for very fine work or delicate fabrics, but an awl generally provides better control and consistency.
- Measuring tool (ruler or flexible tape measure): Precision in spacing and alignment is key. A ruler is excellent for straight lines, while a flexible tape measure is better suited for curved areas like collars or armholes. Accurate measurement ensures a symmetrical and polished final look.
- Marking tool (fabric chalk or disappearing ink pen): You need a reliable way to mark stud placement points on your fabric. Choose a marking tool appropriate for your fabric color and type – fabric chalk works well on dark materials, while disappearing ink pens are good for lighter ones. Always opt for marks that are easily removable or will be completely hidden under the stud head. Test on a scrap piece first.
Safety Note: Always handle sharp tools like awls and the stud prongs themselves with care. Work in a well-lit area and consider wearing safety glasses, especially when working with tougher materials or applying significant force.
3. Fabric fundamentals: Understanding your canvas
The type of fabric you choose significantly influences the studding process and the final result. Not all fabric types are equally suitable for supporting metal studs. Understanding your canvas is crucial for achieving durable and aesthetically pleasing outcomes.
Denim and leather are prime candidates for studding.
- Denim: Its sturdy weave and substantial thickness provide excellent support for pronged studs. The fibers can often be gently separated rather than cut when creating openings, which helps maintain the fabric’s integrity, especially around the stud area. Different weights of denim may require slightly different techniques, but generally, it holds studs securely.
- Leather: Genuine leather offers a robust and stable base. Its density ensures studs remain firmly in place once the prongs are correctly secured. However, unlike woven fabrics, holes pierced in leather are permanent, demanding greater precision during marking and piercing. The thickness and temper (stiffness) of the leather will dictate the effort needed for piercing and securing.
Conversely, very thin or delicate fabrics pose challenges. Lightweight silks, chiffons, or loosely knit materials often lack the structure to support the weight and tension of metal studs. Stretchy fabrics are particularly problematic; the fabric can pucker around the studs, or the studs themselves might pop off as the material flexes.
While not impossible, studding less ideal fabrics often requires reinforcement. Applying fusible interfacing to the back of the material before studding can add stability and help distribute the stress. However, for beginners or for items intended for sale where durability is paramount, sticking to robust materials like denim and leather generally yields more reliable and professional results.
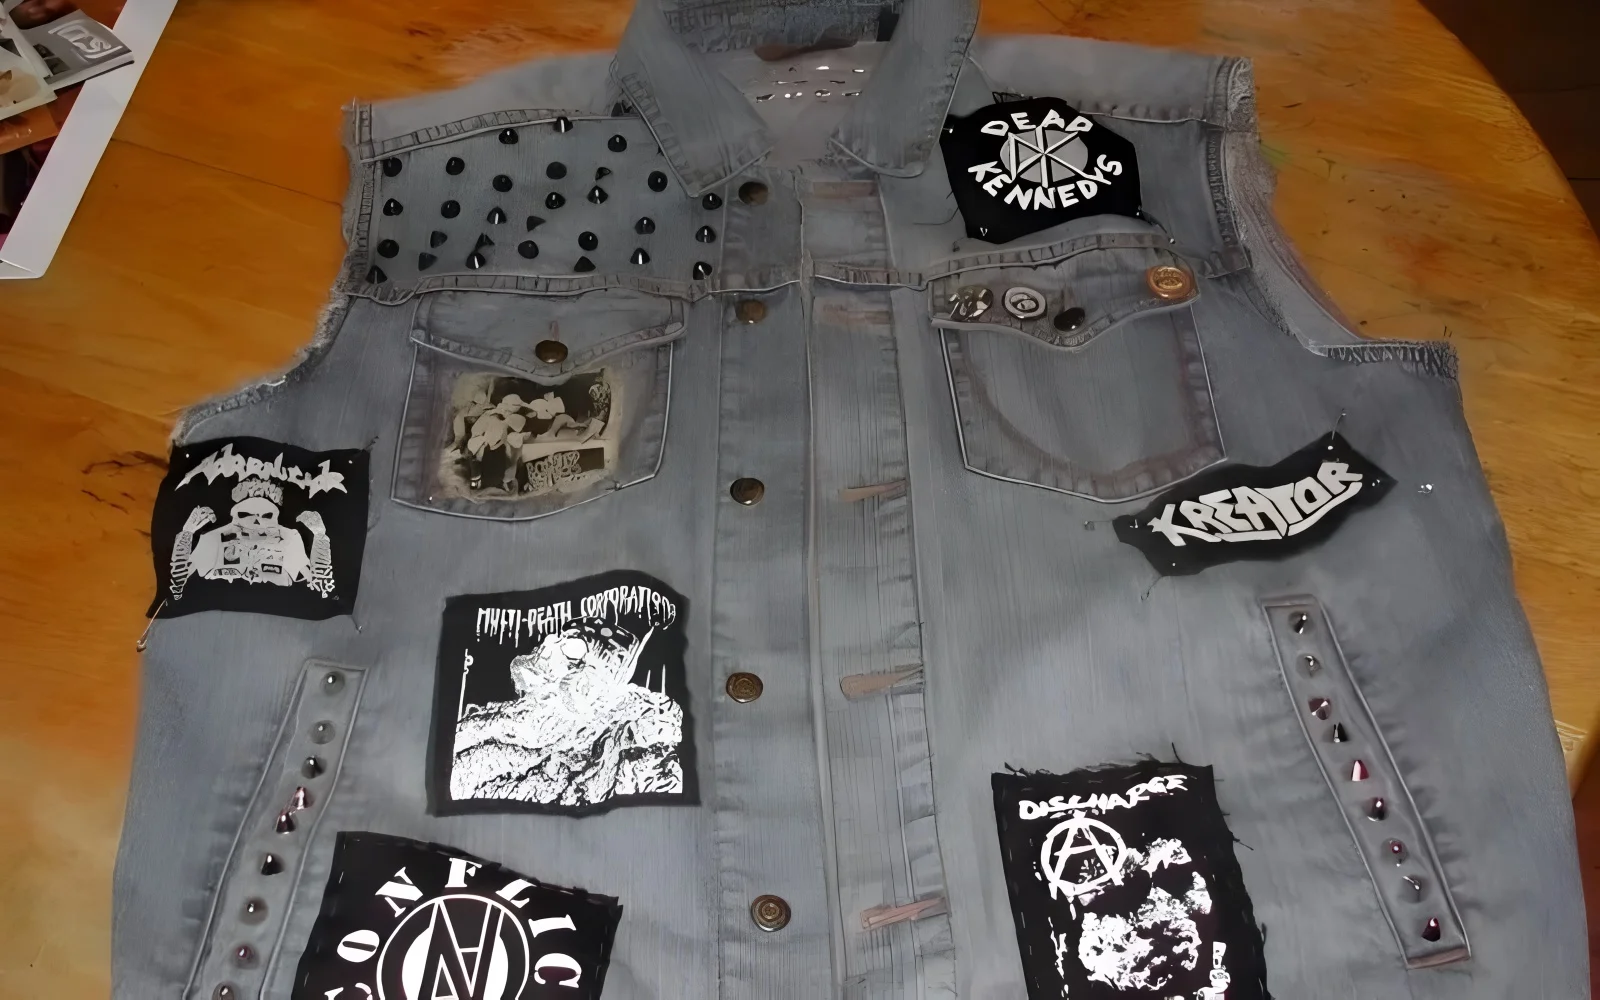
4. Finding inspiration and mapping your pattern
Before making any permanent marks or holes, planning your stud design and layout is essential. This stage bridges creative inspiration with practical execution, ensuring the final look is intentional and well-balanced.
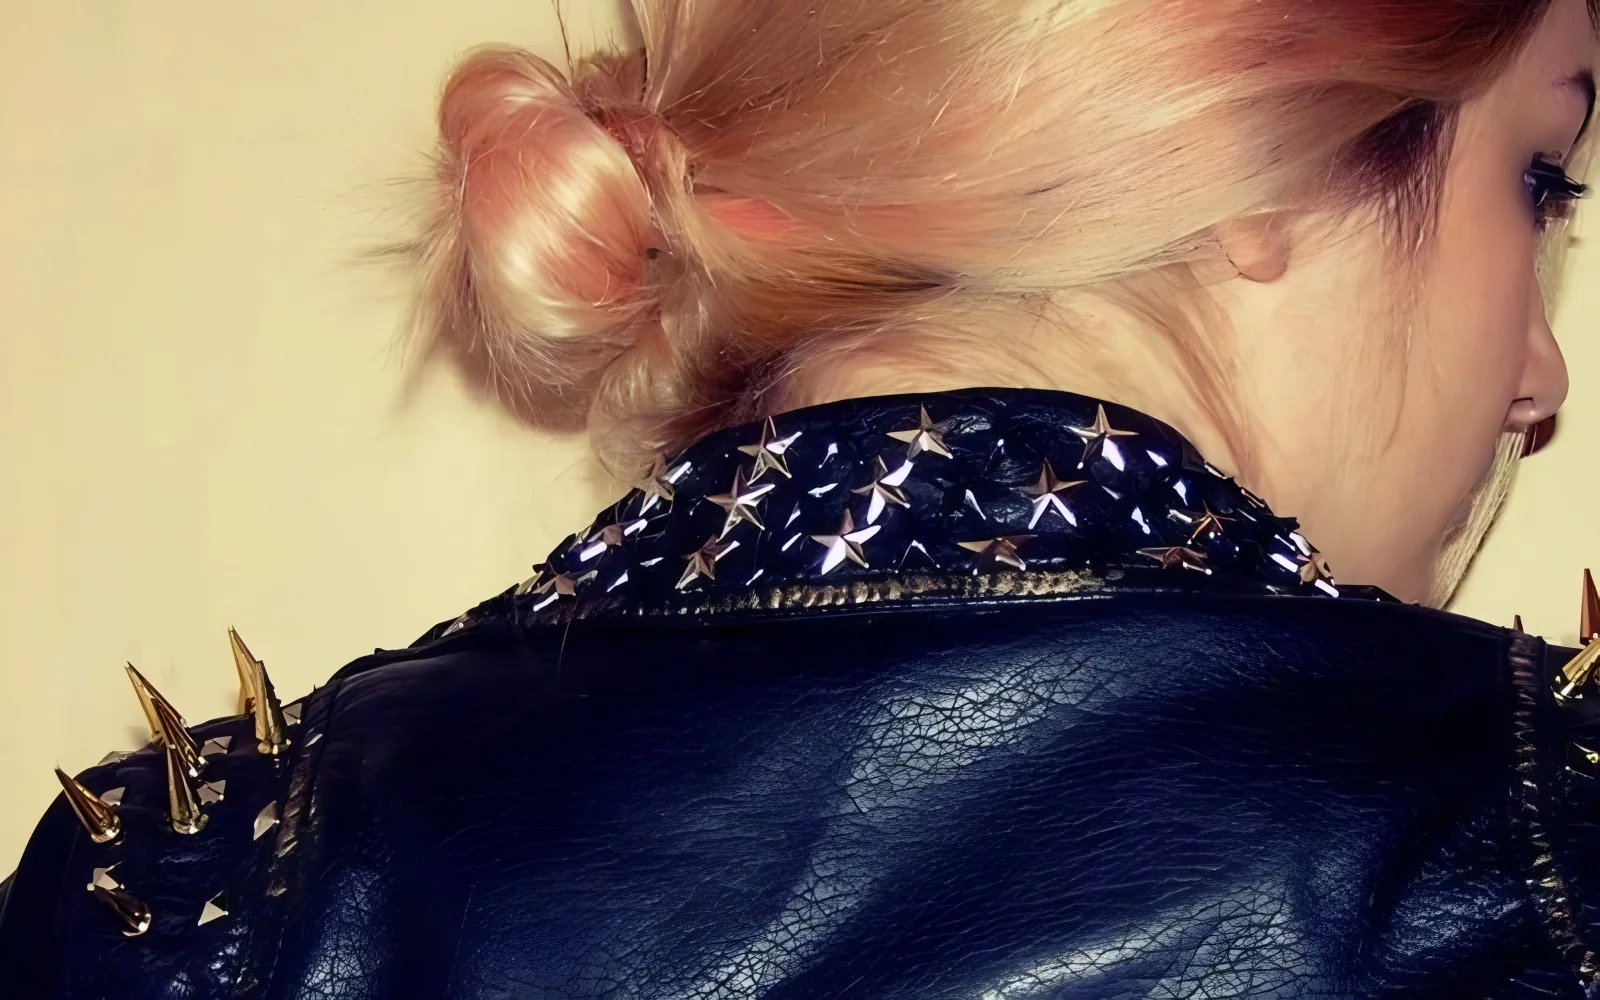
Consider where studs will have the most impact. Common placement areas include:
- Along seams (shoulders, sides, yokes)
- Collars and cuffs
- Pocket edges or flaps
- Creating geometric shapes or motifs
The density and arrangement of studs contribute heavily to the overall fashion style. Sparse, linear placements might offer subtle accents, while dense clusters or intricate patterns lean towards a bolder punk aesthetic or metal fashion vibe. Gather inspiration from existing garments, fashion photography, or even architectural patterns, but always adapt it to the specific piece you’re working on.
Crucially, visualize the pattern before you start piercing.
- Sketching: Draw your design directly onto a paper template of the garment section or even lightly onto the fabric with a removable marker.
- Physical Layout: Place the studs loosely on the garment surface to see how they look in situ. This helps gauge spacing, flow, and the total number of studs needed. It allows for adjustments without commitment.
This planning phase prevents mistakes, ensures symmetry if desired, and helps estimate the quantity of studs required, avoiding interruptions mid-process. It’s far easier to adjust a sketch or reposition loose studs than to remove incorrectly placed ones later.
5. Achieving perfect spacing and alignment
Consistent spacing and precise alignment are hallmarks of professional-quality stud work. Even the most creative pattern can look amateurish if the studs are crooked or unevenly distributed. Achieving this precision requires careful measurement and marking.
- Using measuring tools: Employ a ruler for straight lines and a flexible tape measure for curves. Start by establishing reference points. For example, if studding along a seam, measure a consistent distance from that seam for each stud mark. If creating a grid or line, mark points at exact intervals (e.g., every 1 cm or ½ inch).
- Ensuring symmetry: For symmetrical designs (like on both collar points or down the front panels of a jacket), measure outwards from a central point or line. Double-check measurements on both sides to ensure they mirror each other accurately.
- Maintaining straight lines and smooth curves: Use the edge of the ruler or draw light guidelines with your marking tool to keep studs perfectly aligned in straight rows. For curves, mark multiple points along the desired path and connect them visually or with a light, removable line before piercing.
Why is this consistency so crucial? For small businesses selling apparel, a professional look is non-negotiable. Evenly spaced and aligned studs demonstrate attention to detail and quality craftsmanship, enhancing the perceived value of the garment. Take the time to measure and mark accurately – this step significantly elevates the final product.
6. Marking your fabric correctly
Once your pattern is planned and measurements are determined, the next step is marking fabric precisely where each stud will be inserted. Accuracy here is vital, as these marks guide the piercing process.
Choose the right tool: Select marking tools based on your fabric color and type.
- Fabric chalk (pencils or tailor’s chalk) is generally best for dark fabrics, as the marks are visible and typically brush off easily.
- Disappearing ink fabric pens work well on lighter fabrics. Ensure the ink is genuinely removable with water or air exposure as advertised – always test on an inconspicuous area or scrap first. Avoid wax-based chalks which can be difficult to remove completely.
Make precise marks: Don’t make large, thick marks. Aim for small, clear dots or crosses exactly where the center of the stud should sit, or where the prongs need to penetrate. The goal is visibility for piercing, but the marks should ideally be covered by the stud head or easily removed afterward. Ensure the marks won’t bleed or stain the fabric permanently.
Careful marking prevents misplaced holes, ensures adherence to your planned pattern and spacing, and contributes significantly to the neatness of the finished application.
7. Preparation is key
Before you begin the hands-on process of piercing fabric and setting studs, taking a few moments for preparation can significantly improve your workflow and minimize potential errors or accidents. A well-organized setup allows you to focus entirely on the precision required for studding.
- Clear your workspace: Ensure you have ample flat, stable surface area to lay out your garment section without bunching or stretching.
- Ensure good lighting: Proper illumination is crucial for seeing your marks clearly and working accurately, especially when dealing with small prongs and precise placement.
- Protect your surface: Place a cutting mat, thick cardboard, or a similar protective layer underneath the fabric area you’re working on. This prevents accidental damage to your table from the piercing tool or stud prongs.
- Gather tools and studs: Have your pliers, piercing tool, marking tool, ruler, and the required number of studs within easy reach. Counting out studs for a specific section beforehand can streamline the process.
Setting up properly creates an efficient environment, reducing the chance of mistakes and making the studding process smoother and more enjoyable.
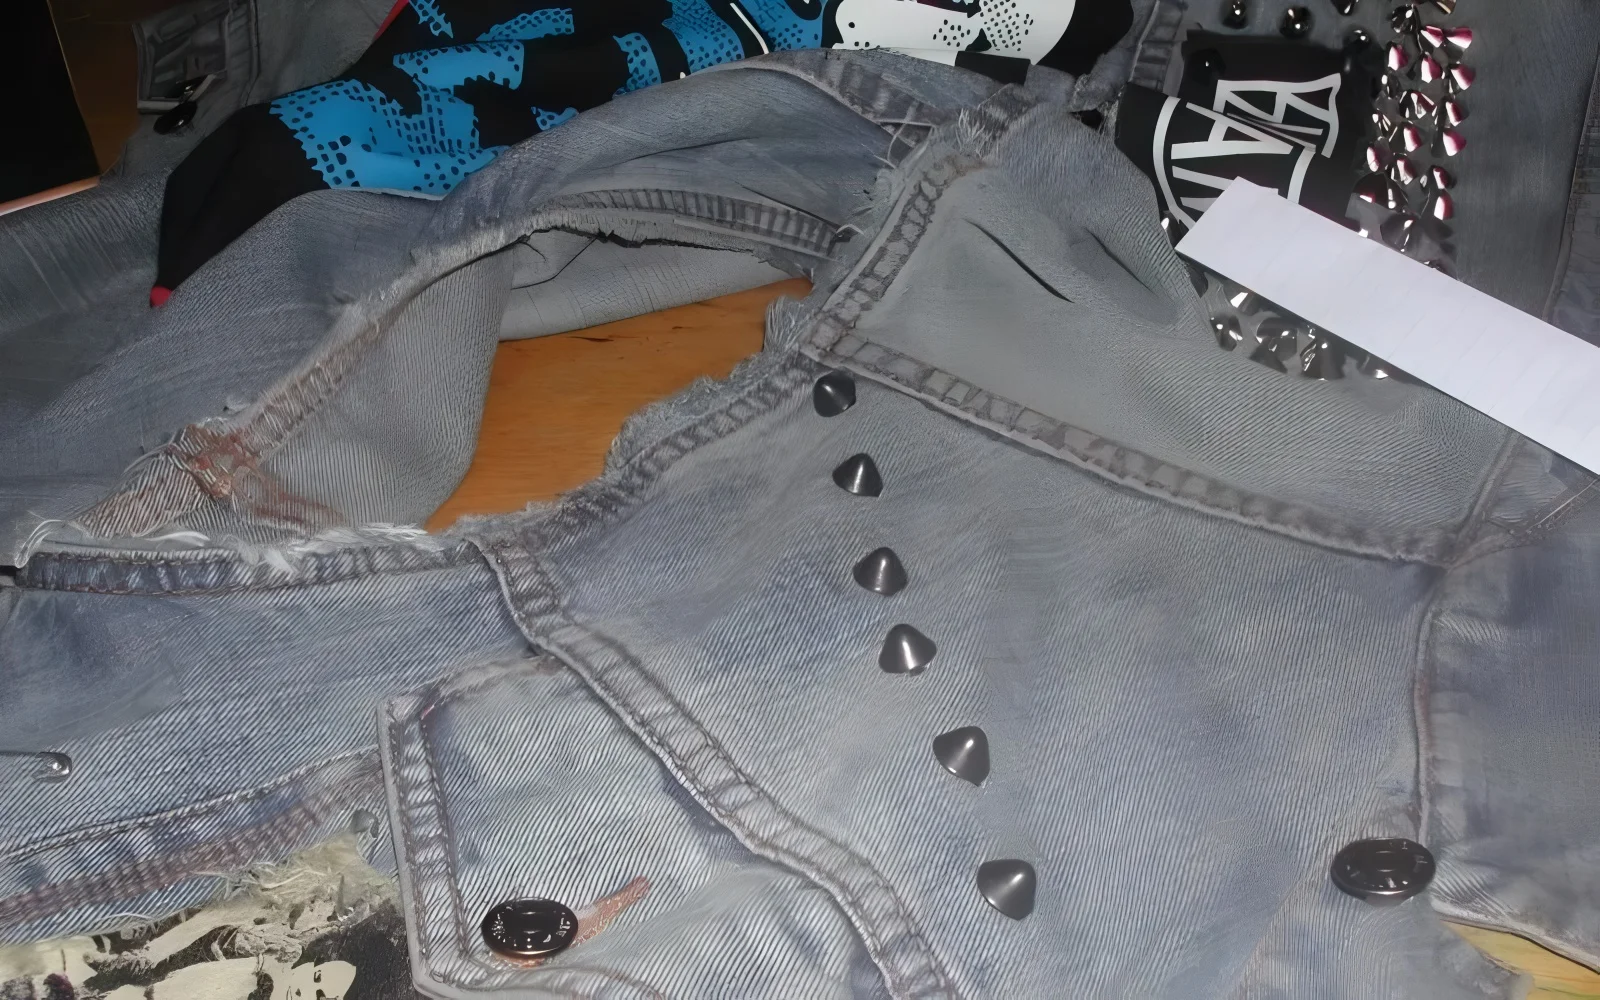
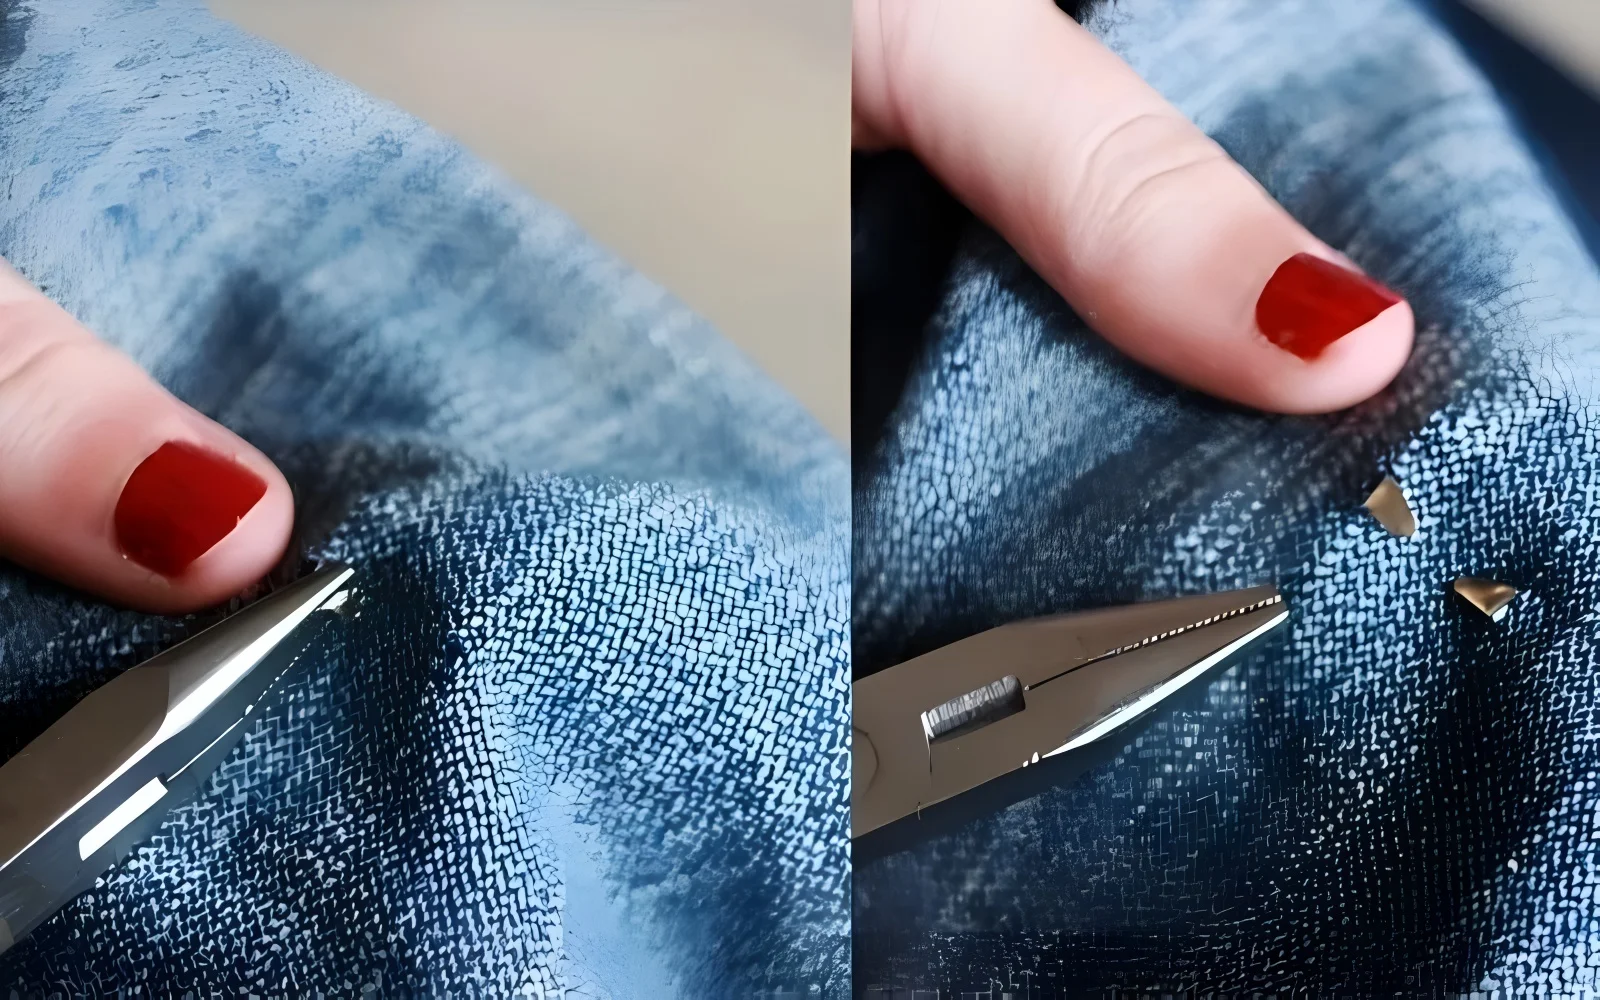
8. Creating the openings
This step requires precision and an understanding of how different fabrics behave. The technique used for piercing fabric directly impacts the fabric integrity and the secureness of the stud. Using an awl or a designated piercing tool is recommended.
- Technique for denim and woven fabrics: For denim and similar woven materials, the goal is generally not to cut the fibers but to gently separate them. Insert the tip of the awl at your mark and carefully wiggle or push it through, creating an opening just large enough for the stud prongs to pass through. This method maintains the fabric’s strength around the holes and reduces the risk of fraying or tearing over time.
- Technique for leather: Leather requires a different approach. Since you cannot separate fibers, you need to create a small, clean hole. Use the sharp tip of the awl or a specialized leather punch (if available, though an awl often suffices for stud prongs) to make a neat opening. Again, the hole should be just large enough for the prongs. Making holes too large can cause the stud to be loose or even fall out. Piercing leather requires more controlled force than piercing denim.
Crucially: Regardless of fabric type, make the opening only as large as necessary. Overly large holes compromise the secure fit of the stud and can look messy. Precision at this stage prevents future problems with loose studs or fabric damage.
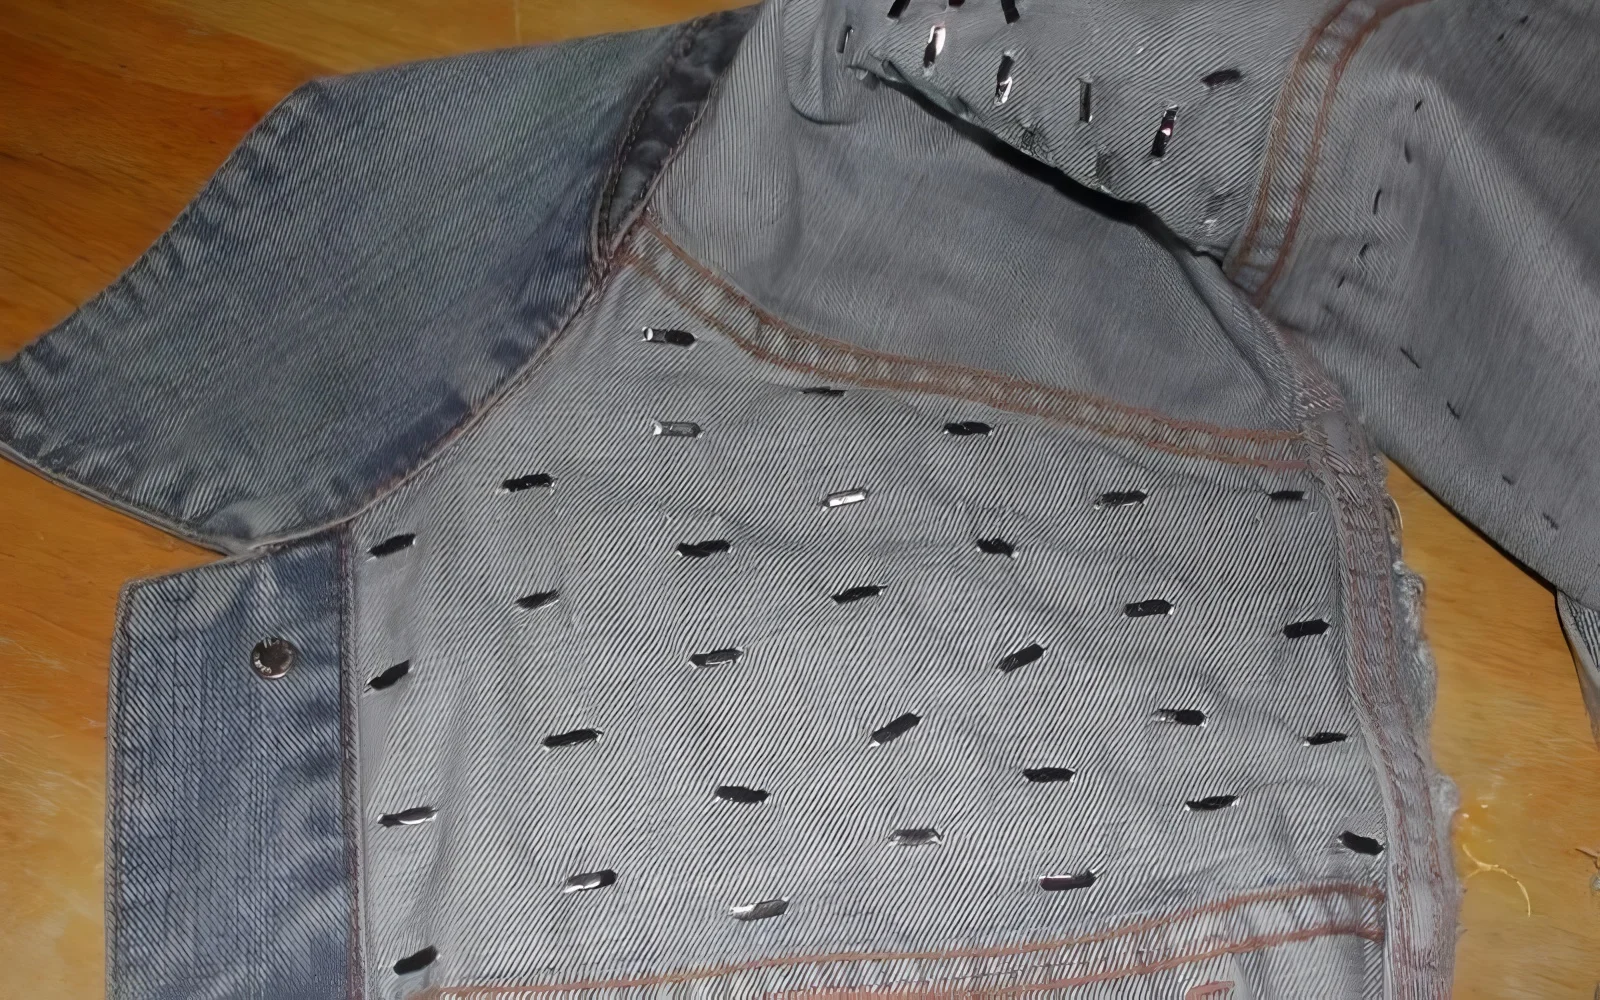
9. Inserting the stud
With the openings correctly prepared in the fabric, the process of inserting the stud is straightforward.
- Take one stud and align its prongs with the openings you created on the outside (the visible side) of the fabric.
- Push the prongs firmly through the openings so they emerge completely on the inside (the back side) of the fabric.
- Ensure the head of the stud sits flush against the outer surface of the fabric, with no gaps underneath. The prongs should now be fully accessible from the inside.
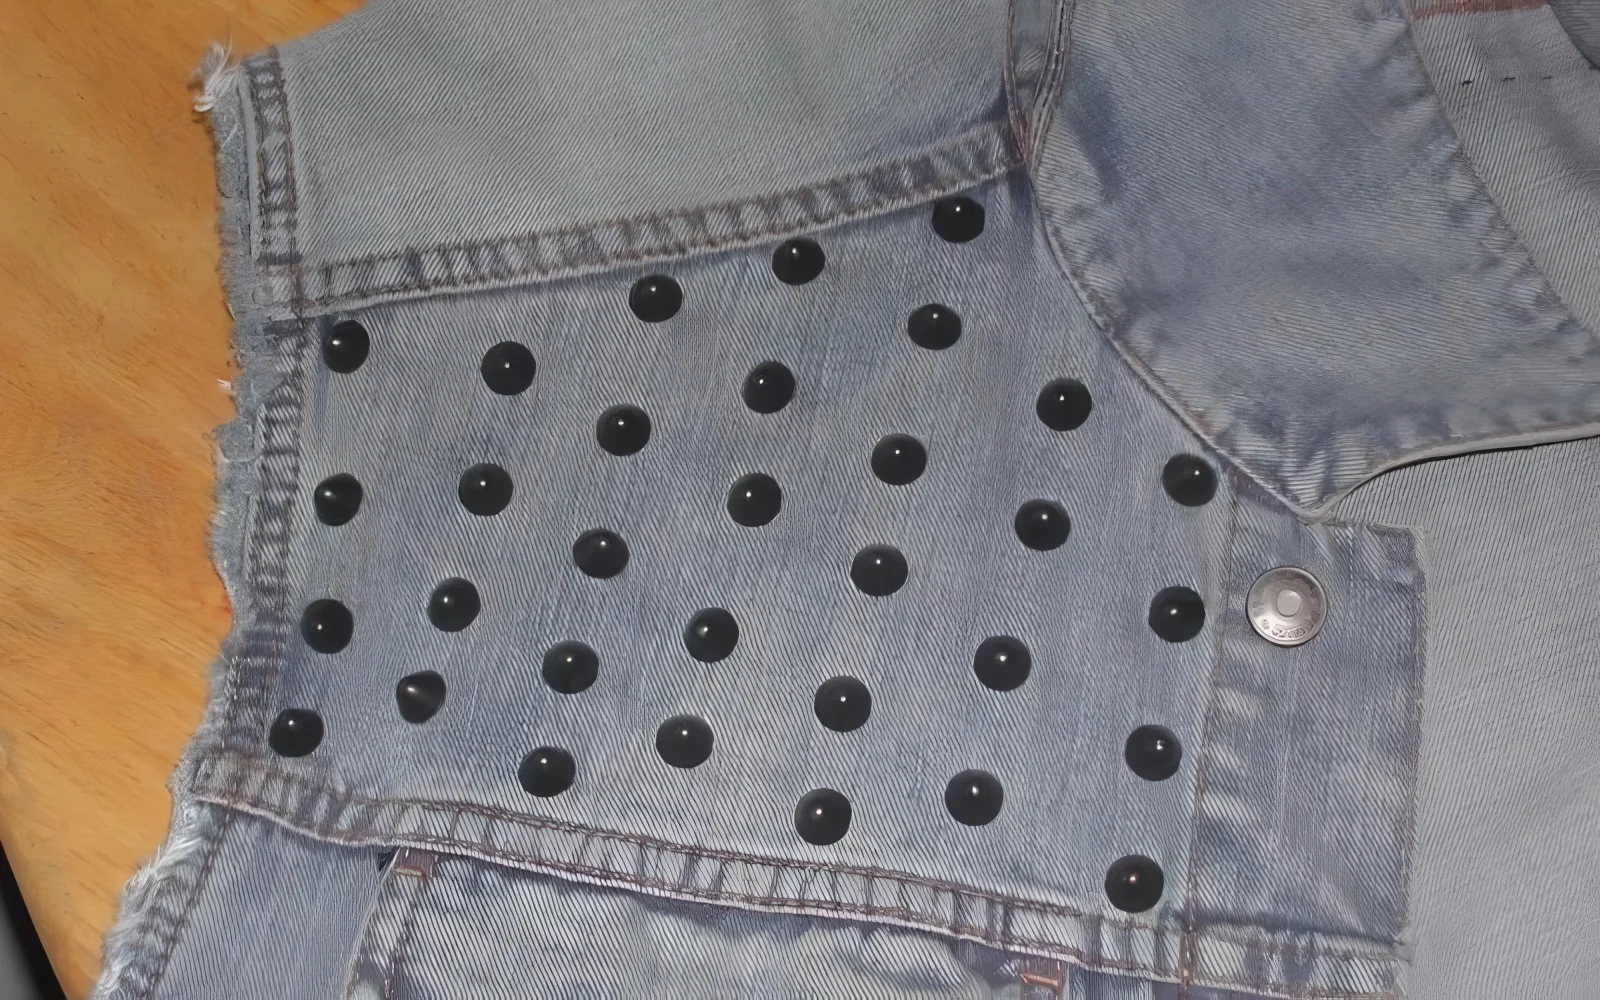
10. Securing the stud: The most critical step
Securing the stud correctly is paramount for both durability and comfort. This is where the technique truly impacts the longevity and wearability of the garment. Improperly bent prongs are the most common cause of lost studs and uncomfortable scratching against the skin or snagging on other clothing.
Using needle-nose pliers, follow these steps carefully for each prong:
- Grip one prong firmly near its base with the pliers.
- Bend the prong inward, towards the center of the stud’s base on the inside fabric.
- Press the prong down until it lies completely flat against the fabric. It should not be sticking up or rounded.
- Repeat this process for all remaining prongs, bending each one inward towards the center.
- Crucially: Ensure the bent prongs lie flat and ideally do not overlap significantly. Overlapping can create unnecessary bulk and potentially sharp edges. The goal is a smooth, flat finish on the inside.
Why this matters:
- Durability: Flatly secured prongs are less likely to catch on things and bend back open, preventing the stud from falling off.
- Comfort: Prongs sticking out, even slightly, will scratch the wearer’s skin or snag on undergarments. A flat finish ensures the inside of the garment remains smooth.
Referencing a visual guide contrasting correctly flattened prongs versus poorly bent ones can be very helpful. Mastering this step ensures your studded creations are professional, comfortable, and built to last.
11. Studding denim like a pro
While studding denim is relatively straightforward due to its robust nature, a few specific tips based on technique can enhance the results, especially when dealing with different denim weaves and weights.
- Clearing thick weaves: Ensure the prongs fully penetrate both layers if studding through seams or thicker areas. You might need slightly more pressure when piercing heavy denim.
- Opening size: For very dense or heavy denim, you might need to make the initial pierced opening slightly larger with the awl than you would for lighter fabrics, just enough to allow the prongs through without excessive force that could distort the fabric.
- Securing prongs: Press the prongs firmly flat against the interior. The texture of denim provides good grip, but ensuring they are completely flattened is still key for comfort and longevity.
- Reinforcement (optional): For very dense stud patterns covering a large area, which might put significant stress on the denim, consider applying a lightweight fusible interfacing to the inside of the garment before studding. This adds stability and helps distribute the weight and tension, although for most typical stud applications on denim, this isn’t strictly necessary.
Following these considerations ensures your studs are securely attached and integrate well with the specific properties of the denim fabric.
12. Working with leather: Precision matters
Working with leather requires heightened precision because, unlike woven fabrics, holes pierced in leather are permanent. Mistakes are much harder to conceal.
- Accurate piercing: Double-check your markings before making any holes. Use a sharp awl to create clean, precise openings just large enough for the prongs. The piercing technique may need adjustment based on the leather’s thickness and temper – thicker, stiffer leather will require more controlled force.
- No room for error: Since you cannot easily ‘heal’ misplaced holes in leather, accuracy in planning and execution is paramount. Measure twice, pierce once.
- Securing for comfort: This is especially critical if the leather garment is unlined. Prongs must be bent completely flat against the inside surface to avoid irritation against the skin. Any sharp points or bulkiness will be immediately noticeable and uncomfortable. Take extra care with the pliers to ensure a smooth internal finish.
The unforgiving nature of leather means meticulousness pays off. Careful work results in a professional, durable, and comfortable studded leather piece.
13. Troubleshooting common studding issues
Even with careful work, you might occasionally encounter issues when adding studs. Here’s how to address some common problems:
Prongs bending incorrectly during application:
- Cause: Often due to not using needle-nose pliers, using pliers incorrectly, or trying to bend prongs made of overly soft/cheap metal.
- Solution: Stop, carefully straighten the bent prongs using pliers. Ensure you are gripping firmly near the base and bending inward deliberately. If the metal is too soft, you may need higher quality studs.
Loose studs after application:
- Cause: Almost always due to prongs not being bent completely flat against the interior fabric. They might be slightly raised or rounded.
- Solution: Turn the garment inside out. Using needle-nose pliers, carefully re-bend each prong, applying firm pressure to ensure it lies perfectly flat. Check for any overlap that might prevent flattening.
Minor fabric damage around stud:
- Cause: May happen if the initial hole was forced too large, the fabric is delicate, or the prongs snagged fibers during insertion/bending.
- Solution: For minor fraying on woven fabrics, a tiny dab of fray sealant or clear fabric glue applied carefully around the base of the stud on the inside can help prevent further unraveling. Prevention is the best approach. Significant fabric damage might require removing the stud and potentially patching from the inside if feasible.
Symmetry or pattern alignment issues:
- Cause: Inaccurate marking, inconsistent measuring, or fabric shifting during application.
- Solution: If noticed early, remove the misplaced studs carefully and re-mark/re-apply. If noticed late, assess if the pattern alignment issue is minor enough to be acceptable. Prevention through careful planning and measuring is key. Using guidelines helps maintain symmetry.
Addressing these issues promptly ensures a better final product and helps refine your fixing studs technique.
14. Caring for your custom studded apparel
Proper apparel care is essential to maintain the appearance and longevity of your studded clothing. Rough handling or incorrect washing can damage both the garment and the stud work. Follow these washing instructions and maintenance tips:
- Turn inside out: Always turn the garment inside out before washing. This protects the studs from abrasion against other clothes or the washing machine drum, and minimizes stress on the prongs.
- Use cold water: Wash in cold water on a gentle cycle. Hot water can potentially affect adhesives (if any were used) or cause fabric shrinkage that might stress the stud placement.
- Hand wash recommended: For heavily studded items or delicate garments, hand washing is the safest option. Gently agitate in cold water with mild detergent, rinse thoroughly, and avoid excessive wringing.
- Mild detergent: Use a gentle detergent free from bleach or harsh chemicals.
- Avoid the dryer: Never put studded clothing in a high-heat machine dryer. The heat can potentially loosen studs over time, damage certain fabrics (especially leather), and tumbling action increases physical stress.
- Air dry: Lay the garment flat or hang it to air dry, away from direct sunlight or intense heat. Reshape while damp if necessary.
- Periodic checks: Occasionally check the inside of the garment to ensure all prongs remain flat and secure. Re-flatten any that may have lifted slightly.
Following these simple caring for apparel steps will help preserve your custom creations for years to come.
15. Related questions
15.1 Can studs be removed once applied?
Yes, studs can usually be removed, but it requires care and may leave evidence behind. To attempt removing studs, turn the garment inside out and use needle-nose pliers to carefully bend the flattened prongs back upright, one by one.
Once they are straight enough, you should be able to gently pull the stud out from the front. Be aware that this process might leave small holes or visible marks in the fabric, especially noticeable on leather where holes are permanent. On woven fabrics, the marks might be less obvious after washing, but distortion is possible.
15.2 Is it possible to add studs to stretchy fabrics?
Adding studs to very stretchy fabrics (like jersey knits or spandex blends) is challenging and generally not recommended for beginners or for durable results. The fabric’s elasticity can cause puckering around the studs, the material may not offer enough stability to hold the studs securely (leading to them popping off), and the weight of the studs can distort the fabric’s drape.
If attempted, stabilizing the fabric by applying fusible interfacing to the back before studding is essential, but success is not guaranteed and may compromise the fabric’s stretch. Sticking to more stable woven fabrics or leather yields better outcomes.
15.3 How do screw-back studs differ from pronged studs?
The main comparison lies in their fastening mechanism. Pronged studs, as detailed in this guide, have metal prongs that pierce the fabric and are bent flat on the inside. Screw-back studs consist of two parts: the decorative stud head attached to a threaded post, and a separate backing piece (usually a small, flat screw).
They require a pre-made hole (often punched) through the material. The post is inserted through the hole, and the backing piece is screwed onto the post from the inside, clamping the fabric between the stud head and the backing. They are often used on thicker materials like belts or dense leather, or where a completely smooth interior is desired without bent prongs.
15.4 Are studded clothes comfortable to wear?
Whether studded clothes are comfortable depends almost entirely on the quality of the stud application. If the prongs on the inside of the garment are correctly bent completely flat against the fabric, with no sharp points or significant overlap, the garment should be comfortable to wear against the skin or over undergarments.
However, if prongs are left sticking up, rounded, or poorly secured, they will inevitably scratch or snag, making the item uncomfortable. For maximum comfort, especially with densely studded areas on unlined garments, applying a soft lining fabric over the studded section on the inside is an option.
Read more:
Mastering the technique of adding studs opens up vast possibilities for apparel customization, allowing you to transform ordinary garments into unique statement pieces. By understanding the importance of choosing the right materials, using the proper tools, and meticulously following the steps for piercing and securing, you can achieve durable style and professional results.
The key lies in precision, patience, and practice. Consistent quality craftsmanship, particularly ensuring prongs are perfectly flattened, elevates your work from DIY-looking to retail-ready. As you build confidence in studding, remember that this attention to detail extends to all aspects of garment finishing.


