


How to Attach An Iron On Patch That Actually Stays On


Applying iron-on patches might seem simple, but achieving a professional finish that lasts wash after wash is crucial for clothing businesses. For small enterprises customizing apparel like jackets, jeans, hats, or bags for retail or wholesale, challenges such as patches peeling off, uncertainty about fabric compatibility, and inconsistent results can arise.
Subpar patch application isn’t just an aesthetic issue; it can lead to customer dissatisfaction, costly returns, wasted materials, and ultimately, harm your brand’s reputation. Conversely, well-applied, durable patches elevate the perceived value of your products, enhance customer satisfaction, and reinforce your brand identity.
This guide provides the precise techniques, critical troubleshooting advice, and best practices needed to master iron-on patch application. Following these steps will help you achieve consistent, professional-grade results, saving time, reducing waste, improving product quality, and building stronger customer trust.
1. Understanding the basics: Iron-on patches vs. sew-on
1.1 Identifying an iron-on patch
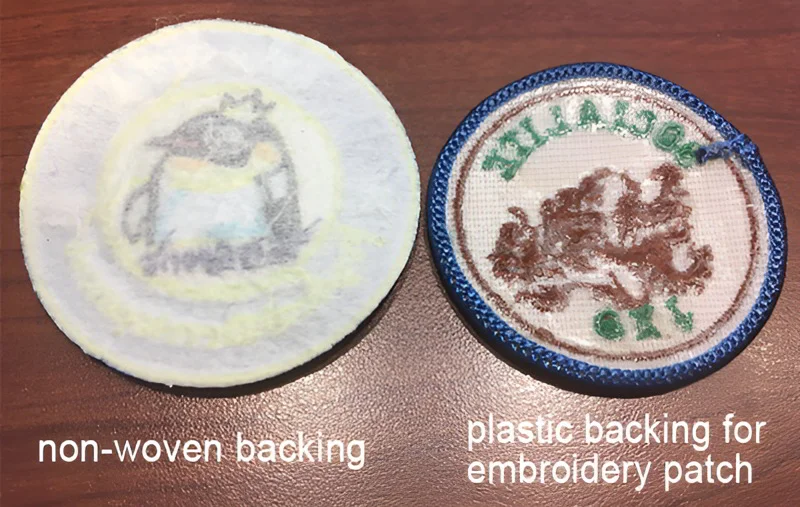
Determining if a patch is designed for ironing is usually straightforward. Turn the patch over and inspect the back. An iron-on patch possesses a distinct heat seal backing. This layer often has a slight sheen, feels somewhat waxy to the touch, or looks like a thin, plastic-like film covering the reverse side’s threads.
This appearance is noticeably different from a sew-on patch, which would typically show exposed fabric or the back of the embroidery threads. A good quality adhesive backing will usually appear uniform across the patch surface.
1.2 Importance of the adhesive layer quality
The long-term success of an iron-on patch heavily depends on the quality and thickness of its adhesive layer (the heat seal backing). This heat-activated glue forms the bond between the patch and the fabric. Patches manufactured with a thicker, higher-grade adhesive generally creates a stronger, more resilient connection.
This contributes significantly to the patch’s ability to withstand washing and wear without peeling. Patches made with lower quality or thinner adhesive may fail prematurely, reflecting poorly on the final product, especially in a commercial setting.
1.3 Briefly mention of sew-on patches as a distinct type
For distinction, sew-on patches represent a separate category. They lack any heat-activated adhesive backing. Attachment requires stitching around the perimeter, either manually using a needle and thread or with a sewing machine.
2. Preparation is key: Setting up for a perfect bond
2.1 Gathering your tools & materials
Before starting the application process, collect all necessary items to ensure a smooth workflow:
- A standard household iron
- An ironing board or a similar sturdy, flat surface that is heat-resistant
- Your iron-on patches
- The garment or fabric item intended for the patch
- A pressing cloth (a thin piece of clean cotton fabric, such as a handkerchief, scrap pillowcase, or quilting cotton) or a sheet of parchment paper (baking paper)
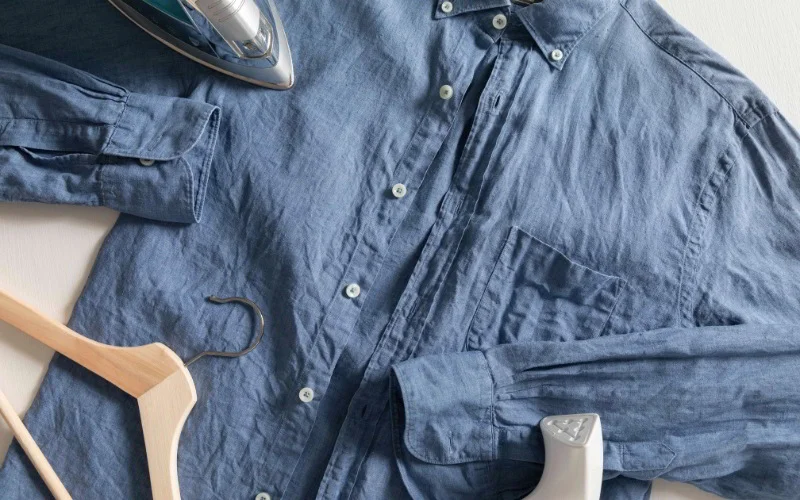
2.2 Preparing the garment
Correct garment preparation is fundamental for effective adhesion.
- The garment must be clean and completely dry. Any dirt, oils, residues from manufacturing, or fabric finishing agents can impede the adhesive’s ability to bond properly. If the item is brand new or has been worn, washing and drying according to its care instructions beforehand is recommended.
- The area where the patch will be placed needs to be smooth and free of wrinkles. Use the iron (set to the appropriate temperature for the fabric) to press this specific area flat before positioning the patch. This initial pressing also gently warms the fabric, preparing the fibers for bonding.
2.3 Critical fabric check: Compatibility matters
Not every fabric is suitable for the heat required for iron-on patch application. Assessing fabric compatibility is vital to prevent damage to the garment and ensure a strong, lasting bond.
- Best fabrics: Materials like cotton, denim, sturdy polyester blends, and canvas typically offer excellent surfaces for iron-on patches. Their fiber composition and tolerance for heat allow the adhesive to melt and bond effectively.
- Problematic/unsuitable fabrics: Use extreme caution or avoid applying iron-on patches to Nylon, Rayon (Viscose), leather (genuine or synthetic), vinyl, velvet, fabrics with waterproof or special coatings, and very delicate synthetic materials. These fabrics can easily melt, scorch, pucker, or develop unwanted shine under the necessary heat, or their surface texture/coating may prevent the adhesive from adhering correctly.
Tip: If unsure about a fabric’s composition or its reaction to heat, always perform a test. Apply the iron (at the intended setting) to an inconspicuous area of the garment first, such as an inside seam allowance or hem, to check for adverse effects before proceeding with the patch application.
3. The ironing process: Step-by-step professional application
3.1 Dialing in the right heat: Iron settings
Employing the correct iron temperature is crucial for success.
- Fully preheat your iron to the temperature recommended for the fabric type, provided it’s compatible with patch application. For common choices like cotton and polyester blends, this usually corresponds to the medium-high or cotton setting, typically around 350°F (175°C). Allow several minutes for the iron to reach the selected temperature.
- Critically important: Ensure the steam function is turned OFF. Set the iron to DRY heat only. Steam introduces moisture, which counteracts the adhesive process and prevents the heat seal backing from creating a secure bond.
- If working with a fabric that necessitates a lower heat setting (always consult the garment’s care label), use the highest temperature that is safe for that specific material. Be aware, however, that significantly lower temperatures might compromise the strength and longevity of the adhesive bond.
3.2 Positioning your patch
Precise placement ensures a professional appearance.
- Lay the prepared garment flat on the ironing board or heat-resistant surface, confirming the target area is smooth.
- Carefully position the patch onto the garment exactly where desired. Verify the adhesive side (the shiny/filmy backing) is facing down against the fabric.
- Take a moment to double-check the alignment and ensure the patch is straight and positioned correctly before applying any heat.
3.3 Protecting the patch and fabric
This step prevents potential damage to the patch embroidery and the fabric surface.
- Place the pressing cloth (thin cotton fabric) or the sheet of parchment paper completely over the positioned patch.
- Under no circumstances should the hot iron soleplate touch the patch’s embroidered surface or edges directly. Direct contact can scorch threads, melt certain types of embroidery thread, cause discoloration, or transfer dyes.
3.4 Applying heat and firm pressure (front)
This stage activates the adhesive and initiates the bond.
- Position the fully preheated iron flat onto the pressing cloth, centered over the patch area.
- Apply firm and even downward pressure directly onto the iron. Avoid the instinct to slide the iron back and forth as if ironing clothing. Maintain a steady hold in one position.
- Sustain this focused heat and pressure for approximately 30 to 45 seconds. Patches that are thicker or being applied to denser fabrics (like heavy denim) might require the longer duration within this range.
3.5 Applying heat from the inside (back)
Applying heat from the reverse side helps to reinforce the bond.
- Carefully turn the garment inside out, maintaining the flatness of the patch area.
- Position the hot iron directly onto the fabric behind the location of the patch. Once again, apply firm, consistent pressure.
- Hold the iron in place for about 30 seconds. This action helps the melted adhesive penetrate more deeply into the fabric fibers from the opposite direction, resulting in a more integrated and durable attachment.
3.6 Cooling and checking the bond
Allowing adequate cooling time is absolutely essential for the adhesive to set properly.
- Turn the garment right-side out again.
- Let the patch and the surrounding fabric area cool down completely to room temperature. This typically requires at least 5 minutes, potentially more for thicker garments or patches. During cooling, the adhesive solidifies, finalizing the bond. Rushing this step can compromise the adhesion.
- Once the area is thoroughly cool, gently attempt to lift one edge of the patch using a fingernail. If the edge remains firmly attached and resists lifting, the bond is secure. If an edge lifts away easily, the adhesion process was incomplete, and troubleshooting is necessary.
4. Troubleshooting: When your iron-on patch won’t stick
If a patch fails to adhere correctly, one or several factors are usually responsible. Pinpointing the cause is key to resolving the issue.
4.1 Identifying the cause
- Insufficient heat: The iron was not hot enough, was not allowed to preheat fully, or an incorrect (too low) temperature setting was selected for the fabric/patch combination.
- Insufficient pressure: Not enough consistent downward force was applied during the ironing steps (both front and back), preventing the adhesive from making full contact with the fabric and penetrating the fibers adequately.
- Insufficient time: The iron was not held in place long enough during the application (either on the front or the back) for the heat to thoroughly melt the adhesive layer.
- Steam used: The iron’s steam function was accidentally left on, introducing moisture that hindered the dry heat adhesive from bonding correctly.
- Fabric incompatibility: The garment’s material itself is unsuitable (e.g., nylon, coated fabrics) or its surface texture (e.g., very rough, ribbed, or uneven like fleece) is preventing a flat, secure bond.
- Uneven surface: Attempting to iron on a soft, padded, or uneven surface (like a bed or a plush ironing board cover) prevented even distribution of heat and pressure. Wrinkles under the patch area during application also cause problems.
- Old/damaged adhesive: Though less common, the heat seal backing on the patch itself could potentially be old, dried out, or defective from the manufacturer.
4.2 Effective solutions
- Verify settings: Double-check that the iron is set to the correct temperature (usually cotton/high for suitable fabrics), confirm the iron has fully preheated, and rigorously ensure the steam function is turned OFF (set to DRY).
- Re-apply heat & pressure: Position the pressing cloth over the patch again. Re-apply heat using the iron, this time concentrating on applying more firm, steady, and even pressure than the initial attempt. Consider slightly increasing the hold time (e.g., add an extra 10-15 seconds to both the front and back application). Crucially, ensure the surface underneath the garment is hard, flat, and heat-resistant.
- Target edges: If the main body of the patch is secure but the edges are lifting, carefully use the tip or edge of the hot iron to focus heat and pressure specifically on those problematic edge areas (always protect with the pressing cloth).
- Consider alternatives: If repeated attempts fail and fabric incompatibility is strongly suspected, ironing may not be a viable method for that specific garment. In such cases, switching to sewing the patch on (by hand or machine) or using an appropriate permanent fabric glue become the necessary alternative solutions for secure attachment.
5. Enhancing durability for commercial use
While standard iron-on application offers convenience, for business applications where product longevity and customer satisfaction are critical, reinforcing the patch attachment is highly recommended.
5.1 The added security of sewing
Stitching provides a mechanical bond that significantly surpasses the long-term durability of adhesive alone. Sewing is strongly advised for:
- Items intended for frequent washing and drying.
- Garments subjected to considerable wear, stress, or friction (such as workwear, jeans, backpacks, or patches placed on high-movement areas like elbows or knees).
- Ensuring maximum durability and security for products sold commercially, thereby minimizing the risk of customer complaints or returns due to peeling patches.
A simple hand-sewn stitch (like a whip stitch or running stitch) around the border of the patch, or using a sewing machine for a quicker and potentially neater finish, drastically improves the patch’s lifespan.
5.2 The best of both worlds: Combining ironing and sewing
For achieving the optimal balance of easy initial placement and ultimate long-term durability, adopt this two-step method. First, carefully iron the patch onto the garment following the detailed steps outlined above. This secures the patch perfectly in position and creates the initial bond.
Second, follow up by sewing around the edges of the patch. This combination represents the professional best practice for maximizing patch security and longevity on commercial apparel items.
5.3 Using fabric glue
High-quality fabric adhesives specifically designed for flexibility and washability (often strong, clear craft adhesives formulated for textiles) can serve a purpose in specific situations. They can be applied cautiously to tack down persistently lifting edges after the initial ironing and cooling process.
In rare instances where ironing is entirely unsuitable due to extreme fabric heat sensitivity, fabric glue might be considered as the primary attachment method. However, apply glue sparingly and meticulously follow the manufacturer’s application and curing instructions to avoid creating a stiff feel, messy appearance, or potential bleed-through.
Fabric glue is generally best regarded as a tool for reinforcement or a niche alternative, rather than the primary method for professional, high-volume application.

6. Post-application care: Preserving your work
Advising customers on proper care, or following these guidelines for items processed in-house, will help extend the life of both the patch and the garment.
- Wait a minimum of 24 to 48 hours after applying the patch before the first wash. This interval allows the heat-activated adhesive to fully cure and reach maximum bond strength.
- Always turn the garment inside out before placing it in the washing machine. This minimizes friction and abrasion directly on the patch surface during the wash cycle.
- Wash the garment in cold water using a gentle cycle setting. Hot water temperatures can potentially soften or weaken the adhesive bond over repeated washes.
- Avoid using chlorine bleach or pouring fabric softeners directly onto the patch area, as these chemicals can degrade the adhesive or affect the patch materials over time.
- Air drying the garment flat or on a line is the most gentle and preferred method. If machine drying is necessary, use the lowest possible heat setting (tumble dry low or air fluff). Sustained high heat from a dryer can negatively impact the adhesive bond over the long term.
7. Related questions
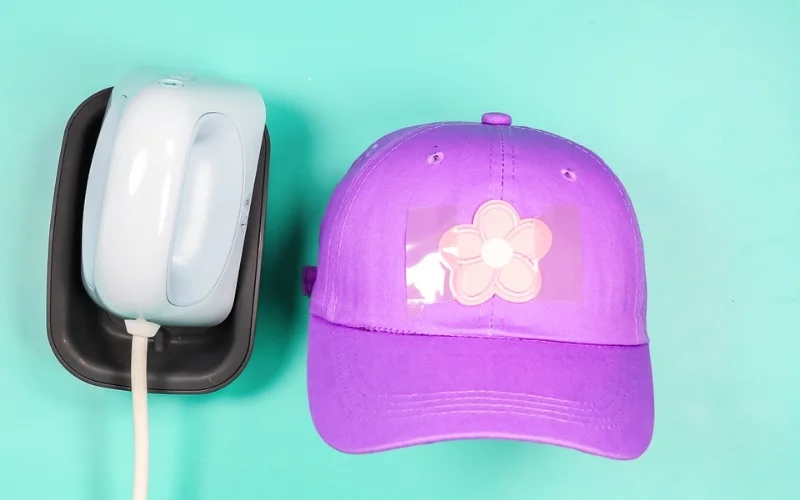
7.1 Can I use a heat press instead of an iron?
Yes, a heat press is an excellent alternative to a household iron, especially for businesses applying patches frequently or in larger quantities. Heat presses offer distinct advantages, primarily providing more consistent temperature control, even pressure distribution across the entire patch surface, and often more precise timing controls.
This can lead to a more uniform, reliable, and efficient bonding process compared to manual ironing. If utilizing a heat press, always consult and adhere to the press manufacturer’s specific instructions regarding temperature, pressure (PSI), and dwell time settings.
These settings should be calibrated based on the type of patch adhesive and the specific fabric being used, as they may differ from standard iron recommendations.
7.2 How long should an iron-on patch realistically last?
The longevity of an iron-on patch depends heavily on several factors: the quality of the patch’s adhesive, the correctness of the initial application process, the compatibility of the fabric, and how the garment is subsequently cared for (especially washing and drying methods).
When applied correctly to a suitable fabric and cared for properly (cold wash, gentle cycle, air or low-heat dry), a good quality iron-on patch can remain securely attached through numerous wash cycles – potentially dozens. However, realistically, some slight lifting at the edges might occur over extended periods, particularly on garments that experience significant friction, stretching, or very frequent laundering.
For applications demanding near-permanent attachment capable of withstanding rigorous use and washing indefinitely, sewing the patch on (either as the primary method or as reinforcement after ironing) offers substantially greater durability and peace of mind.
7.3 What if I need to remove an iron-on patch?
Removing an iron-on patch can be a difficult process and carries inherent risks, including potentially leaving behind stubborn adhesive residue or even damaging the underlying fabric. Removal should generally be avoided unless absolutely necessary.
If removal is required, take precautions to protect your work surface. Turn the garment inside out. Place a pressing cloth over the fabric area directly behind where the patch is located. Carefully apply heat with your iron to this backing area; the goal is to soften the adhesive without scorching the garment.
While the area remains warm, cautiously attempt to peel the patch away from the fabric surface, starting from an edge. Using tweezers can sometimes help grip the patch edge. Proceed slowly and gently. If significant adhesive residue remains, a commercial fabric-safe adhesive remover.
Crucially, always test any chemical remover on an unseen, inconspicuous part of the garment first to check for potential discoloration or fabric damage before applying it to the main area.
Read more:
Successfully applying iron-on patches for a lasting, professional look hinges on meticulous preparation, adherence to the correct technique, and a solid understanding of the materials being used. Key factors include starting with clean, compatible fabrics, applying adequate heat (critically, without steam) combined with firm, even pressure, allowing sufficient time for complete cooling, and verifying the bond’s integrity.
While the iron-on method provides convenience and good results when done correctly, reinforcing the attachment by sewing offers superior durability and security – an essential consideration for apparel businesses prioritizing product quality, longevity, and customer satisfaction.
Investing the time and effort into proper patch application techniques enhances the final product, reflects positively on your brand’s commitment to quality, and ensures your customized garments maintain their appearance over time.
By mastering these techniques, you ensure your customized garments not only look great but also stand the test of time, strengthening your brand’s reputation for quality. For businesses ready to elevate their apparel with truly professional branding, Packlove offers a complete solution.
From high-quality iron-on and sew-on patches to custom woven labels, hang tags, and branded packaging, we provide all the essential trims to make your products stand out. Trust an experienced partner like Packlove to deliver the quality and expertise your brand deserves.


