


How to Put Letters on a Shirt: Easy DIY Methods and Pro Tips


This guide is your comprehensive resource for personalizing clothing from crafting a unique design for a special event to creating a memorable look for your small business. Whether you’re a beginner looking for basic techniques or an experienced crafter seeking to elevate your skills, we’ll equip you with the knowledge and confidence to create personalized apparel that truly stands out. Let’s unlock your creative potential and transform ordinary garments into extraordinary expressions!
1. Choosing the Right Method for Lettering a Shirt
1.1 Iron-On Transfer Methods
Iron-on transfer methods stand out as a frequently chosen path for applying lettering to shirts, and for good reason. Their accessibility makes them appealing to individuals at all skill levels, from those just starting out to experienced craft enthusiasts.
The process is generally considered quick and quite straightforward, allowing for the application of pre-designed lettering or even fully customized graphics onto fabric. For optimal and lasting results, it’s advisable to use materials specifically engineered for heat transfer applications.
These specialized materials are designed to bond effectively with fabric when heat is applied, ensuring the design adheres properly and withstands wear and washing.
Heat Transfer Paper: This method involves printing a mirrored image onto special heat transfer paper, cutting it out, and then applying it onto fabric using a heat press or iron. While a heat press provides more consistent results, an iron can also be used for smaller designs.
- Pros: Fast, relatively easy, wide variety of designs available.
- Cons: Requires specific heat transfer paper, might not be as durable as sewn-on lettering.
Pre-cut Iron-On Appliqué Letters: Pre-cut iron-on appliqués are applied directly to the fabric using a press cloth. Manufacturers’ instructions for specific appliqués should be carefully followed.
- Pros: Easy to apply, often good value, especially for pre-designed letters.
- Cons: Limited design options, not as durable as other methods.
Pre-cut Iron-On Letters: Similar to iron-on appliqués, these letters are applied with an iron and a press cloth. The backing is typically removed after the material has cooled, but always follow the manufacturer’s instructions.
- Pros: Straightforward and fast, can accommodate some custom lettering.
- Cons: Letter size and style options might be limited, durability can vary.
Fusible Web or Fusible Interfacing: This involves using a double-sided iron-on adhesive, often called fusible web or interfacing, to bond fabric letters or shapes to the garment. The fabric is cut to the desired shape, the fusible web is applied to the back, and then the entire piece is ironed onto the garment.
- Pros: Allows for more intricate design, adds a permanent element
- Cons: Requires careful preparation, some experience with iron-on techniques.
1.2 Sewing & Embroidery for Letter Application
For those seeking a more enduring and textured approach to shirt lettering, sewing and embroidery present compelling options. These methods move beyond surface application, integrating the lettering directly into the fabric itself.
Let’s first consider the nuanced craft of hand embroidery. Techniques like the backstitch, known for creating solid lines, and the running stitch, ideal for dashed lines or outlines, are foundational in hand-embroidered lettering.
For anyone venturing into this technique, an embroidery hoop is an invaluable tool. By holding the fabric taut, the hoop significantly enhances control and precision, leading to neater and more consistent stitch work. If you’re interested in learning hand embroidery, numerous online tutorials and workshops are readily available, offering step-by-step guidance to master these beautiful techniques.
On the other end of the spectrum is machine embroidery, which opens up possibilities for more complex and intricate designs, often with greater speed. Machine embroidery necessitates specialized equipment, namely an embroidery machine, and often requires a degree of digital design skill.
Creating elaborate embroidered lettering typically involves using software to digitize designs, translating them into instructions that the embroidery machine can follow. When deciding between hand and machine embroidery, it’s important to weigh the time investment and skill level required for each.
Hand embroidery, while offering a uniquely personal and handcrafted touch, is considerably more time-consuming and demands patience and fine motor skills. Machine embroidery, while faster for complex designs, involves an initial investment in equipment and learning curve associated with design software and machine operation. Each method offers distinct advantages and caters to different preferences and project requirements.
1.3 Direct Application Methods: Painting & Stenciling
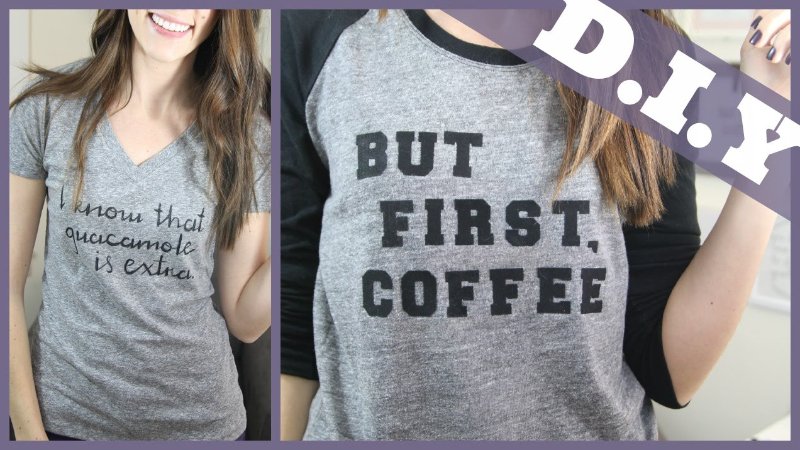
This section focuses on creative personalization through direct application techniques like painting and stenciling. We’ll discuss selecting appropriate fabric paints or markers for different fabrics. Instructions for creating stencils, including custom stencil design, will be provided.
Crucially, the importance of sealing fabric paint for washability and lasting durability will be emphasized. Finally, we’ll offer tips for achieving successful freehand painting techniques on fabric.
1.4 Other Techniques for Lettering
- Rubber Stamping: Using rubber stamps and permanent ink to create text or designs on fabric. This technique is well-suited for creating repeated elements. Consider the fabric type for ink compatibility.
- Adhesive Stencils: Use adhesive stencils to add a layer of design detail to any project. Ideal for creating shapes and patterns.
2. Preparing Your Shirt and Materials for Lettering
Achieving professional-looking lettering on a shirt isn’t just about the application method itself; meticulous preparation beforehand is equally, if not more, crucial. Think of it as laying a solid foundation for your creative work. The very first step in this foundation is pre-washing your shirt.
This isn’t just about cleanliness; it’s about removing any sizing or finishes that might be present on new garments. These substances can interfere with the bonding process of lettering materials, leading to premature peeling or cracking.
Crucially, when pre-washing, avoid fabric softeners at all costs. Fabric softeners leave behind a coating that, while making fabric feel soft, creates a barrier that actively repels adhesives and heat-activated materials. After washing, ensure your shirt is completely dry and then take the time to iron out any wrinkles. A smooth, wrinkle-free surface is essential for even application and prevents distortions in your lettering design.
Furthermore, understanding the fabric composition of your shirt is more than just a detail; it’s a key factor in determining the most appropriate lettering technique and materials. Cotton, polyester, and fabric blends each react differently to heat and adhesives. For instance, some delicate synthetic fabrics might not withstand the high heat required for certain iron-on methods, while others might be ideal for specific types of heat transfer vinyl. Checking the care label of your shirt is always a wise first step.
Beyond shirt preparation, the way you handle your lettering materials is equally important. If you’re working with materials like heat transfer vinyl, precise cutting is paramount. Whether you’re using a craft cutter or scissors, clean, accurate cuts will result in sharper, more defined lettering.
Following cutting, the process of “weeding,” or removing the excess vinyl around your design, demands patience and care. Careless weeding can lead to accidentally removing parts of your intended design. For those using iron-on transfer paper, a critical step often overlooked is mirroring your design before printing. Since the design is applied face-down onto the fabric, failing to mirror it will result in backward lettering on your finished shirt.
Choosing the correct type of transfer paper or vinyl is also not a trivial matter. Different materials are designed for different fabric types and application methods. Using the wrong type can lead to poor adhesion, faded colors, or designs that don’t last.
For example, there are specialized heat transfer vinyls designed for stretch fabrics, ensuring the design moves with the fabric without cracking. Taking the time to select the right materials for your specific project is an investment in the quality and longevity of your finished shirt.
In conclusion, remember that each step in preparing your shirt and materials, from the initial pre-wash to the final material selection and preparation, is not just a procedural formality. Each action directly contributes to the professional appearance, durability, and overall success of your custom shirt lettering project. By paying attention to these details, you’re setting yourself up for a rewarding and long-lasting result.
3. Step-by-Step Instructions for Each Lettering Method
3.1 Heat Transfer Vinyl (HTV) Application: A Detailed Walkthrough
Working with heat transfer vinyl offers a crisp, professional look, especially well-suited for bold lettering and graphics. The process begins with design creation and cutting. Using design software, create your lettering design and then use a vinyl cutting machine to precisely cut the design into the HTV.
Remember to mirror your design in your software before cutting, as HTV is applied in reverse. Once cut, the next crucial step is weeding. This involves carefully removing all the excess vinyl around your design, leaving only your letters adhered to the clear carrier sheet. Patience is key here; using a weeding tool can greatly assist in picking out small vinyl pieces.
With your design weeded, position it onto your pre-washed and thoroughly ironed shirt. Placement is important, so take your time to ensure it’s centered and aligned as desired. To protect both the HTV and your shirt during heat application, always use a protective layer. Teflon sheets or parchment paper work exceptionally well. Place this protective sheet over the HTV design.
Now for the heat application. A heat press is generally recommended for HTV application as it provides consistent heat and pressure across the entire design area. However, a household iron can be used with careful technique.
For a heat press, while specific temperature and pressure settings will vary depending on the exact type of HTV you are using (always consult the manufacturer’s instructions!), a good starting point is a temperature of around 305°F (150°C) and medium, even pressure for approximately 10 to 15 seconds.
If using a household iron, set it to a medium-high, dry heat setting (no steam). Apply firm, even pressure, moving the iron slowly and steadily over the design for a similar duration, ensuring all areas of the design receive heat.
After heat application, allow the vinyl to cool slightly before carefully peeling away the clear carrier sheet. Some HTV is “hot peel,” meaning it’s peeled immediately while still warm, while others are “cool peel” and require complete cooling before peeling. Again, refer to your HTV instructions.
3.2 Iron-On Transfer Paper: A User-Friendly Approach
Iron-on transfer paper is a more accessible method, particularly for designs with intricate details or full-color images. The process starts with printing your design. Crucially, remember to mirror your design before printing. Most transfer paper is designed for inkjet or laser printers, so ensure you are using the correct type for your printer. Also, identify the correct side of the transfer paper to print on – packaging instructions will clearly indicate this, often it’s the brighter white side.
Once printed, carefully trim away any excess paper around your design. This helps prevent unwanted transfer of the paper’s background onto your shirt. Position the transfer paper face-down onto your prepped shirt in your desired location. Cover the transfer paper with the parchment paper included in the transfer paper pack, or use baking parchment paper.
Using a household iron set to its highest dry heat setting (cotton or linen setting is usually appropriate, but always check your transfer paper instructions), apply firm, even pressure. Avoid using steam. Apply pressure across the entire design area, ensuring you cover all edges and corners. The ironing time typically ranges from 1 to 3 minutes, but this is highly dependent on the specific transfer paper brand and thickness. Follow the manufacturer’s recommended ironing time precisely. After ironing, allow the transfer to cool completely before carefully peeling away the backing paper. Peel slowly and evenly to avoid tearing the transferred image.
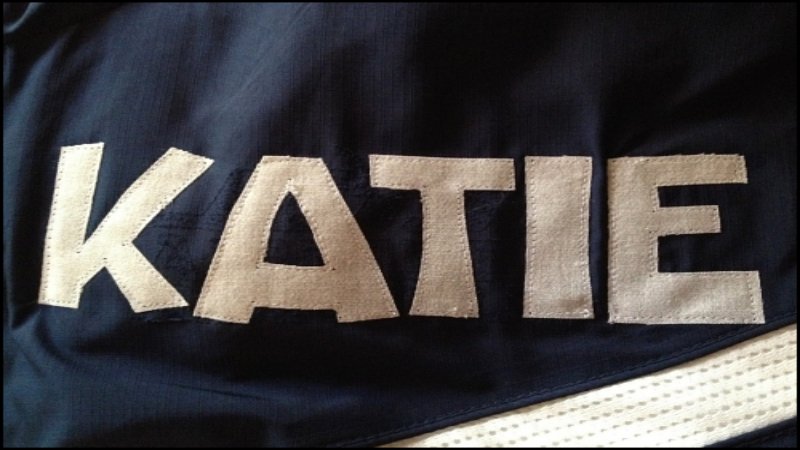
3.3 Sewing & Embroidery: For a Textured, Lasting Finish
For a truly unique and durable lettering effect, sewing and embroidery are excellent choices. Begin by securely hooping your shirt fabric in an embroidery hoop. This tension is essential for creating neat and even stitches. Transfer your lettering design onto the fabric. There are various methods for transferring designs, including using water-soluble pens or transfer paper specifically designed for embroidery.
For outlining letters, the backstitch is a reliable and easy-to-learn stitch that creates a solid, defined line. For filling in letters to create a bolder, more substantial look, the satin stitch is ideal. The satin stitch creates a smooth, solid area of embroidery. If you are new to embroidery, practicing these stitches on scrap fabric first is highly recommended to develop your technique and stitch consistency. There are countless online resources and tutorials available to guide you through learning hand embroidery stitches.
3.4 Troubleshooting Common Lettering Issues: Expert Tips
Even with careful execution, you might encounter some common issues. Let’s address these proactively:
- Peeling Lettering: If your lettering, particularly HTV or iron-on transfers, starts to peel after application and washing, the most likely cause is insufficient heat, pressure, or application time. Go back and double-check the recommended settings for your specific material. It’s always better to err on the side of slightly more heat and pressure within the recommended range. Another factor can be fabric softener residue preventing proper adhesion – ensure you pre-wash shirts without fabric softener.
- Uneven Application: Patches of your design adhering well while other areas are weak or faded often indicate uneven pressure during heat application. With a heat press, ensure the pressure is evenly distributed. With a household iron, consciously apply firm, even pressure across the entire design, paying particular attention to edges and corners. An uneven ironing surface can also contribute to this problem; ensure you are working on a hard, flat surface.
- Bubbling: Bubbling, especially with HTV, can be a sign of overheating. The heat may have been too high, or the application time too long, causing the adhesive to bubble or the vinyl itself to distort. Reduce the temperature or application time slightly and test on a scrap piece of fabric.
- Scorching: Fabric scorching, indicated by discoloration or even burning, is a clear sign of excessive heat. Immediately reduce the temperature of your heat press or iron. Some fabrics are more sensitive to heat than others. Always check the fabric care label and consider using a lower heat setting or shorter application time for delicate fabrics. It’s also crucial to ensure the material you are using is compatible with the heat levels you are applying.
By understanding these step-by-step instructions and common troubleshooting tips, you’ll be well-equipped to create beautifully lettered shirts using your chosen method. Remember, practice and patience are key to mastering any of these techniques.
And for all your garment label and tag needs to complete your custom creations, remember to explore the range of options available at Packlove. With over 8 years of experience in the garment industry, Packlove understands the importance of quality and detail in every aspect of apparel creation, from lettering to branding.

4. FAQs about Lettering on Shirts
4.1 What type of shirt is best for lettering?
While various fabrics can be used for lettering, 100% cotton is highly recommended for most methods. Cotton provides a smooth, stable surface that adheres well to heat transfers, paints and embroidery threads. Its natural fibers absorb and hold color effectively, resulting in vibrant and long-lasting designs. Additionally, cotton is durable and can withstand the heat and pressure required for heat transfer applications.
4.2 How do I make my lettering last longer?
To maximize the lifespan of your shirt lettering, proper care is essential. You can wash lettered shirts inside out in cold water using a gentle cycle. Avoid harsh detergents and bleach which can fade or damage the design. Air drying is ideal but if you must use a dryer, tumble dry on low heat. For some iron-on transfers, heat setting after the initial application can improve durability.
4.3 What is the easiest method for a beginner?
Iron-on transfers are often considered the easiest method for beginners due to their simplicity and minimal required equipment. You can achieve professional-looking results with just a household iron and transfer paper. The process involves printing your design onto transfer paper and then ironing it onto your shirt, making it straightforward and accessible. Pre-cut iron-on letters and designs are also available, eliminating the need for printing.
Stenciling with fabric paint is another beginner-friendly option. You can create custom designs using pre-made stencils or make your own from materials like cardboard or acetate. Simply secure the stencil to your shirt and apply fabric paint with a sponge or brush. This method allows for creativity without requiring advanced skills or expensive equipment. Both iron-on transfers and stenciling offer a low barrier to entry for those new to shirt lettering.
4.4 Can I layer different lettering materials?
Layering different materials can create unique and visually appealing effects but it’s essential to understand the limitations. Heat transfer vinyl can be layered but typically only up to 2-3 layers. Thicker layers can become stiff and prone to cracking. When layering vinyl, always apply the bottom layer first and work your way up, using shorter pressing times for each subsequent layer to avoid overheating. Combining paint and embroidery can also be effective, but consider the fabric’s texture and the design’s complexity.
4.5 Where can I find supplies for lettering shirts?
For high-quality lettering supplies, Packlove offers a range of products suitable for various methods. Their Heat Transfer Vinyl is durable and comes in various colors and finishes, perfect for creating custom designs. Proper supplies are crucial for successful lettering projects. Packlove provides reliable materials to achieve professional results.
5. The Finishing Touch: Elevate Your Creations with Professional Branding
Once you’ve mastered the art of lettering and created a beautiful custom shirt, there’s one final step to transform it from a DIY project into a professional-looking garment branding.
A custom woven label sewn into the collar, a sleek heat transfer label applied as a tagless tag, or a custom hang tag attached to the finished product adds a mark of quality and legitimacy. These are the small details that separate a hobby project from a brand-worthy product and tell your story.
At Packlove, we specialize in creating these high-quality branding elements to help your apparel stand out. With over 8 years of experience, we understand that the final details make all the difference.
Ready to add that professional finish? Explore our range of custom woven labels, heat transfer labels, and hang tags to see how we can help your creations shine.
Read more:
From the professional touch of woven labels to the ease of heat transfer and the practicality of zipper bags, personalized apparel allows you to express your unique style and create a lasting impression. Packlove is your trusted partner in this creative journey, providing not only high-quality supplies but also expert advice to guide you every step of the way. Don’t wait any longer – start your DIY apparel project today and experience the transformative power of personalization with Packlove!


