


How to Reuse Iron On Patches: Make Them Stick Again


This article is for anyone who loves using iron-on patches. Whether you’re a small business owner looking for ways to extend the life of your merchandise, a fashion enthusiast customizing your wardrobe, or someone looking to save money and be more sustainable, you’ll get the insights and practical skills. Let’s get started!
1. Understanding iron-on patches
1.1 What are iron-on patches?
Iron-on patches are decorative pieces of fabric featuring designs, logos, or text, designed to be attached to garments using heat. They consist of a base material, often embroidered fabric or PVC, and a crucial component: heat-activated adhesive.
This adhesive is a special type of glue that forms a strong bond with fabric when exposed to high temperatures, typically from a household iron. The heat melts the adhesive, allowing it to seep into the fibers of the target fabric, creating a secure and lasting application.
1.2 Types of iron-on patches
Iron-on patches come in a variety of styles, each with unique characteristics and best-use cases:
- Embroidered patches: These are the most traditional type, created by stitching threads onto a fabric backing. Embroidered patches offer a classic, textured look and are known for their durability. They are a great choice for adding a vintage or high-quality feel to garments.
- Printed patches: Using modern printing technology, designs are directly transferred onto fabric. Printed patches allow for intricate details, gradients, and photographic images. While they can be less durable than embroidered patches, they offer greater design flexibility.
- PVC patches: Made from Polyvinyl Chloride (PVC), these patches are highly durable, waterproof, and resistant to fading. PVC patches are often used for outdoor gear or items that require extra resilience. They have a distinct, rubber-like texture.
- Chenille patches: Known for their fuzzy, looped texture, chenille patches are created using a special yarn that creates a raised, three-dimensional effect. They are commonly seen on letterman jackets and offer a unique tactile experience. Chenille patches are not as durable as others, and they are often applied to thick fabrics.
1.3 Benefits of using iron-on patches
Iron-on patches are a fantastic choice for quick and easy customization. They offer a simple, at-home application process, allowing anyone to personalize their clothing and accessories in minutes.
2. Preparing for patch removal
2.1 Gathering your tools
Before you begin removing an iron-on patch, gather these essential tools:
- Iron: Used to heat and loosen the adhesive bond between the patch and the fabric.
- Pressing cloth/thin cloth: A protective layer placed between the iron and the patch to prevent scorching or damage to the garment or the patch.
- Tweezers: To carefully lift and peel the patch away from the fabric once the adhesive has been softened.
- Adhesive remover: A fabric-safe solution to dissolve any remaining adhesive residue after the patch is removed.
- Parchment paper: An alternative to a pressing cloth, providing a non-stick surface for heating.
- Hair dryer: A gentler heat source for delicate fabrics or patches.
- Seam ripper: Useful for removing any threads if the patch was additionally sewn on.
Important safety note: Always exercise caution when working with hot tools like irons and hair dryers. Use adhesive removers in a well-ventilated area and follow the manufacturer’s instructions.
2.2 Assessing your garment and patch
Before attempting removal, it’s crucial to assess both the garment and the patch:
- Check the garment care label: Find the label to understand the fabric composition (e.g., cotton, polyester) and its heat tolerance.
- Test for heat tolerance: On a hidden spot (like an inside seam), place a pressing cloth and press with your iron on low for 10-15 seconds. If there’s no damage, you can slowly increase the heat to find a safe temperature.
- Inspect the patch: If you plan to reuse it, check for significant fraying, fading, or damage to the adhesive backing, which could hinder re-adhesion.
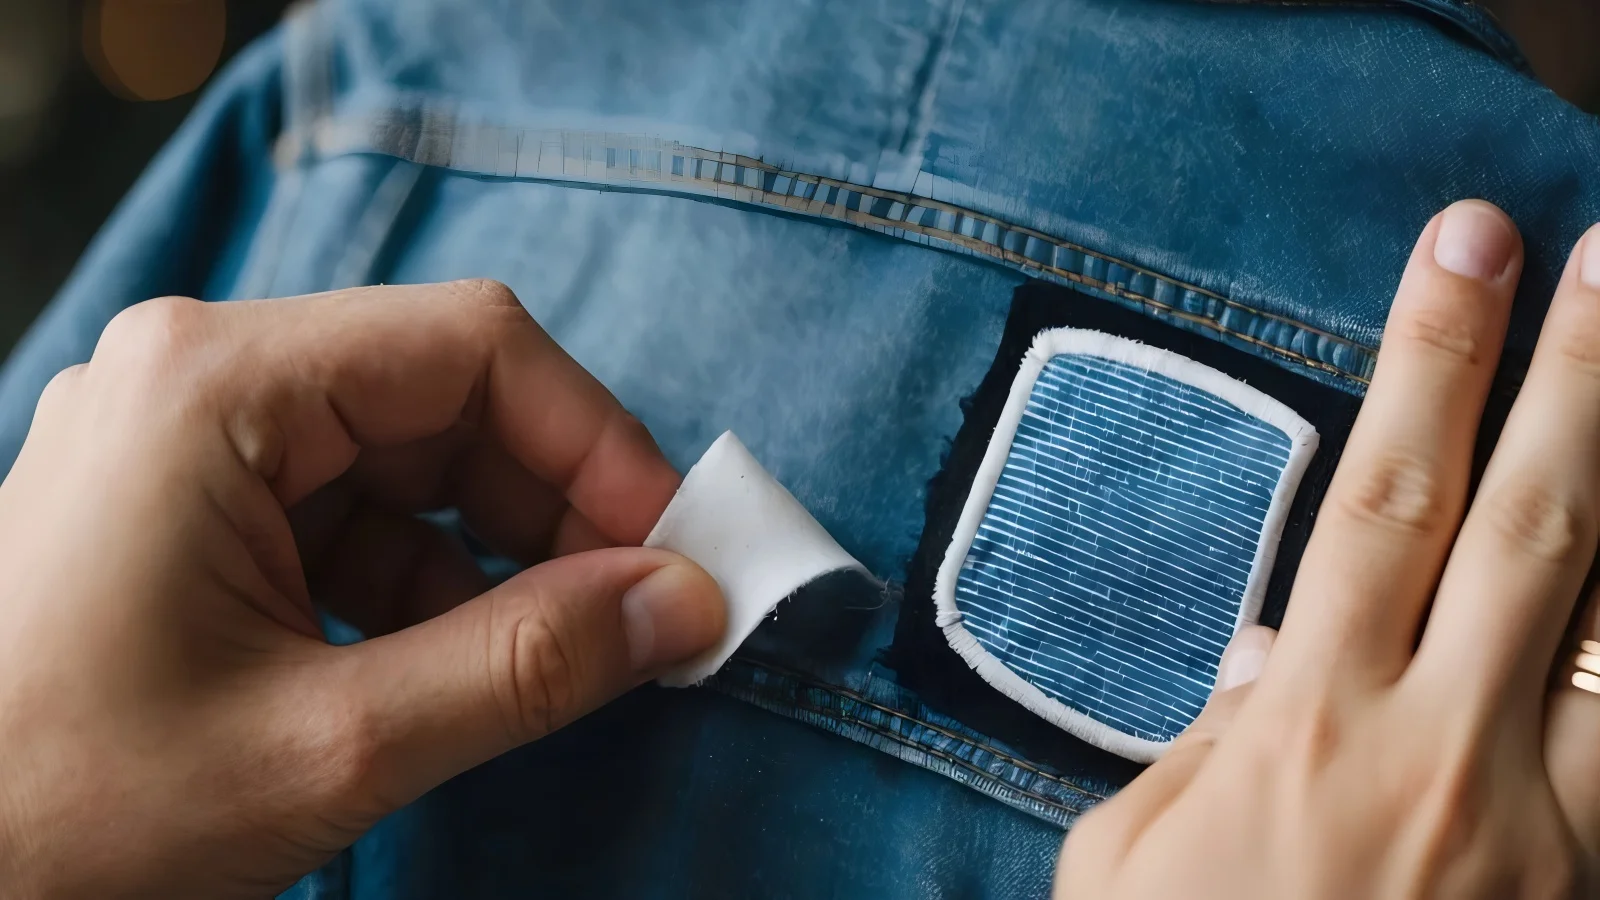
3. How to remove iron-on patches
3.1 Method 1: Using an iron
This is the most common method for removing iron-on patches, utilizing the same heat source used for application.
- Prepare your workspace: Place your garment on a flat, heat-resistant surface like an ironing board. Ensure the area around the patch is accessible.
- Protect the patch: Cover the patch with a pressing cloth or a piece of parchment paper. This prevents direct contact between the iron and the patch, minimizing the risk of scorching.
- Heat the iron: Set your iron to a medium-high setting, without steam. The exact temperature will depend on the fabric’s heat tolerance (refer to your assessment in section 2.2).
- Apply heat: Place the heated iron directly on top of the pressing cloth or parchment paper, covering the entire patch. Apply firm, even pressure.
- Pressing time: Hold the iron in place for approximately 15-20 seconds. The heat will gradually soften the adhesive bond.
- Check for loosening: Carefully lift a corner of the pressing cloth or parchment paper and use tweezers to gently test if the edge of the patch can be lifted.
- Peel carefully: If the adhesive has softened sufficiently, use tweezers to slowly and carefully peel the patch away from the fabric. Work your way around the patch, lifting gradually.
- Reapply heat if needed: If the patch resists removal, reapply heat for another 10-15 seconds and repeat the peeling process. Do not force the patch, as this could damage the fabric.
- Continue until removed: Continue this process of heating and gently peeling until the entire patch is removed.
3.2 Method 2: Using a hair dryer
This method is ideal for more delicate fabrics that might be damaged by the high heat of an iron.
- Apply heat: Set your hair dryer to the highest heat setting. Hold it 2-3 inches away from the patch and heat the area evenly for 30-60 seconds.
- Test and peel: Use tweezers to gently test an edge of the patch. If it begins to lift, continue applying heat with one hand while slowly peeling the patch away with the other.
- Be patient: This method is gentler and may take longer. Reheat sections as needed until the patch is fully removed.
3.3 Method 3: Using adhesive remover
Adhesive remover is a chemical solution designed to dissolve adhesive bonds. This method is particularly useful for stubborn patches or for removing residue after using heat methods.
- Choose a fabric-safe remover: Select an adhesive remover specifically designed for use on fabrics. Look for citrus-based removers or products specifically labeled as fabric-safe and compatible with your garment’s fabric. Always check the product label to ensure it’s compatible with your garment’s fabric.
- Test in an inconspicuous area: Before applying the remover to the patch area, test it on a hidden part of the garment (like the inside of a hem) to ensure it doesn’t cause discoloration or damage.
- Apply the remover: Turn the garment inside out to expose the back of the patch area. Apply a small amount of adhesive remover to the fabric behind the patch, allowing it to soak through.
- Waiting time: Refer to the adhesive remover’s instructions for the recommended waiting time. This allows the solution to penetrate and break down the adhesive.
- Check for loosening: After the waiting time, turn the garment right-side out and use tweezers to gently test if the edge of the patch can be lifted.
- Peel carefully: If the adhesive has softened, carefully peel the patch away from the fabric.
- Reapply if necessary: For stubborn patches, you may need to reapply the adhesive remover and repeat the waiting and peeling process.
- Clean the area: Once the patch is removed, follow the adhesive remover’s instructions for cleaning the treated area. This often involves washing the garment.
4. Removing adhesive residue
4.1 Identifying residue
To ensure complete removal, it’s important to identify all traces of adhesive residue. Feel the fabric gently for any stickiness. Examine the area closely for any discoloration, which might be subtle, especially on darker fabrics. Look carefully for any visible remnants of adhesive, which may appear as small pieces or a thin, sometimes shiny, film.
4.2 Techniques for residue removal
For adhesive residue, use a fabric-safe adhesive remover, following the product’s instructions for application and dwell time, then launder. Rubbing alcohol might work, but always test it on a hidden area first; apply sparingly. Washing the garment with fabric softener is another option. Prioritize testing to avoid damage.
5. How to reapply iron-on patches
5.1 Preparing the patch and garment
Proper preparation is key to successfully reapplying an iron-on patch. For the patch, carefully remove any loose threads or debris from the adhesive side to ensure a clean surface. For the garment, the application area must be completely clean, dry, and free of lint. Ironing the area beforehand (if wrinkled) creates an optimal surface for adhesion.
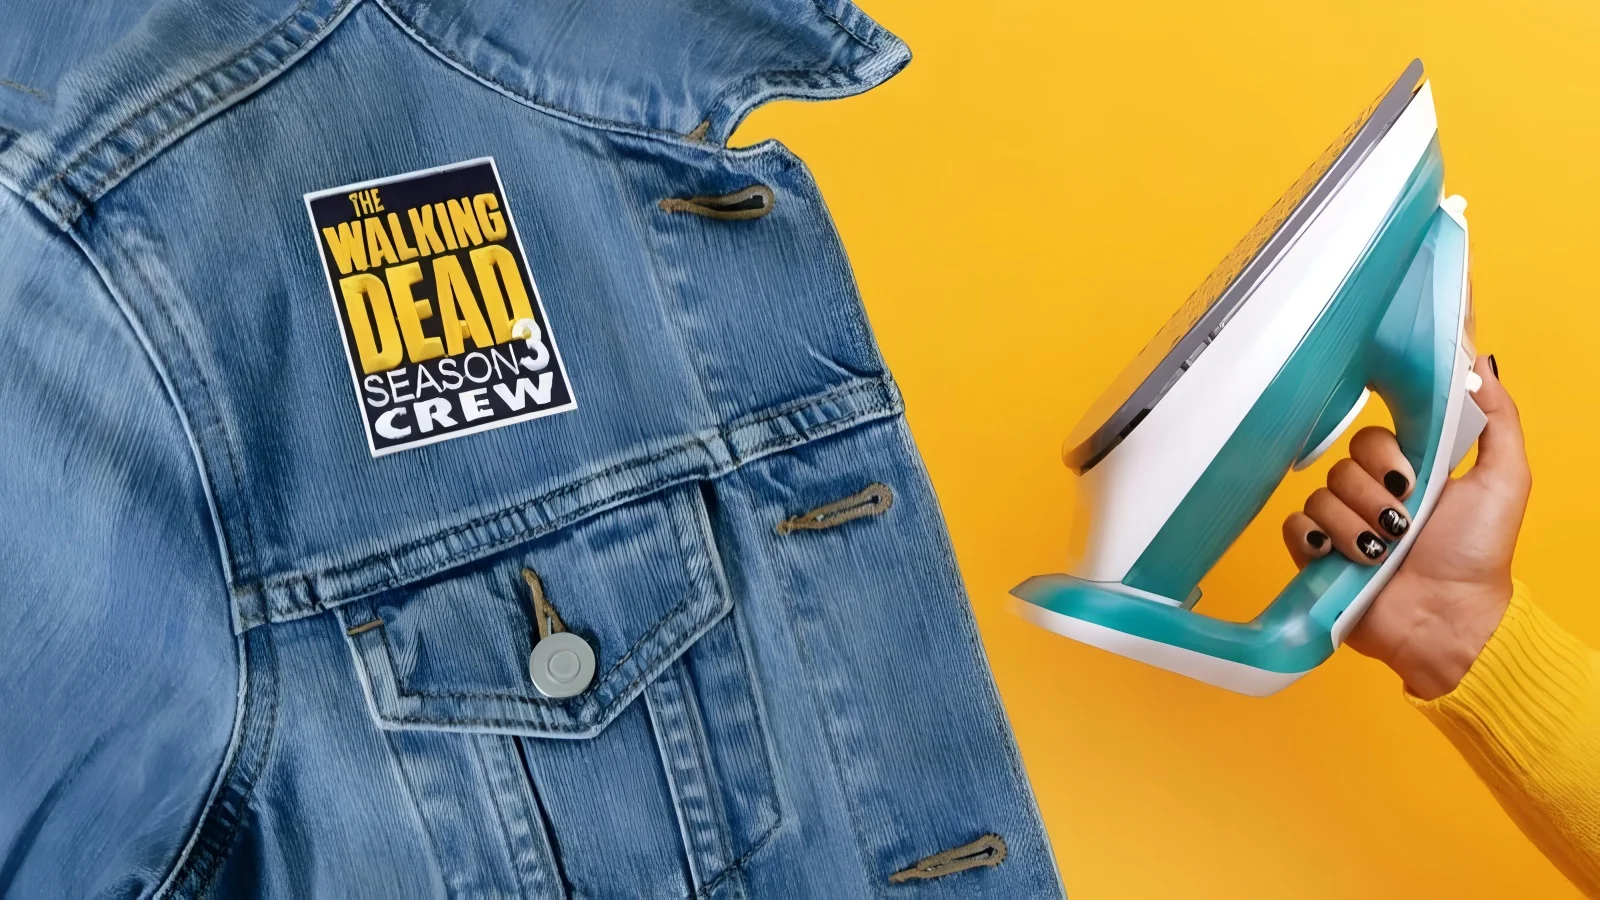
5.2 Method 1: Re-ironing
If the original adhesive on the patch is still relatively intact, re-ironing can be a simple and effective way to reattach it.
- Position the patch: Carefully place the patch on the desired location on the garment, ensuring it’s correctly aligned.
- Protect the patch: Cover the patch with a pressing cloth or a piece of parchment paper. This will prevent direct contact between the iron and the patch, reducing the risk of scorching or damage.
- Heat the iron: Set your iron to a medium-high setting, without steam. The appropriate temperature will depend on the fabric’s heat tolerance (refer to your assessment in section 2.2).
- Apply heat and pressure: Place the heated iron directly on top of the pressing cloth or parchment paper, covering the entire patch. Apply firm, even pressure.
- Pressing time: Hold the iron in place for approximately 15-30 seconds. The heat will reactivate the remaining adhesive on the patch.
- Check for adhesion: Carefully lift a corner of the pressing cloth or parchment paper and gently check if the patch has adhered to the fabric.
- Reapply heat if needed: If the patch hasn’t fully adhered, reapply heat for another 10-15 seconds and repeat the checking process.
- Cool down: Once the patch is securely attached, allow it to cool completely before handling or wearing the garment. This allows the adhesive to set properly.
5.3 Method 2: Using fabric glue
If the original adhesive on the patch is insufficient or damaged, fabric glue provides a reliable alternative for reattachment. When choosing a fabric glue for your patch, it’s important to pick one that’s made for bonding fabrics. Look for a glue that will create a permanent bond, is washable so you can clean the garment, and remains flexible so the patch doesn’t feel stiff.
Carefully apply a thin, even layer of fabric glue to the back of the patch. Avoid using too much glue, as this can seep out from the edges and create a messy appearance. Place the patch on the desired location on the garment, pressing down gently to ensure good contact. If any glue squeezes out from the edges, immediately wipe it away with a damp cloth.
Allow the fabric glue to dry completely according to the manufacturer’s instructions. This typically takes several hours or even overnight. Some fabric glues may benefit from heat setting after they’ve dried. Check the glue’s instructions to see if this is recommended. If so, cover the patch with a pressing cloth and iron it briefly on a low setting.
5.4 Method 3: Sewing the patch
For maximum durability and longevity, sewing the patch onto the garment is the most secure method, especially for patches that will be subjected to frequent wear and tear or washing.
Choose thread and needle: Select a thread color that matches either the patch or the garment fabric. Use a needle that is appropriate for the fabric’s weight – a finer needle for delicate fabrics, a thicker needle for heavier fabrics.
Basic stitches:
- Running stitch: A simple stitch that goes in and out of the fabric, creating a dashed line around the perimeter of the patch. This is the easiest stitch for beginners.
- Back stitch: A stronger stitch that creates a solid line. It’s more secure than a running stitch and less likely to come undone.
- Position the patch on the garment.
- Thread your needle and knot the end.
- Starting from the inside of the garment (to hide the knot), bring the needle up through the fabric and the edge of the patch.
- Using your chosen stitch (running stitch or back stitch), sew around the entire perimeter of the patch, keeping your stitches close together and evenly spaced.
- When you reach the starting point, knot the thread securely on the inside of the garment and trim any excess thread.
6. Alternative uses for iron-on patches
6.1 Creative repurposing
Iron-on patches, even those that have been removed from garments, offer a wealth of creative repurposing opportunities. Instead of discarding them, consider these imaginative ideas:
Quilts: Incorporate patches into a memory quilt, combining them with other fabric scraps to create a personalized and meaningful piece. Patches representing travels, hobbies, or special events can add a unique touch.
Wall art:
- Framed patches: Arrange a collection of patches in a frame to create a unique piece of wall art. This works particularly well with themed patches, such as vintage travel patches or band logos.
- Wall hanging: Attach them to fabrics to decorate the wall.
Accessories:
- Bags: Add patches to tote bags, backpacks, or purses to give them a customized look.
- Hats: Personalize hats, caps, or beanies with patches that reflect your style or interests.
6.2 Upcycling and repair old clothes
Iron-on patches are good options for upcycling and giving new looks to old clothes, helping them to:
- Cover up tears, and stains on clothes.
- Add colors, and express personal styles to old, boring clothes.
7. Tips for patch longevity
To maximize the lifespan of your reapplied iron-on patches, whether you’ve re-ironed them, used fabric glue, or sewn them on, follow these essential care and maintenance tips:
Washing:
- Turn garment inside out: Before washing, turn the garment inside out. This protects the patch from abrasion against other clothes or the washing machine drum.
- Use cold water: Wash the garment in cold water. Hot water can weaken the adhesive bond or cause the patch to fade.
- Gentle cycle: Select a gentle or delicate cycle on your washing machine. This reduces the stress on the patch.
- Avoid harsh detergents: Use a mild detergent. Harsh chemicals can damage the patch or the adhesive.
Drying:
- Air dry is best: Whenever possible, air dry the garment. Hang it up or lay it flat to dry.
- Low heat if using dryer: If you must use a dryer, use the lowest heat setting. High heat can reactivate the adhesive and potentially cause the patch to detach or become distorted.
Storage:
- Store flat or hanging: Store the garment flat or hanging to prevent creasing or folding the patch.
- Avoid direct sunlight: Prolonged exposure to direct sunlight can cause the patch to fade.
Reinforcement: Consider sewing: Even if you’ve re-ironed or used fabric glue, consider adding a few stitches around the perimeter of the patch for extra security, especially for patches on high-wear areas.
Extending patch lifespan: If users follow the above tips, patches can stay on clothes for much longer and users can save a significant amount of money in renewing clothes.
8. Related questions
8.1 Can I remove an iron-on patch without an iron?
Yes, alternatives to an iron exist. A hair dryer (on high heat) can soften the glue, allowing you to gently peel the patch. Fabric-safe adhesive removers are also effective, but always test them first. Freezing the garment is another, less reliable option.
8.2 Will removing an iron-on patch damage my clothes?
Damage is possible, but avoidable. Risk depends on fabric type (delicates are more vulnerable), adhesive strength, removal method, and patch age. Minimize risk by testing methods, starting gently, working slowly, and being patient. Consider the garment’s condition; very old or fragile items might be best left alone.
8.3 How do I get rid of all the sticky residue after removing a patch?
Complete residue removal is key. Fabric adhesive remover is your best bet: apply, let it sit, then gently rub and wash. Rubbing alcohol might work (test first!), or washing with fabric softener can help. Avoid harsh scrubbing.
8.4 What’s the best way to remove an iron-on patch from delicate fabrics like silk or lace?
Delicate fabrics need gentle handling. Start with a hair dryer on low heat. If needed, use a fabric-safe adhesive remover, but extensive testing is crucial. Professional cleaning is the safest option if you’re unsure. Avoid force and harsh chemicals.
8.5 Can I remove an iron-on patch that’s been on for a very long time?
Old patches are removable, but often more difficult. The glue may be very strong. Try heat (iron or hair dryer) first, possibly for longer. Adhesive remover is likely necessary, perhaps with multiple applications. Be patient and persistent, but consider the garment’s age and fragility; removal might not always be the best choice.
Read more:
Iron-on patches offer an easy way to personalize, repair, and upcycle clothing. Removing, reapplying, and repurposing extends lifespan, helping users save money and the environment. By following this comprehensive guide, you can confidently tackle any iron-on patch project, maximizing value and expressing creativity.


