


How to Securely Iron On Cub Scout Patches


Cub Scout patches, representing earned achievement badges and official scouting insignia, carry significant pride for young scouts and their families. Displaying these symbols correctly on the uniform is a rite of passage. Ironing offers a convenient and effective no-sew method for attaching these important emblems.
This guide provides clear, reliable instructions for successful iron-on patch application, ensuring durability and preventing damage to the uniform. Following these steps will give parents and guardians confidence in applying Cub Scout patches correctly, making certain these symbols of accomplishment stay securely in place. You will learn the proper preparation, application technique, and aftercare needed for a lasting bond.
1. Gathering your supplies: Essential tools for patch attachment
Before starting, collect the necessary items for a smooth application process:
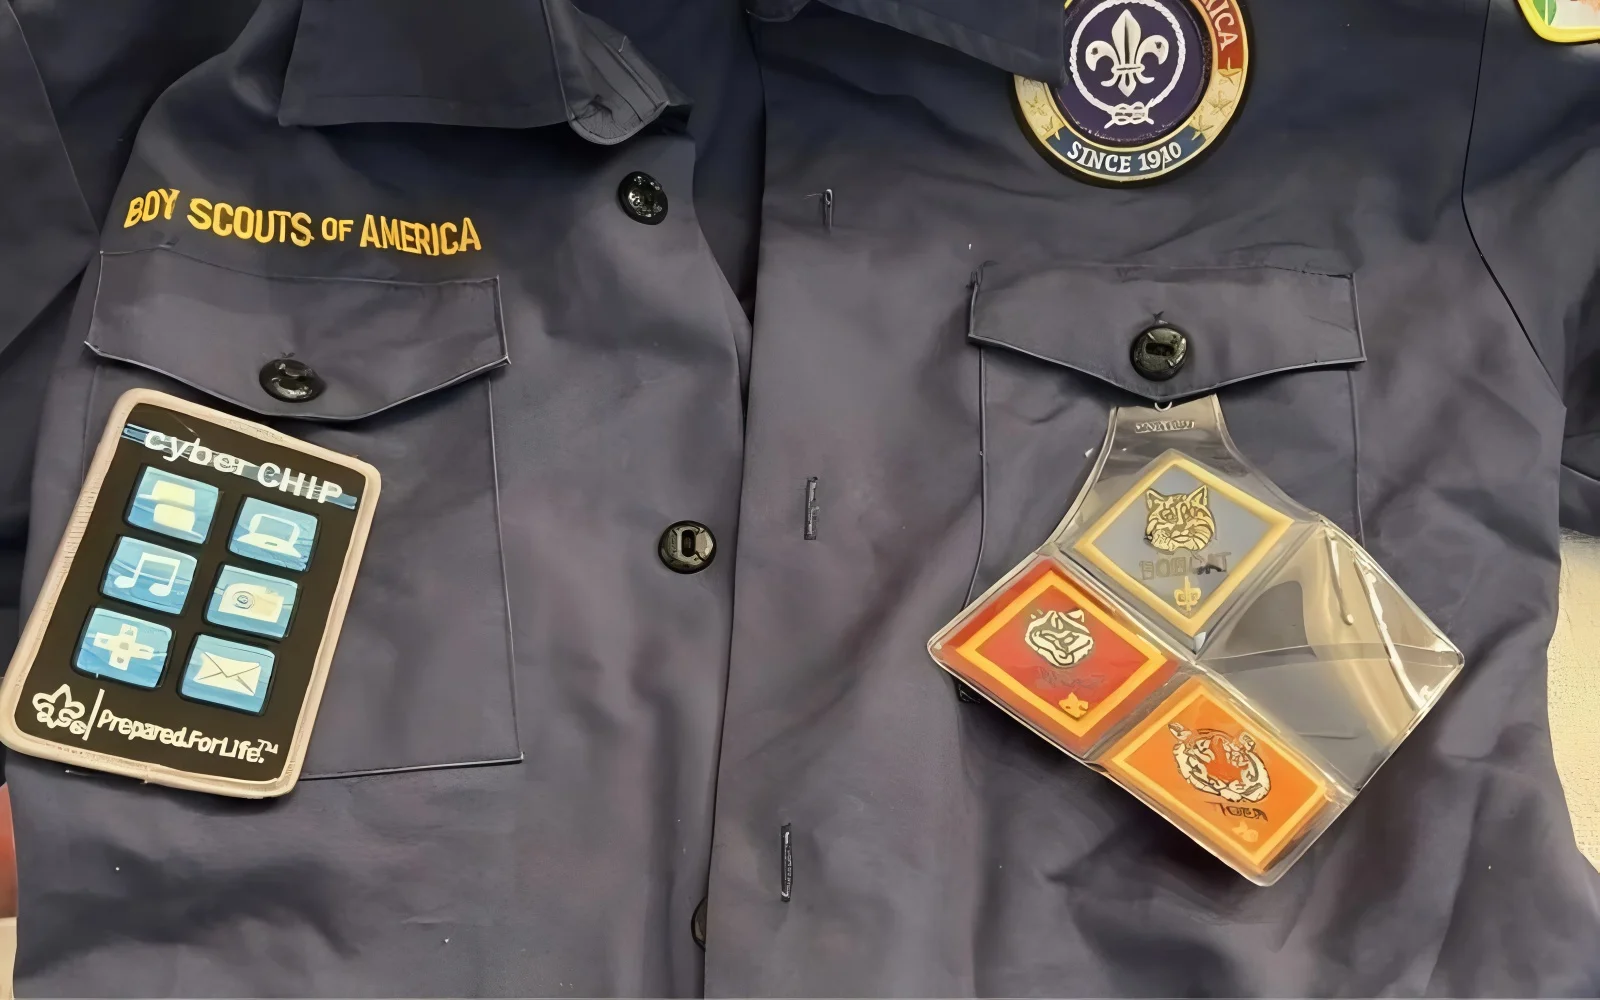
- Cub Scout Uniform: Ensure the garment is clean, completely dry, and free of wrinkles where the patch will be placed.
- Cub Scout Patches: Confirm the patches have the special heat-activated adhesive backing designed for iron-on application.
- Household Iron: A standard iron capable of reaching appropriate heat settings without steam.
- Ironing Board or Suitable Flat Surface: A sturdy, heat-resistant surface is crucial for even pressure application.
- Pressing Cloth: A thin piece of cotton fabric (like a handkerchief, pillowcase scrap, or muslin) to protect the patch and uniform from direct heat. Avoid synthetic materials that could melt.
- Optional: Ruler or Measuring Tape: Helpful for ensuring accurate placement according to official guidelines.

2. Preparing for success: Pre-application steps for optimal adhesion
Proper preparation is key to ensuring the patch adheres strongly and the uniform remains undamaged.
2.1. Clean & prep uniform
The uniform area must be clean, dry, and smooth. Dirt, oils, or moisture can interfere with the fabric adhesion process. Wrinkles create an uneven surface, preventing the patch’s adhesive from making full contact with the fabric fibers, particularly on common uniform materials like cotton/polyester blends. Iron the area flat before positioning the patch.
2.2. Understand iron settings
Always check the uniform’s fabric care label first to determine the highest safe heat setting. Typically, a medium to medium-high temperature setting is suitable for cotton/polyester blends. Crucially, ensure the steam function is turned off, as moisture interferes with the adhesive.
Before applying heat to the patch, test the iron on an inconspicuous area of the uniform (like an inside seam or hem) to prevent accidental scorching or melting. Using a temperature setting that is too high can permanently damage the fabric.
2.3. Pre-heat the iron
Allow the iron to reach the selected temperature setting completely before starting the application. Applying heat before the iron is fully hot can lead to incomplete melting of the adhesive and a weak bond.
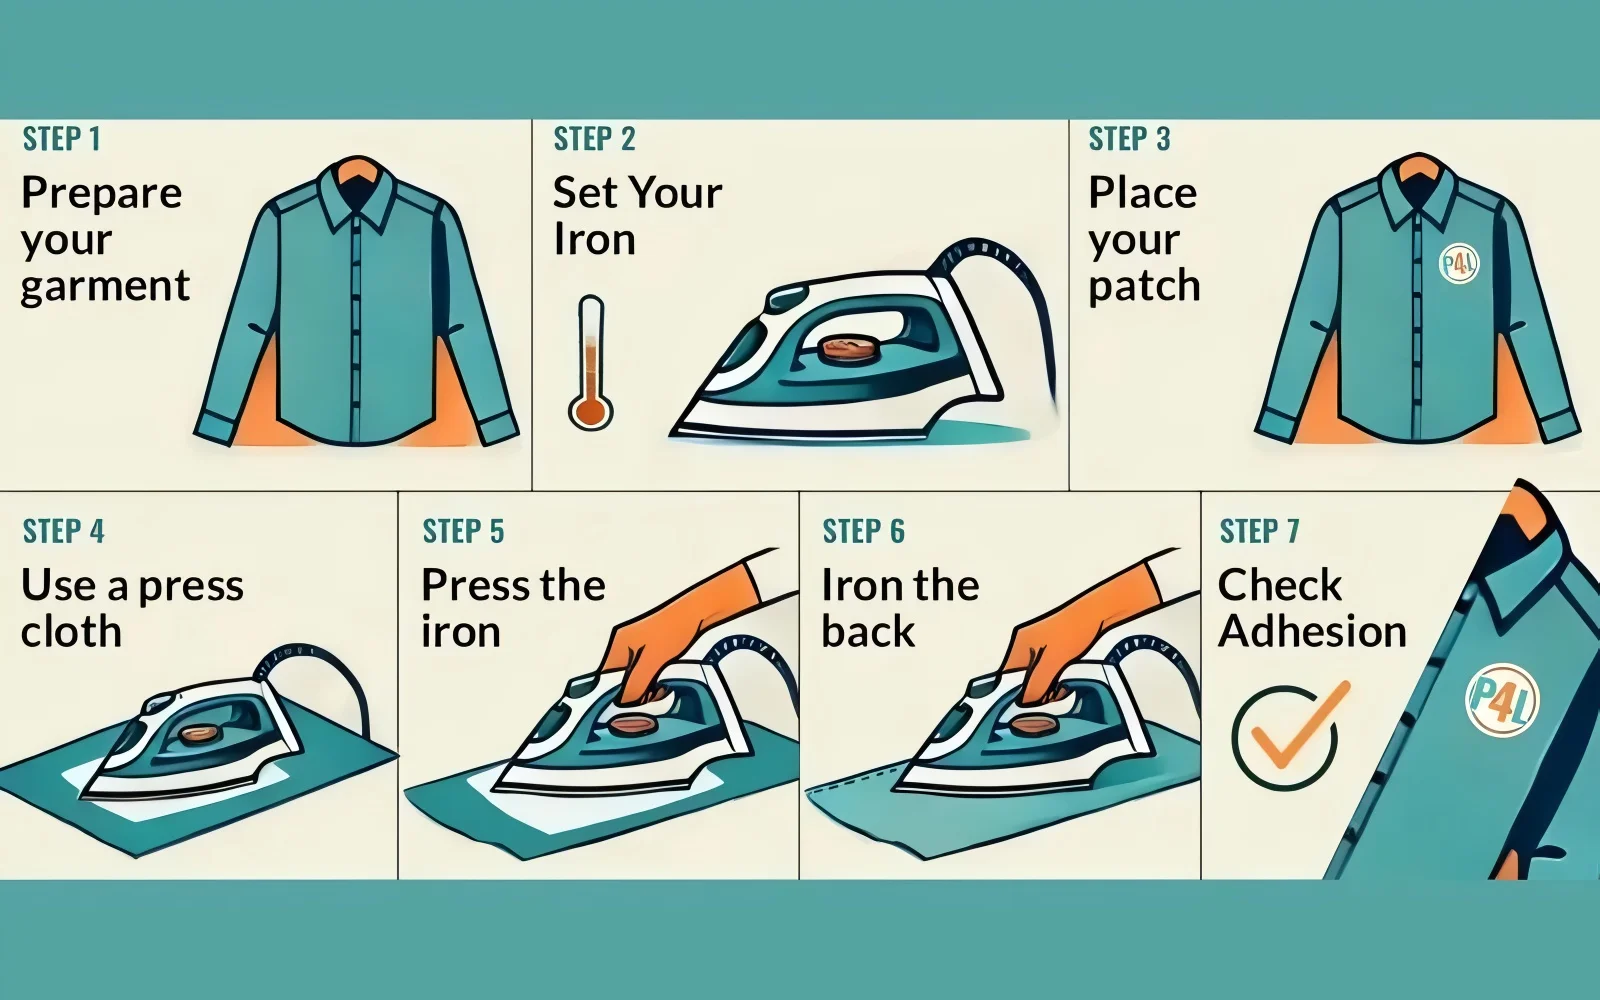
3. The iron-on process: A step-by-step guide to patch application
Follow these steps carefully for secure patch attachment.
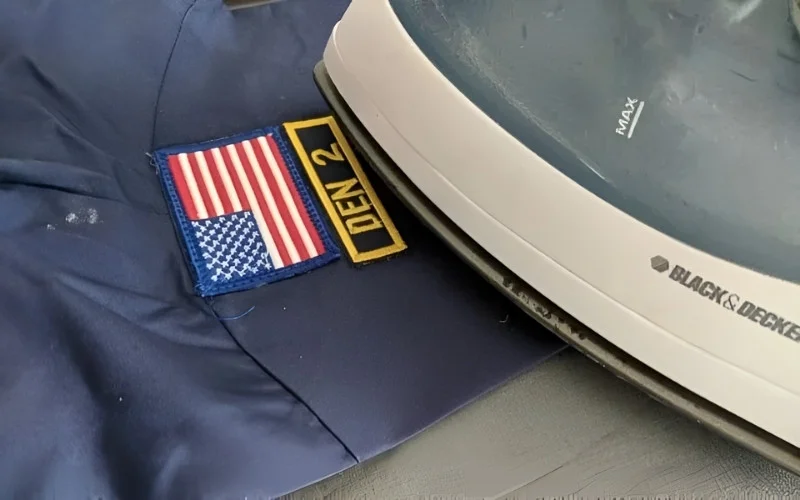
3.1. Step 1: Positioning the patch
Carefully place the patch onto the correct location on the uniform. Accurate patch placement is essential. Always consult the official Boy Scouts of America (BSA) guidelines found in the current Cub Scout Handbook or on the official BSA website for the specific placement rules for each type of scouting insignia or achievement badge. Using a ruler can help achieve precise alignment.
3.2. Step 2: Protecting your patch and uniform
Place the pressing cloth smoothly over the positioned patch. This piece of fabric acts as a crucial barrier for fabric protection, preventing the iron from directly touching and potentially scorching the patch or the uniform material.
3.3. Step 3: Applying heat and pressure
Position the pre-heated iron (with steam off) onto the pressing cloth covering the patch. Apply firm, even pressure – do not simply rest the iron on top. Press down consistently for the duration recommended by the patch manufacturer, typically around 15-20 seconds.
If no specific instructions are available, start with 15 seconds. You may need to make slight movements to ensure the heat and pressure cover the entire patch surface, especially the edges. This heat application activates the adhesive, initiating the adhesion process similar to how heat press patches work commercially.
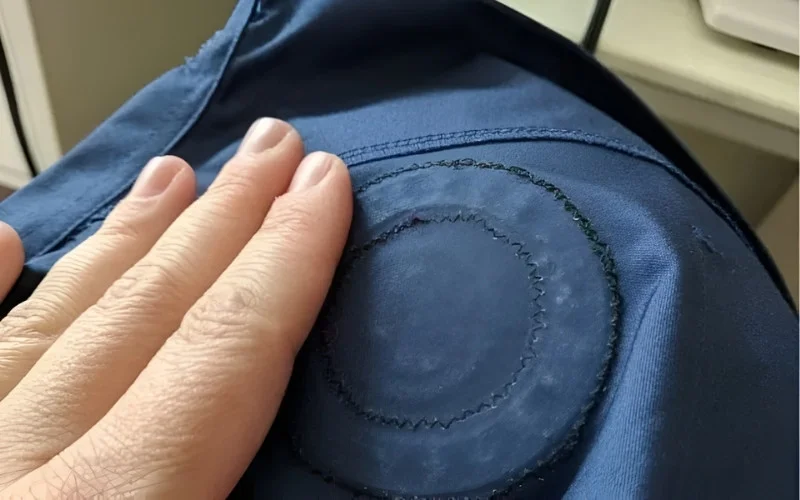
3.4. Step 4: Checking adhesion
Carefully lift the iron and the pressing cloth. Allow the area to cool for a few seconds – it will be hot. Gently try to lift the edge of the patch with a fingernail. If the edge lifts easily, the patch has not fully adhered. Repeat Step 3, reapplying heat and pressure for another 10-15 seconds, paying particular attention to the edges. Perform this adhesion check carefully.
3.5. Step 5: Full cooling
Once the patch seems secure, leave the uniform flat and undisturbed until the patch and surrounding fabric have cooled completely. This cooling period is critical as allows the heat-activated adhesive polymers to fully set and create a strong adhesive bond with the textile fibers of the uniform. Rushing this step can compromise the bond strength.
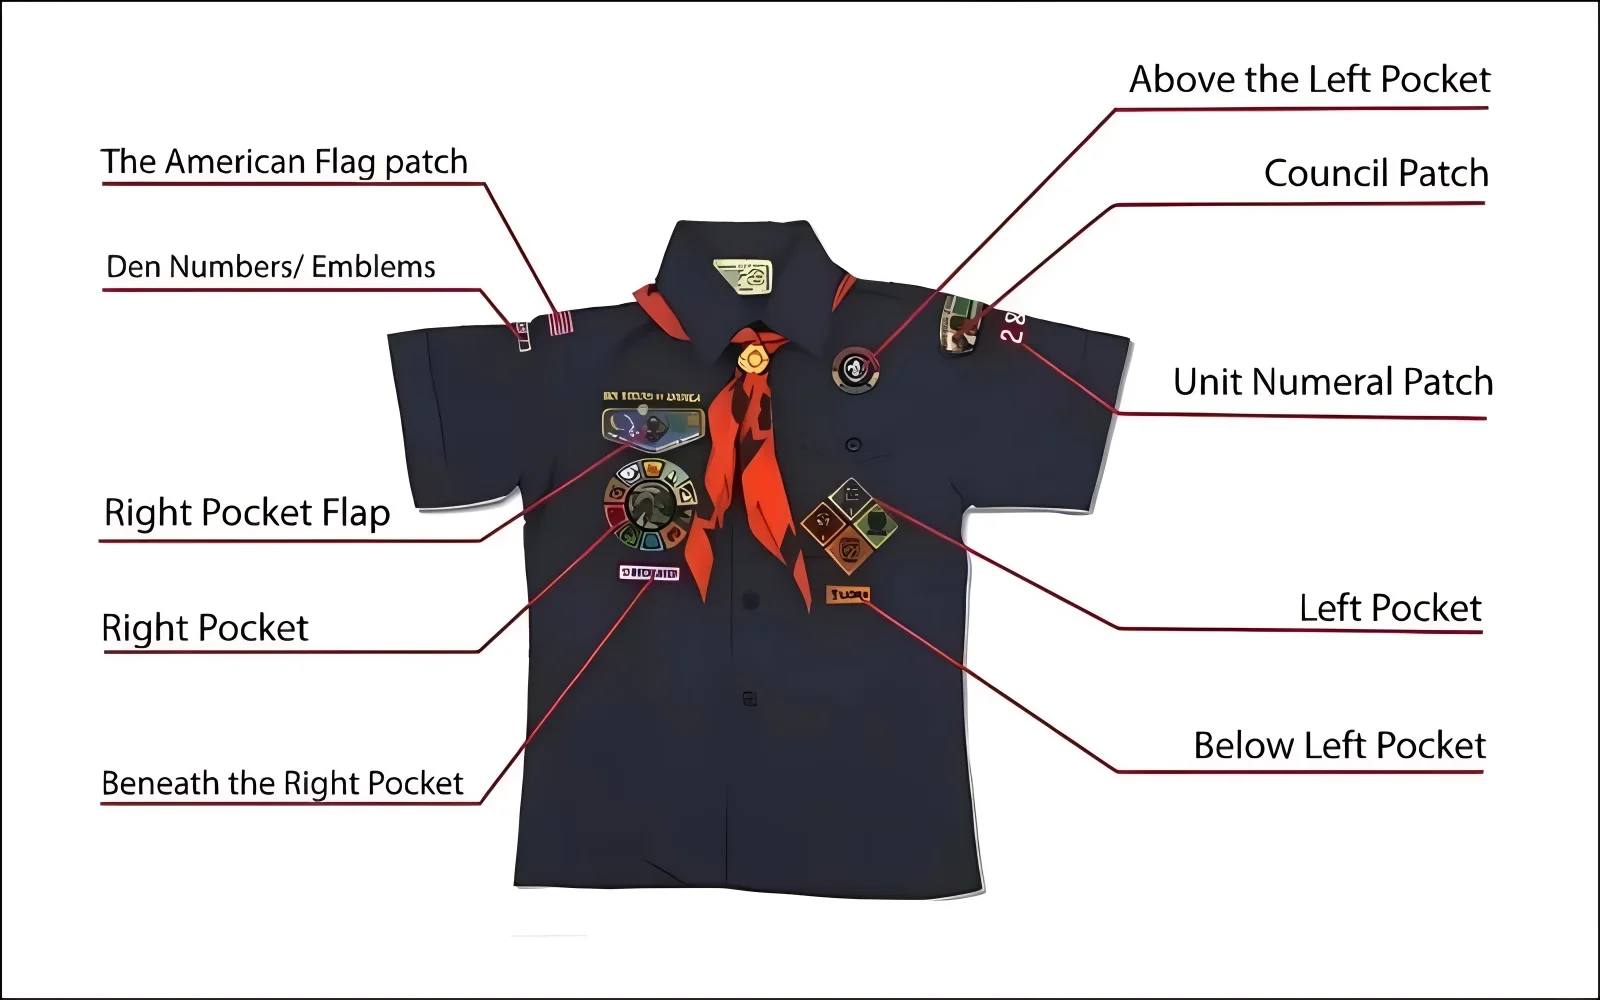
4. Getting it right: Official Cub Scout patch placement matters
Adhering to the official uniform standards set by the Boy Scouts of America (BSA) for patch placement is important. Correct placement shows respect for the program’s traditions, ensures consistency across the organization, and properly recognizes the scout’s achievements.
The definitive sources for placement diagrams and rules are the official Cub Scout Handbook and the BSA website. Rely on these official resources rather than potentially outdated or inaccurate third-party diagrams to ensure uniform compliance for all achievement badges and insignia.
5. Pro tips from experience for a lasting bond
- Stubborn patches: If a patch resists adhering (possibly due to age or lower quality adhesive), double-check your iron’s heat setting and ensure you applied sufficient, even pressure for the full duration. If problems persist, consider reinforcing the edges with a few stitches or using a suitable fabric adhesive designed for clothing as a supplementary measure. Adhesion failure can sometimes occur.
- Uniform fabrics: Most Scout uniforms are durable polyester blends. While sturdy, these fabrics can be sensitive to excessive heat. Always verify the care label instructions and test the iron heat first.
- Pressure is key: Remember that firm, even pressure across the entire patch surface is just as vital as the correct heat setting. Don’t just focus on the center.
- No steam, ever: Reinforce the habit: always ensure the steam function on your iron is turned off when using this iron-on method. Steam introduces moisture that weakens the adhesive bond.
6. Troubleshooting common iron-on issues
Problem: Patch not sticking
- Possible Causes: Iron temperature too low; insufficient pressure applied; pressing time too short; patch is not an iron-on type (lacks adhesive backing); uniform fabric has a coating resisting adhesion.
- Solutions: Check iron setting against fabric label; ensure iron is fully preheated; apply more firm, even pressure; increase pressing time slightly (e.g., by 5-10 seconds); verify patch has shiny adhesive backing; wash uniform (without fabric softener) if coating is suspected. This addresses potential adhesion failure.
Problem: Patch edges lifting
- Possible Cause: Uneven heat or pressure application, especially around the perimeter.
- Solution: Re-cover with the pressing cloth and apply targeted heat and pressure specifically to the lifting edges for 10-15 seconds. Ensure the iron edge covers the patch edge completely during application.
Problem: Preventing scorching fabric
- Recap of Protective Measures: Always use a pressing cloth as a barrier. Use the correct temperature setting verified by the care label and pre-testing. Do not exceed the recommended pressing time. The logical relationship is clear: pressing cloth leads to protection. The requirement for success includes proper heat and pressure.
7. Aftercare: Keeping patches secure through wear and tear
Proper care helps maintain the bond and appearance of ironed-on patches.
- Washing: Turn the uniform inside out before washing. Use cold water and select a gentle cycle. Use a mild detergent. Avoid bleach and fabric softeners, which can degrade the adhesive. Following these washing instructions helps preserve the patch.
- Drying: Air drying the uniform flat or on a hanger is the best option. If machine drying is necessary, use the lowest heat setting (tumble dry low). High heat can reactivate and weaken the adhesive, potentially causing patches to loosen or detach.
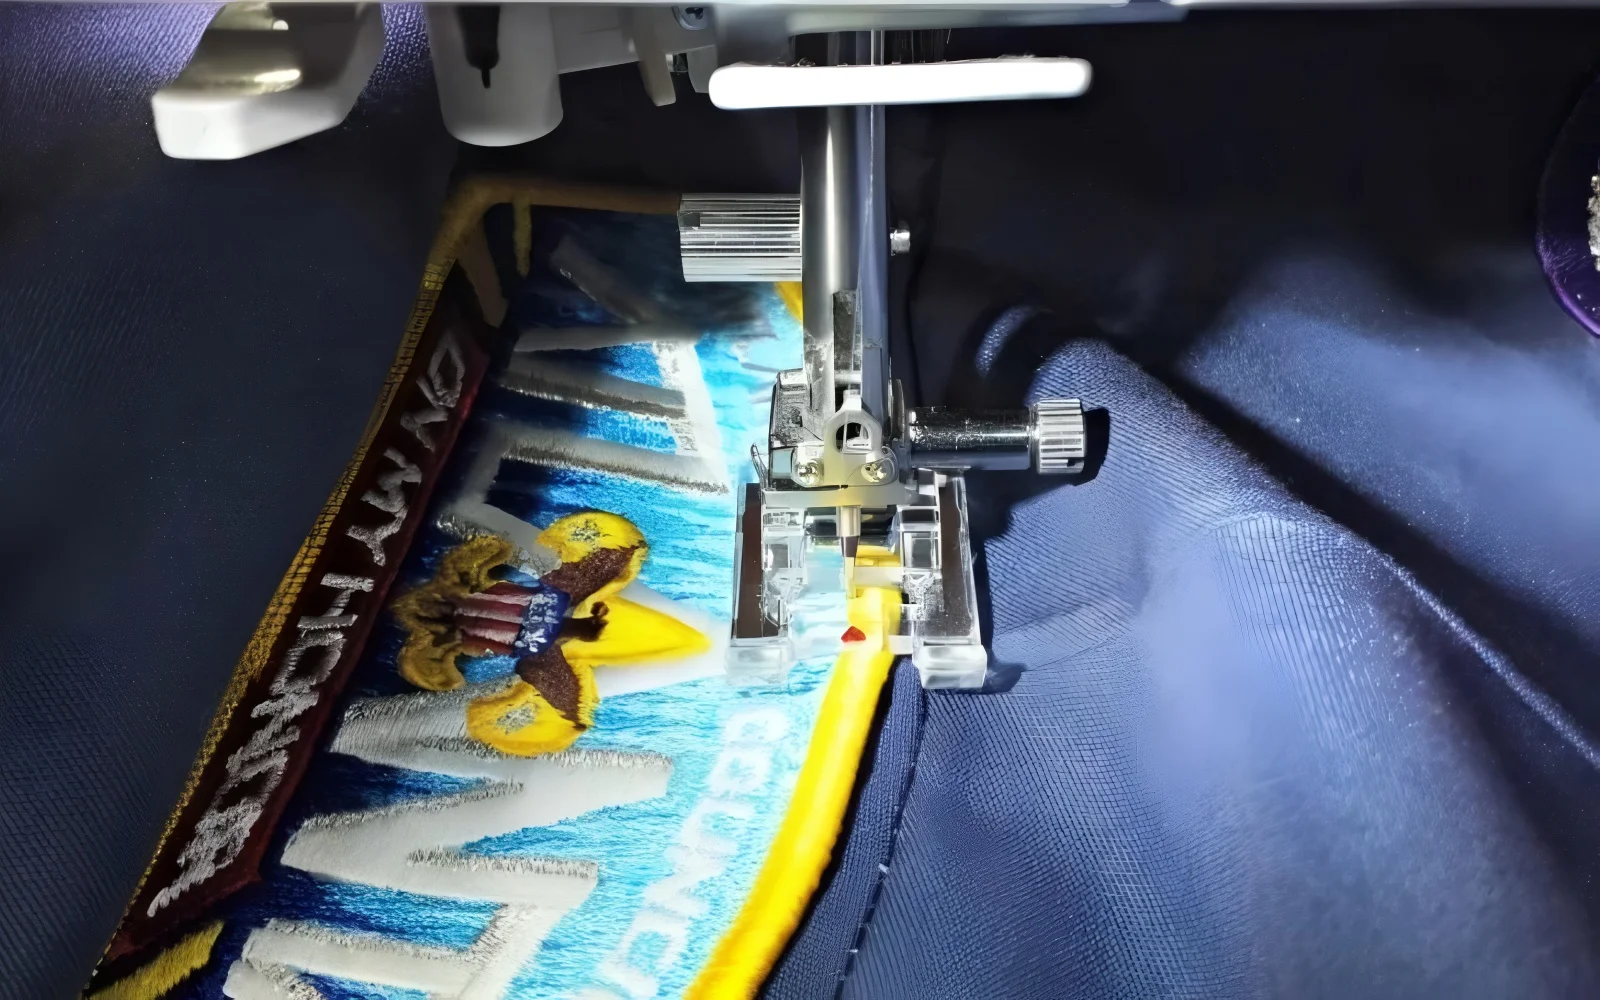
- Reinforcement: For maximum durability, especially on uniforms that see frequent washing and active wear, consider adding a few small stitches around the edge of the patch after ironing. Some Scout leaders may require this. This serves as a strong alternative or supplement, contrasting with the initial no-sew application (the antonym concept: how to sew on Cub Scout patches provides extra security).
8. Related questions
8.1 Can iron-on Cub Scout patches be removed?
Removing iron-on patches is difficult and often leaves behind adhesive residue or can damage the uniform fabric. It typically involves reheating the patch to soften the adhesive and carefully peeling while hot, often requiring specialized adhesive removers for cleanup. Success is not guaranteed, and fabric damage is possible.
8.2 Do I still need to sew the patch on after ironing?
While ironing provides a strong initial bond for patches with heat-activated backing, sewing the edges offers the most durable, long-term attachment, especially through repeated washing and wear. Some troops may require patches to be sewn for official uniform standards. Ironing first can perfectly position the patch, making sewing easier. Consider sewing as reinforcement.
8.3 How do I attach old patches or those without adhesive backing?
Patches without a heat-activated adhesive backing (non-iron-on types) or very old patches where the adhesive may have degraded cannot be reliably ironed on. These require alternative methods like sewing (the traditional sew-on patch method) or using a permanent fabric glue suitable for clothing applications. Always test fabric glue in an inconspicuous area first.
Read more:
Successfully applying iron-on Cub Scout patches comes down to careful preparation, using the correct heat and pressure, ensuring accurate placement according to official guidelines, and allowing sufficient cooling time. Displaying these emblems correctly reflects a scout’s journey and accomplishments with pride.
With these steps and tips, you can confidently use the iron-on method to attach patches securely, ensuring they look sharp on the uniform. Should you need further guidance on uniform care or specialized patch requirements, reliable resources can provide expert assistance. Applying Cub Scout patches using the iron-on technique correctly is achievable with attention to detail.


