


Iron Patch to Beanie: Easy, No-Damage Guide


You’ve found the ideal patch – that perfect emblem, design, or statement to elevate your favorite beanie from ordinary to extraordinary. But the application process? That can feel like a high-stakes game. Many people hesitate, picturing scorched fabric, a ruined patch, or the disappointment of it detaching after just one wear.
It’s a common dilemma for anyone looking to customize their headwear. Poorly applied patches aren’t just aesthetically displeasing; they can permanently damage the beanie’s material. That’s a waste of your time, resources, and a potentially great accessory.
1. Understanding Iron-On Patches and Beanie Materials
1.1. Types of Iron-On Patches
These patches are created by stitching a design onto a backing fabric. They are known for their textured, three-dimensional appearance, offering a classic and durable option. The thickness can sometimes make them less ideal for very thin or delicate beanies, where the patch might feel stiff. However, on most standard beanies, they provide a high-quality look.
Woven patches are made by weaving threads together to form the design, resulting in a flatter, smoother surface compared to embroidered patches. They offer excellent detail and are more flexible, making them a good choice for various beanie types, including thinner materials. Their lower profile blends seamlessly with the beanie’s fabric.
1.2. Beanie Material Compatibility
Acrylic is a synthetic fiber known for its durability and resistance to stretching. When ironing, use a low to medium heat setting (around 275-325°F or 135-160°C). Apply heat for a shorter duration, typically 10-15 seconds initially, checking adhesion and repeating if necessary.
Wool is a natural fiber that can be sensitive to heat. Use a low heat setting (around 250-300°F or 120-150°C) and a pressing cloth is *absolutely essential* to prevent scorching or damage to the fibers. Apply heat for very short intervals (8-10 seconds), checking frequently. Cotton is generally more heat-tolerant than wool or acrylic. A medium heat setting (around 300-350°F or 150-180°C) is usually suitable. You can apply heat for slightly longer periods (15-20 seconds), but still, check regularly.
For blended fabrics, always err on the side of caution and use the settings recommended for the most delicate fiber in the blend. If the beanie is a mix of acrylic and wool, follow the wool guidelines (low heat, pressing cloth, short intervals). It’s always better to apply heat gradually than to risk damage.
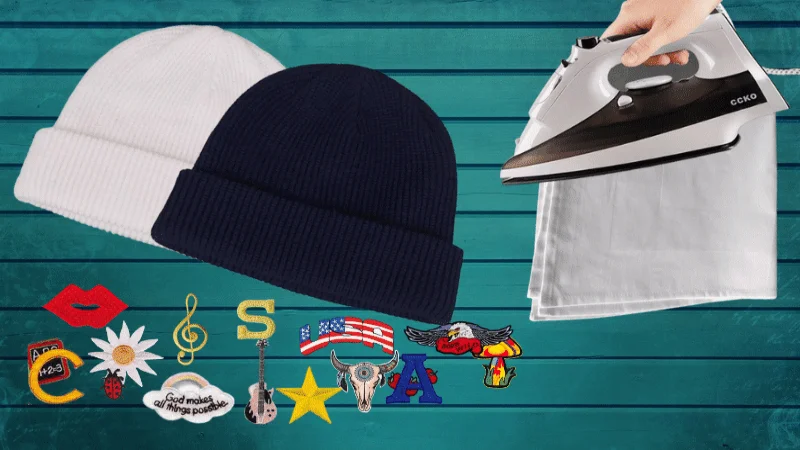
2. Gathering Your Supplies
Here’s a simple, clear list of everything needed:
- Iron-on Patch: This is the decorative element you’ll be attaching to your beanie.
- Beanie: The star of the show – the headwear you’re customizing.
- Iron: The tool that will apply the heat needed to activate the patch’s adhesive.
- Ironing Board (or heat-resistant surface): A stable, heat-safe surface to work on. A sturdy table covered with a thick towel can also work.
- Pressing Cloth (thin cotton cloth – essential): This crucial item acts as a barrier between the iron and the patch/beanie, preventing scorching and damage. A thin, clean cotton handkerchief, pillowcase, or piece of fabric is perfect. Do not skip this.
- (Optional) Hair straightener: Can be useful for applying heat precisely to Curved areas of the beanie or patch.
- Optional: Fabric Glue: A small amount can be used to reinforce the patch’s adhesion, especially along the edges, or as a complete alternative to ironing.
- Optional: Sewing Needle and Thread: For those who prefer a more permanent attachment or want to add extra security, sewing the patch on is an excellent option.
3. Step-by-Step Guide: Ironing Your Patch onto Your Beanie
3.1. Preparing Your Beanie and Patch
- Clean the Beanie Surface: Before applying the patch, ensure the area of the beanie where you’ll be attaching it is clean and free of any lint, dust, or debris. A clean surface ensures better adhesion. You can use a lint roller or a slightly damp cloth to wipe the area.
- Position the Patch: Carefully place the patch on the desired location on your beanie. Take your time to ensure it’s centered, straight, and precisely where you want it.
- Consider Using Pins (Optional): If you’re concerned about the patch shifting during the ironing process, you can use a few straight pins around the perimeter of the patch (not through the patch itself, as this could leave holes) to temporarily hold it in place. Be very careful to remove these pins before applying heat.
3.2. Setting Up Your Iron
- Correct Temperature Setting: Refer back to the material guidelines in Section 1.2. Choose the appropriate temperature setting for your beanie’s fabric. Lower temperatures are generally safer, and you can always increase the heat gradually if needed.
- Turn OFF the Steam Function: This is crucial. Steam can interfere with the patch’s adhesive and prevent it from sticking properly. It can also cause watermarks or damage to some beanie materials. Make absolutely sure the steam function is disabled.
- Allow Iron to Heat Up Fully: Before you begin, let the iron heat up completely to the selected temperature. This ensures consistent heat application.
3.3. The Ironing Process
- Place the Pressing Cloth: Lay your thin cotton pressing cloth over the patch and the surrounding beanie area. This is non-negotiable – it protects both the patch and the beanie from direct heat.
- Apply Firm, Even Pressure: Place the heated iron on top of the pressing cloth, directly over the patch. Apply firm, even pressure. Avoid moving the iron around in a scrubbing motion; this can cause the patch to shift or wrinkle. Instead, press straight down.
- Hold for Recommended Time: Refer to the material guidelines in Section 1.2 for the recommended ironing time. Start with the lower end of the time range and check the adhesion after that.
- Check Edges and Repeat if Necessary: After the initial ironing time, carefully lift the pressing cloth and check the edges of the patch. Gently try to lift an edge with your fingernail. If it lifts easily, the patch hasn’t fully adhered. Replace the pressing cloth and repeat the ironing process for a few more seconds.
- Ironing the Inside of the Beanie (Optional, for Extra Adhesion): For added security, you can turn the beanie inside out and, with the pressing cloth still in place, briefly iron the area directly behind the patch. This helps to further melt the adhesive from both sides.
3.4. Dealing with Curved area
- How to use Hair Straightener: Set your straightener on a low to medium heat, select a small part on the patch, apply and keep it for 5-10 seconds. Do not move the straightener around. Do the same for the rest of the patch.
- Important Note: Always use a pressing cloth to protect the direct heat from damaging both the beanie and the patch.
3.5. Cooling and Setting
- Allow to Cool Completely: Once you’re satisfied with the adhesion, remove the iron and the pressing cloth, and leave the beanie undisturbed to cool completely. This is a crucial step. The adhesive needs time to cool and set properly. Don’t touch, peel, or test the patch during this time. This usually takes at least 10-15 minutes.
- Check for Adhesion: After the beanie has cooled completely, thoroughly check the edges of the patch again to ensure it’s fully adhered. If any areas are still loose, you can repeat the ironing process on those specific spots.
4. Troubleshooting Common Problems
4.1. Patch Not Sticking
- Insufficient Heat: If your patch isn’t adhering, the most common reason is that the iron wasn’t hot enough. Gradually increase the temperature setting, being mindful of the beanie’s material, and try ironing again (always using the pressing cloth).
- Uneven Pressure: Ensure you’re applying firm, even pressure across the entire patch. If you only press on certain areas, other parts may not receive enough heat to activate the adhesive.
- Dirty Surface: As mentioned earlier, a clean beanie surface is essential. If there’s any residue or debris on the beanie, it can interfere with the adhesion.
- Incompatible Materials: While most iron-on patches work with common beanie materials, there might be rare exceptions. Double-check the patch manufacturer’s instructions to ensure it’s compatible with your beanie’s fabric.
4.2. Patch Peeling or Bubbling
- Too Much Heat: Excessive heat can cause the adhesive to melt too much, leading to bubbling or peeling. If you notice this, reduce the iron temperature and try again. If the patch is already bubbling, you may need to remove it (if possible) and start with a new patch.
- Steam Used: The presence of steam can also cause bubbling and prevent proper adhesion. Double-check that the steam function is turned off.
- Insufficient Cooling Time: If you try to handle or test the patch before it has cooled completely, it can disrupt the setting process and cause it to peel. Be patient and allow ample cooling time.
4.3. Beanie Material Damaged
- Iron Too Hot: Scorching or melting of the beanie material indicates that the iron was too hot for the fabric. Always start with a lower temperature and increase gradually only if needed. Refer to the material guidelines (Section 1.2).
- No Pressing Cloth Used: The pressing cloth is essential for protecting the beanie. If you ironed directly onto the beanie without a pressing cloth, it’s likely to cause damage.
- Incompatible Materials: Certain delicate materials, like some types of synthetics, may not be suitable for ironing at all. Always check the care label on your beanie.
5. Alternative Patch Attachment Methods
5.1. Sewing a Patch
Sewing a patch onto your beanie offers the most permanent and secure attachment. You can hand-sew the patch using a needle and thread, or you can use a sewing machine. Hand-sewing is suitable for all skill levels and allows for precise control.
Machine-sewing is faster but requires some experience with a sewing machine. For hand sewing, a simple running stitch or a whip stitch around the edge of the patch is usually sufficient. For sewing machine, a zigzag stitch is often recommended for its flexibility and durability.
5.2. Gluing a Patch
If you prefer a no-sew, no-iron option, fabric glue can be used to attach a patch. Choose a high-quality fabric glue that’s specifically designed for fabric and is washable. Apply a thin, even layer of glue to the back of the patch (avoiding applying too much, which can seep out and create a mess).
Carefully position the patch on the beanie and press it firmly in place. You may want to place a heavy object on top of the patch while the glue dries to ensure good adhesion. Allow the glue to dry completely according to the manufacturer’s instructions before wearing or washing the beanie.
6. Caring for Your Patched Beanie
- Washing Instructions (Hand Washing vs. Machine Washing): To preserve the patch and the beanie, hand-washing is generally recommended. Use cool or lukewarm water and a mild detergent. Gently agitate the beanie in the water, paying particular attention to avoid scrubbing directly on the patch. Rinse thoroughly. If machine washing is necessary, turn the beanie inside out and place it in a mesh laundry bag to protect the patch. Use a delicate cycle with cold water and a mild detergent.
- Drying Instructions (Avoiding High Heat): Never put a patched beanie in a dryer. High heat can damage the patch’s adhesive, causing it to peel or crack. It can also damage the beanie itself, causing shrinkage or distortion. Instead, gently squeeze out excess water (don’t wring) and lay the beanie flat on a clean, dry towel to air dry. You can also shape the beanie on a hat form or a rolled-up towel to help it maintain its shape as it dries.
- Storage Tips: Store your patched beanie in a cool, dry place away from direct sunlight. Direct sunlight can fade the colors of both the patch and the beanie. Avoid storing the beanie in a humid environment, which can also affect the adhesive.
7. Related Questions
7.1. How to remove an iron-on patch from a beanie?
To remove a patch from a beanie, gently heat the adhesive with a hairdryer (on low heat, moving constantly) or an iron (with a pressing cloth, on low setting). Test frequently with tweezers, and peel carefully once the adhesive softens. Adhesive remover (tested first!) might be needed for stubborn patches.
7.2. Can I iron a patch on a hat made of leather or suede?
Ironing directly onto leather or suede is not recommended, as the heat can damage these materials. Instead, consider stitching the patch on, or using a fabric glue specifically designed for leather/suede (test in an inconspicuous area first).
7.3. Where is the best place to buy quality iron-on patches?
Quality iron-on patches can be found at craft stores (online and physical), online marketplaces, and specialized patch shops (both online and brick-and-mortar). Look for reviews and detailed product descriptions.
7.4. How to fix a patch that’s already peeling off my beanie?
A peeling patch can often be re-secured. Try gently reheating it with an iron (using a pressing cloth) to reactivate the adhesive. If that doesn’t work, use fabric glue to reattach the loose edges, or stitch it down for a permanent fix.
7.5. Can I use a regular iron, or do I need a special heat press for patches?
A regular household iron is usually sufficient for applying iron-on patches. A heat press provides more even heat and pressure, which can be beneficial for larger patches or professional applications, but it’s not essential for most home use.
Read more:
Attaching an iron-on patch to a beanie might seem daunting at first, but as we’ve explored, it’s a straightforward process when approached with the right knowledge and care. The key takeaways are simple: preparation is paramount, understanding your materials is crucial, and patience is your best friend.
By following the step-by-step guide, choosing the correct temperature settings for your beanie’s fabric, and using a pressing cloth without fail, you can confidently achieve a professional-looking, long-lasting result. Don’t be afraid to personalize your beanies and express your unique style! With a little practice, you’ll be transforming plain headwear into customized creations in no time.


