


Refashion Old Clothes: Upcycle for Style and Savings


Have you ever looked at a pile of old clothes and felt a pang of guilt about throwing them away, but also a bit lost about what else to do with them? This article is your guide to unlocking the hidden potential in those forgotten garments! We’ll explore the exciting world of refashioning (transforming old clothes into something new), revealing how it’s not just good for the planet, but also for your wallet and your creative spirit.
Through this article, you will grasp the numerous advantages of upcycling (reusing discarded objects or materials to create a product of higher quality or value than the original), understand how to prepare your clothes for their transformation, learn a range of refashioning techniques, and find inspiration to spark your first project. Get ready to see your old wardrobe in a whole new light!
1. Why refashion your old clothes? The benefits of upcycling
1.1 Environmental impact
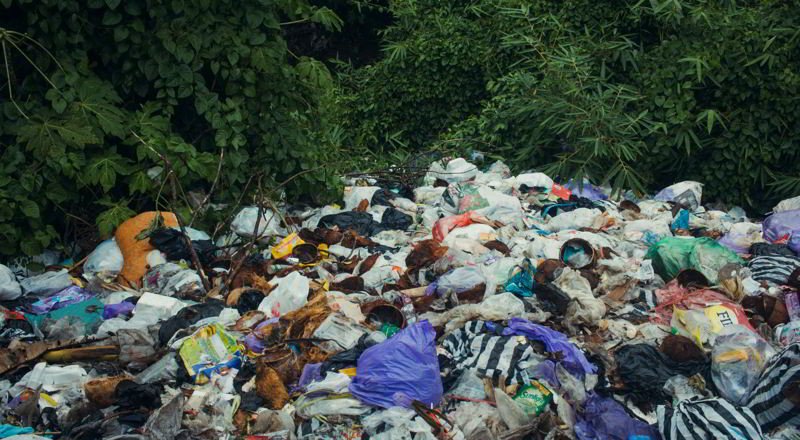
The fashion industry, especially fast fashion (inexpensive clothing produced rapidly by mass-market retailers in response to the latest trends), has a significant environmental footprint. Textile waste is a major problem, with millions of tons of clothing ending up in landfills annually.
This contributes to pollution and strains our planet’s resources. Refashioning helps reduce this waste by giving clothes a second life. It’s a practical way to embrace the “reduce, reuse, recycle” mantra.
1.2 Economic advantages
Refashioning is a budget-friendly alternative to constantly buying new clothes. It allows for the creation of unique, high-quality pieces without the high-end price tag. This approach can save a considerable amount of money, making the wardrobe both stylish and affordable.
1.3 Unleash your creativity
Refashioning is a fantastic outlet for self-expression. It allows individuals to personalize their style, experiment with designs, and create one-of-a-kind garments. It’s an opportunity to move beyond mass-produced fashion and truly express unique personality through clothing.
1.4 Develop new skills
Refashioning often involves learning basic sewing and alteration techniques. These are valuable life skills that extend beyond just clothing. Mastering these techniques opens up a world of possibilities for creativity and problem-solving, both within fashion and in other areas of life.
2. Getting started: Preparing your old clothes for upcycling
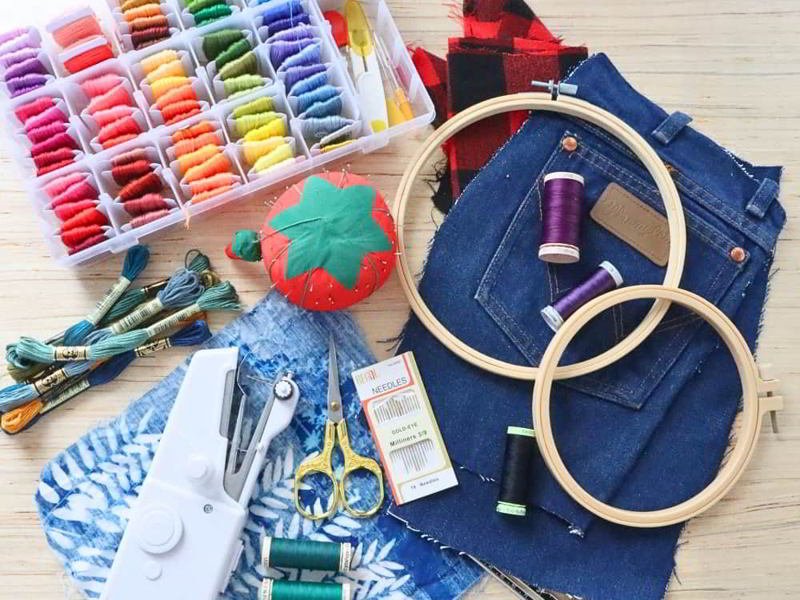
2.1 Gathering your materials
Before starting the refashioning journey, gather these essential tools:
- Sewing machine: While not always necessary, a sewing machine speeds up many projects.
- Fabric scissors: Sharp scissors dedicated to fabric ensure clean cuts.
- Rotary cutter: A rotary cutter, used with a cutting mat, is excellent for cutting straight lines through multiple layers of fabric.
- Cutting mat: This self-healing mat protects the work surface and provides a grid for accurate cutting.
- Thread: Choose thread that matches or complements the fabric’s color and weight.
- Needle: Have both machine needles and hand-sewing needles on hand.
- Pins: Pins hold fabric pieces together before sewing.
- Seam ripper: This tool is essential for removing seams and correcting mistakes.
- Iron and ironing board: Pressing fabric throughout the process is crucial for a professional finish.
- Measuring tape: Accurate measurements are key for successful alterations.
2.2 Assessing your wardrobe
Identify clothes that are no longer worn but are still in good condition. Consider the fabric type, the garment’s condition, and its potential for transformation. Look for items that meet criteria such as being made of durable fabric, having an interesting print or texture, or possessing a shape that can be easily altered.
2.3 Cleaning and preparing your clothes
Wash and dry all clothes before starting any refashioning project. This ensures that any shrinkage occurs before alterations are made. Address any stains or minor damage that can be repaired before proceeding. A clean, well-prepared garment is the foundation of a successful refashion.
2.4 Deconstructing garments
Carefully deconstruct garments by removing seams, buttons, zippers, and any other unwanted elements. This step-by-step process involves using a seam ripper to gently separate the fabric pieces, preparing them for their new purpose. This creates a clean slate for the refashioning process.
3. Refashioning techniques: From basic to advanced
3.1 No-sew techniques
These techniques require no sewing machine, making them perfect for beginners or those who prefer quick projects.
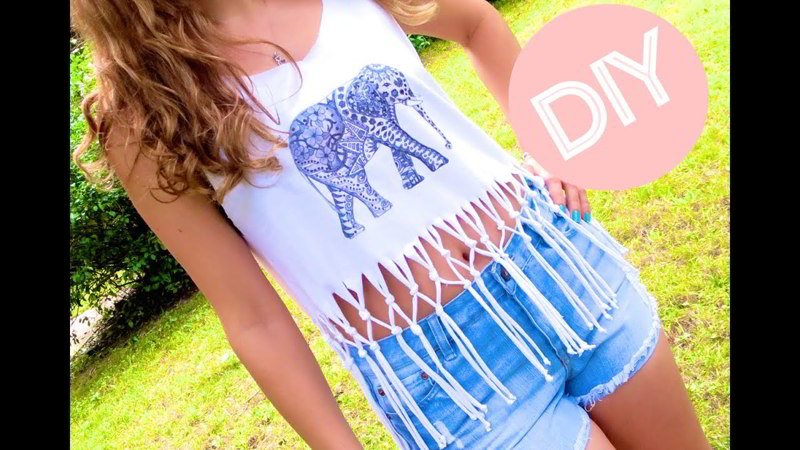
T-shirt transformations:
- Step 1: Lay the T-shirt flat on a work surface.
- Step 2: Carefully cut off the sleeves along the seams.
- Step 3: Cut the neckline into your desired shape (e.g., a wider scoop or a V-neck).
- Step 4: Create a fringe by cutting vertical strips along the bottom hem.
- Step 5: Tie the fringe strips together in knots to create a new, stylish bottom edge.
These simple steps can transform a basic T-shirt into a tote bag, a fringed top, or a scarf.
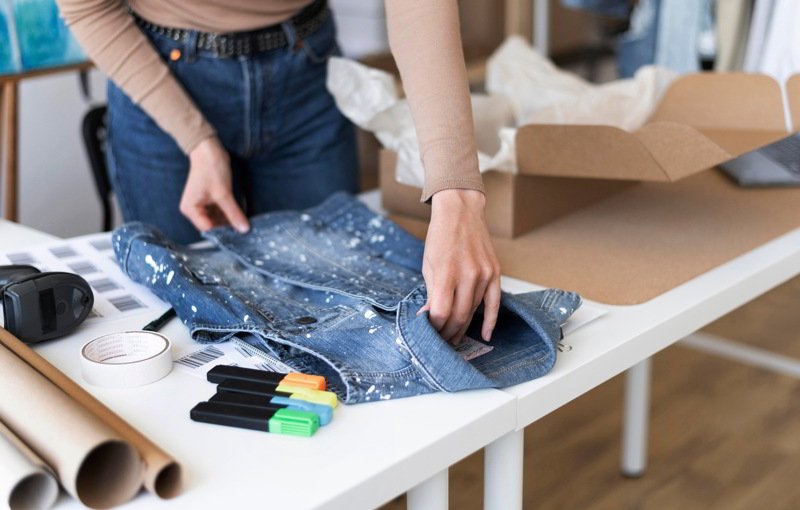
Denim updates:
- Step 1: Select an old pair of jeans or a denim jacket for your project.
- Step 2: Use scissors or a seam ripper to carefully create frayed edges or distressed patches.
- Step 3: Add personality with patches by ironing or gluing them onto the denim surface.
These techniques can give denim a distressed or customized look.
Other techniques:Old fabrics can be used to create braided rugs, headbands, and other accessories using simple knotting or braiding methods.
3.2 Basic sewing techniques
These techniques require basic sewing skills and a sewing machine.
Hemming and shortening:
- Step 1: Put on the garment and mark the new desired length with pins or chalk.
- Step 2: Take the garment off, then fold and press the new hemline with an iron for a crisp edge.
- Step 3: Sew the hem in place using your machine or by hand for a clean finish.
This is a fundamental skill for altering the length of pants, skirts, and dresses.
Taking in and letting out:
- Step 1: Try the garment on inside out and use pins to mark where adjustments are needed.
- Step 2: Carefully take the garment off and sew along the new marked line.
- Step 3: Trim any excess fabric from the new seam to reduce bulk.
This allows for adjusting the fit of garments that are too big or too small.
Adding embellishments:
- Step 1: Arrange your chosen embellishments, like patches or lace, on the garment.
- Step 2: Secure them in place with pins or a dab of fabric glue.
- Step 3: Sew the embellishments on by hand or machine for durability.
Buttons, patches, and embroidery can be added to personalize and enhance garments.
3.3 Intermediate sewing techniques
These techniques require more advanced sewing skills and a greater understanding of garment construction.
Combining garments:
- Step 1: Carefully deconstruct the garments you plan to combine using a seam ripper.
- Step 2: Plan the layout of how the different fabric pieces will fit together.
- Step 3: Pin the pieces together to hold them in place for sewing.
- Step 4: Sew the pieces together, creating your new patchwork fabric or garment.
- Step 5: Adjust the fit as needed and finish the seams for a clean, professional look.
This involves taking pieces from multiple garments and sewing them together to create a new, unique piece, such as patchwork designs.
Resizing and restyling:
- Step 1: Assess the garment to decide which parts need to be changed to achieve your new vision.
- Step 2: Carefully deconstruct the necessary sections, such as removing sleeves or separating the bodice from a skirt.
- Step 3: Re-cut the fabric pieces according to your new design or pattern.
- Step 4: Sew the pieces back together to create the newly styled garment.
This involves significantly altering the size or style of a garment, such as transforming a dress into a skirt or a shirt into a vest.
3.4 Advanced sewing techniques
Pattern:
- Step 1: Identify and select a sewing pattern that suits your fabric and vision.
- Step 2: Prepare the fabric, then carefully lay out and pin the pattern pieces.
- Step 3: Cut the fabric, transfer any necessary markings, and sew the pieces together following the pattern instructions.
Using existing patterns or creating new ones opens up many possibilities for clothing transformations
Tailoring:
- Step 1: Conduct an initial fitting to see how the garment fits and identify areas for adjustment.
- Step 2: Pin and mark the necessary adjustments directly on the garment.
- Step 3: Sew the alterations, pressing seams as you go for a professional, custom-fit finish.
Involves making precise alterations to achieve a perfect fit, often requiring multiple fittings and adjustments.
4. Project ideas: Inspiring transformations
4.1 T-shirt projects
These projects are generally easy and beginner-friendly, offering quick and satisfying transformations.
Tote bag:
- Cut off the sleeves and neckline of a t-shirt.
- Sew the bottom of the shirt closed.
- Turn the shirt inside out to hide the seam.
Crop top:
- Cut a t-shirt to the desired length.
- Hem the raw edge (optional) for a clean finish.
T-shirt dress:
- Choose an oversized t-shirt.
- Cut off the sleeves (optional).
- Shape the sides by sewing new seams for a more fitted look (optional).
- Hem any raw edges.
Graphic pillow:
- Cut the graphic from the front of the shirt into a square.
- Cut out a matching piece from the back of the shirt.
- Sew the two pieces together on three sides.
- Stuff the pillow with filling.
- Sew the final side closed.
4.2 Jeans projects
These projects can range from simple to more complex, offering a variety of creative options.
Distressed denim shorts:
- Cut jeans to the desired length.
- Use sandpaper or a pumice stone to distress the edges and create a frayed look.
Denim skirt:
- Cut the legs off a pair of jeans.
- Open the inseam using a seam ripper.
- Sew the front and back together to create a skirt shape.
- Add a panel of fabric if needed to fill in any gaps.
Patchwork jeans:
- Cut patches from various denim scraps.
- Sew the patches onto jeans, overlapping them for a textured look.
Denim bag:
- Cut the legs off a pair of jeans.
- Sew the bottom closed to form the bag.
- Use the waistband or other fabric scraps to create handles.
4.3 Dress projects
These projects allow for significant alterations, transforming dresses into entirely new garments.
Shortening:
- Measure and mark the desired new length.
- Cut the dress to the new length.
- Hem the raw edge for a clean finish.
Maxi dress to top and skirt set:
- Cut the dress horizontally at the waistline.
- Hem the bottom edge of the new top.
- Add an elastic casing or a drawstring to the top edge of the skirt.
Embellishments:
- Add lace, beads, or other decorative elements to the dress.
- Secure the embellishments by sewing or using fabric glue.
4.4 Sweater projects
These projects are perfect for repurposing warm, cozy sweaters into new, functional items.
Sweater mittens:
- Trace a hand onto a piece of paper to create a mitten pattern.
- Cut out four mitten pieces from the sweater fabric.
- Sew two pieces together for each mitten, leaving the wrist end open.
Sweater pillow:
- Cut two square or rectangular pieces from the sweater.
- Sew the pieces together on three sides.
- Stuff the pillow with filling.
- Sew the remaining side closed to finish.
Upcycled sweater coat:
- Combine pieces from multiple sweaters to create a unique, patchwork coat.
- Cut and sew the pieces together, adding buttons, a zipper, or other closures.
4.5 Shirt project
Shirt to vest:
- Carefully remove the sleeves using a seam ripper.
- Finish the armholes by hemming them for a clean edge.
- (Optional) Add buttons, snaps, or other embellishments to complete the vest.
5. Tips for success
- Start small: Begin with simple projects to build confidence and skills before tackling more complex transformations.
- Practice: Use fabric scraps to practice techniques before working on the final garment. This helps avoid mistakes and perfect the methods.
- Experiment: Don’t be afraid to try new things and deviate from instructions. Refashioning is about creativity and personal expression.
- Patience: Take time with each project. Rushing can lead to mistakes. Enjoy the process and learn from any challenges.
- Inspiration: Look for ideas online (Pinterest, blogs, YouTube tutorials) and in fashion magazines. Inspiration can spark new and creative projects.
- Resources: Utilize online tutorials, sewing books, and local sewing classes to expand knowledge and skills.
- Sewing community: Connect with other refashioners and sewers online or in person. Sharing tips and advice can be incredibly helpful and motivating.
6. Related questions
6.1 What are the best fabrics to use for refashioning?
Natural fibers like cotton, linen, denim, and wool are generally easier to work with and more durable. However, blends can also be used, depending on the project.
6.2 Where can I find inspiration for refashioning projects?
Pinterest, Instagram, blogs dedicated to upcycling and refashioning, and YouTube channels offer a wealth of ideas and tutorials.
6.3 Do I need advanced sewing skills to refashion clothes?
No, many projects can be done with basic sewing skills or even no-sew techniques. Start with simpler projects and gradually increase complexity.
6.4 What can I do with fabric scraps that are too small to use?
Very small scraps can be used as stuffing for pillows or toys, or they can be composted if they are made of natural fibers.
6.5 Where can I donate or recycle textiles that I can’t refashion?
Many charities and organizations accept textile donations, and some cities have textile recycling programs. Research local options to ensure responsible disposal.
Read more:
Refashioning is a powerful way to transform the wardrobe, reduce textile waste, and embrace a more sustainable lifestyle. It’s an opportunity to express creativity, save money, and develop valuable skills. By giving old clothes a new life, a positive impact is made on the environment and a unique, personalized style is cultivated. So, gather those unworn garments and start the refashioning journey today!


