


Seam Allowance: Key to Pro Garment And Quality


For small clothing businesses navigating the complexities of garment production, achieving consistent fit and quality can be a persistent challenge. While often overlooked as mere “extra fabric,” seam allowance is a foundational element that significantly impacts these crucial aspects. Understanding its purpose and application goes beyond basic sewing; it’s key to elevating your production standards.
This article provides clarity on what seam allowance truly entails, explores its critical roles, discusses industry standards and variations, and offers practical guidance on adding and sewing allowances accurately. You’ll gain the practical knowledge needed to improve consistency, enhance garment quality, and ultimately streamline your production process. Let’s delve into the details.
1. What exactly is seam allowance?
1.1 Defining seam allowance: more than just extra fabric
Seam allowance is the precise space measured between the intended stitching line (the line where your needle will sew) and the actual cut edge of a fabric panel. Think of it as a necessary buffer zone or a working margin around each pattern piece. This isn’t leftover material; it’s an intentional addition required for successful garment assembly. Without this carefully measured space, joining fabric pieces cleanly and securely would be impossible.
1.2 The core purposes: why seam allowance is non-negotiable
Seam allowance serves several vital functions in garment construction:
- Joining fabric: its primary role is providing the physical area needed to stitch two or more fabric pieces together securely.
- Preventing fraying: the allowance keeps the raw, cut edge of the fabric away from the main stress-bearing stitching line, minimizing the risk of the fabric unraveling or fraying (also known as raveling), especially crucial for woven materials.
- Enabling pressing: it provides the necessary fabric to press the seam open flat or to one side after stitching, contributing significantly to a neat, professional finish inside the garment.
- Adding strength: the fabric within the allowance contributes to the overall structural integrity and durability of the seam itself.
- Facilitating techniques: many construction techniques, such as enclosed seams or certain finishes, rely on a specific amount of seam allowance to be executed correctly.
1.3 Seam allowance vs. stitching line vs. finished measurement
Distinguishing between these terms is essential for accuracy:
- Stitching line: this is the exact line where the sewing machine needle penetrates the fabric to create the seam.
- Seam allowance: this is the fabric located between the stitching line and the physical cut edge of the fabric piece.
- Finished measurement: this refers to the final dimension of the garment section after the seam has been sewn and the allowance is typically turned to the inside (making it invisible from the exterior).
For example, if you take two fabric squares, each 10cm wide, and join them along one side using a 1cm seam allowance on each piece, the resulting sewn rectangle will be 18cm wide (10cm + 10cm – 1cm – 1cm), not 20cm. The seam allowances are consumed within the seam. Understanding this difference is fundamental to correct garment sizing.
2. The critical role of seam allowance in garment fit and quality control
2.1 Achieving consistent fit: how seam allowance dictates sizing
Even minor inaccuracies when sewing seam allowances can dramatically impact the final garment fit. Consider that a garment has multiple seams – side seams, shoulder seams, sleeve seams, waist seams, etc. If the seam allowance is sewn slightly too wide or too narrow on each seam, these small deviations accumulate.
An extra 3mm (1/8 inch) sewn into each of four vertical seams (two side seams, two sleeve seams) could reduce the total garment circumference by 1.2cm (almost 1/2 inch), potentially changing the size entirely. Therefore, consistency in sewing the correct allowance width is paramount for reliable sizing and effective quality control.
While standard allowances like 5/8″ offer a tiny bit of room for minor fitting adjustments (“letting out”), relying on this is not a substitute for sewing accuracy from the start.
2.2 Ensuring durability and a professional finish
Sufficient seam allowance is vital for garment durability. It prevents the fabric near the stitching line from pulling away or tearing under stress (known as seam strain). Furthermore, the allowance enables various clean finishing techniques essential for a professional appearance. Raw edges can be enclosed within the seam itself (e.g., French seams, flat-felled seams) or turned under neatly for topstitching.
Techniques like grading (trimming seam allowance layers to different widths), trimming excess fabric, and clipping or notching curves all rely on having enough seam allowance material to work with, ultimately reducing bulk and allowing seams to lie flat and smooth. This meticulous handling of the seam allowance distinguishes high-quality tailoring from amateur work.
3.1 The common 5/8 inch (1.5 cm): understanding the home sewing standard
Many commercial sewing patterns designed for home sewers (like those historically from brands such as Simplicity patterns) utilize a standard measurement of 5/8 inch (approximately 1.5 cm) for seam allowances.
This width became popular because it’s relatively forgiving for less experienced sewers, provides a wider area to guide the fabric under the machine’s presser foot, offers ample protection against fraying for many common fabrics, and leaves enough room to comfortably press the seams open.
While prevalent in the home sewing market, it’s important to recognize this as just one possible standard measurement, not the universal rule, especially in industrial production.
3.2 Industry insights: production standards and efficiency
In clothing manufacturing and professional apparel production, narrower seam allowances are frequently the norm. Standards like 1 cm (roughly 3/8 inch) or even 6mm (1/4 inch) are common. This shift is often driven by efficiency and cost-saving measures.
Narrower allowances mean faster sewing (less fabric to manage under the needle), potentially less need for subsequent trimming, and marginal savings in fabric consumption over large production runs. However, these narrower manufacturing standards demand significantly higher precision during both fabric cutting and the sewing process. There is less room for error.
3.3 When allowances change: adapting for design and fabric
3.3.1 Specific garment areas (curves, corners, stress points)
Seam allowances often vary within a single garment based on the specific area and construction needs:
- Curves: areas like necklines, armholes, and princess seams typically require narrower allowances (e.g., 1/4″ or 6mm). This allows the seam to turn smoothly without bunching or requiring excessive clipping to lie flat.
- Enclosed seams/corners: facings, collars, cuffs, and sharp corners also benefit from narrower allowances. This reduces bulk when the piece is turned right-side out, enabling sharper points and flatter edges.
- Stress points: while sometimes slightly wider allowances might be used in high-stress areas (like the center back seam of a tightly fitted jacket) for potential fitting adjustments or added reinforcement, strength is more often achieved through specific seam finishes or reinforcement techniques rather than just wider allowances.
3.3.2 Fabric characteristics matter (delicate, bulky, stretchy)
The type of textile being used heavily influences seam allowance choices:
- Delicate/sheer fabrics: materials prone to fraying or showing bulk might necessitate specific seam finishes (like French seams or bound seams) which dictate the required seam allowance width from the outset.
- Bulky fabrics: thick materials like wool coating, heavy fleece, or denim may require a standard or slightly wider allowance initially, which is then aggressively graded (trimmed in layers) after sewing to minimize thickness at the seamline.
- Stretchy knits: knit fabrics are frequently sewn using a serger/overlocker. These machines often create stitch widths around 1/4″ (6mm) while simultaneously trimming excess fabric, effectively establishing a narrower seam allowance, which is a standard part of the construction process in the knitwear segment of the textile industry.
3.3.3 Construction techniques and required allowances
Certain seam finishes inherently demand specific, sometimes unconventional, seam allowances before sewing even begins. For instance, a traditional flat-felled seam (commonly seen on denim jeans) requires one fabric edge to have a significantly wider seam allowance than the piece it joins.
This allows the wider allowance to be folded over and enclose the narrower one. Welt seams and some tailored pocket constructions also have unique allowance requirements. This highlights that the allowance must always align with the chosen construction techniques.
4. Adding and sewing seam allowances accurately
4.1 From pattern to fabric: adding the allowance
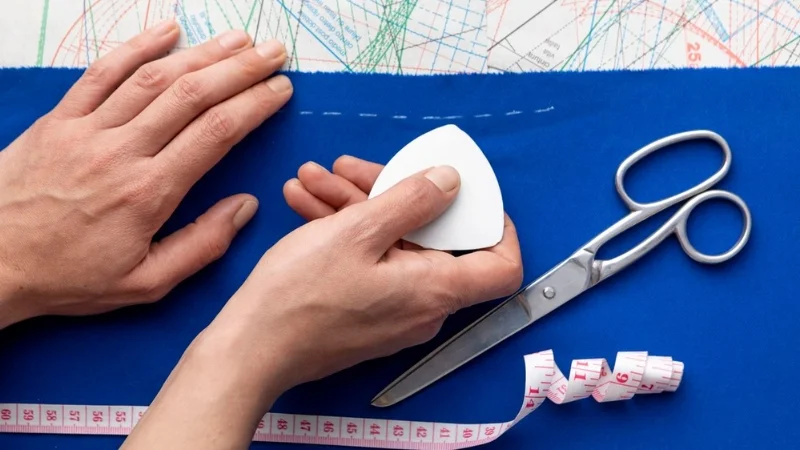
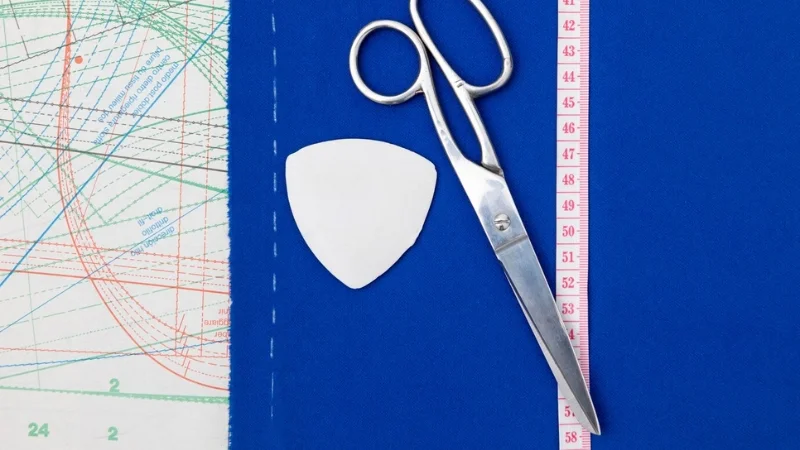
If working with ‘net’ patterns (patterns drawn to the finished dimensions, common in drafting basic blocks), seam allowances must be added before cutting the fabric. Manual methods involve using specialized rulers like a Pattern Master, which has parallel lines at various increments, or simply measuring out from the stitching line and marking a parallel cutting line.
This can be time-consuming and requires care. Contrastingly, digital pattern making software (common tools include Adobe Illustrator with specialized plugins, or dedicated CAD software) allows seam allowances to be added automatically around pattern pieces with high precision and can be easily adjusted globally or locally, offering significant time savings and accuracy benefits for businesses.
4.2 Tips for sewing precise seams consistently
Achieving accurate sewing starts with accurate cutting; precisely cut fabric panels are easier to align and sew correctly. Here are tips for consistent sewing:
- Use guides: utilize the measurement markings etched onto your sewing machine’s throat plate. Alternatively, use a magnetic seam guide or masking tape placed on the machine bed at the desired distance from the needle. The edge of the standard presser foot often corresponds to a specific measurement (commonly 1/4″ or similar).
- Know your machine: identify which guide corresponds to your most frequently used seam allowances (e.g., 5/8″, 1cm, 1/4″).
- Practice: sew lines on scrap fabric, measuring the results until you can consistently hit the target allowance.
- Steady speed: maintain a consistent, controlled sewing speed, especially around curves.
4.3 Essential techniques: managing seam allowance after stitching
What happens to the seam allowance after stitching is crucial for a professional finish:
- Pressing: this is non-negotiable. Adopt the mantra “press as you go.” Pressing seams open flat or to one side (as directed by the pattern or construction logic) sets the stitches and creates a crisp, flat appearance.
- Trimming: reducing the overall width of the seam allowance, often done on enclosed seams before turning to reduce bulk.
- Grading: trimming the layers of the seam allowance to different widths (e.g., the layer closest to the garment trimmed narrower than the outer layer). This drastically reduces bulk, especially at intersections, points (like collars), and thick fabric areas.
- Clipping: making small snips into the seam allowance on inward (concave) curves, stopping just short of the stitching. This allows the seam allowance to spread open when the curve is turned right-side out, preventing pulling and distortion.
- Notching: cutting small v-shaped wedges out of the seam allowance on outward (convex) curves. This removes excess fabric that would otherwise bunch up when the curve is turned.
5. Seam allowance considerations for small clothing businesses
5.1 Consistency is king: standardizing for reliable production
For small clothing businesses aiming for growth and customer satisfaction, consistency is paramount. Establishing and adhering to a standard seam allowance for specific product lines across all pattern pieces and sizes is vital.
This ensures predictable sizing, simplifies garment assembly (especially if multiple sewers are involved), aids in troubleshooting fitting issues, and forms a cornerstone of effective quality control. Standardization streamlines reliable production.
5.2 Choosing your standard: balancing efficiency, skill, and quality
Selecting the appropriate standard allowance for your business involves weighing several factors:
- Skill level: a wider allowance (like 5/8″) might be more forgiving if your sewing team has varying levels of experience.
- Efficiency & fabric waste: narrower allowances (1cm, 3/8″) can speed up sewing and reduce fabric consumption, but demand higher sewing accuracy.
- Fabric type: the primary fabrics used can influence the choice. Knits often pair well with the narrower allowances created by a serger/overlocker. Delicate fabrics might need allowances suitable for specific finishes.
- Equipment: the availability and use of specialized machinery like sergers/overlockers can dictate practical allowance choices.
- Quality & brand: the desired final quality and the positioning of your brand should inform the standard. A higher-end product might necessitate techniques that work best with specific allowances.
Carefully consider these trade-offs as a small business owner to determine the best fit for your operation.
5.3 Clear communication: documenting allowances
Ambiguity regarding seam allowances can lead to costly errors in production. It is essential to clearly document the intended allowance:
- On patterns: mark allowances directly on physical pattern pieces or embed the information within digital pattern files.
- In tech packs: crucially, specified seam allowances (which may vary for different seams on the same garment) must be clearly listed in the technical package (tech pack) provided to internal teams or external manufacturers. This document serves as the blueprint for clothing manufacturing and leaves no room for guesswork. Standard industry notation should be used where applicable.
6. Related questions
6.1 Does using a serger/overlocker change how I handle seam allowance?
Yes, often it does. A typical 4-thread overlock stitch creates a seam that is approximately 1/4″ (6mm) wide and simultaneously trims away any fabric beyond that width. If your pattern was drafted with a wider allowance (e.g., 5/8″ or 1.5cm), the serger effectively reduces this allowance as it constructs the seam.
If you need to preserve the original wider allowance (perhaps for potential alterations), you can serge just along the raw edge without trimming, then sew the main construction seam with a regular sewing machine at the intended stitching line inside the serged edge.
6.2 How does seam allowance width impact fabric consumption and cost?
There’s a direct relationship: wider seam allowances mean more fabric is encased within the seams of each garment. While the difference per seam might seem small, multiplied across all seams on a garment and then across an entire production run, this adds up to a noticeable increase in total fabric yardage required.
Consequently, wider allowances lead to slightly higher material cost and potentially more fabric waste. Conversely, narrower allowances conserve fabric and reduce cost but necessitate greater sewing precision.
6.3 What’s the best way to handle seam allowance on very curved areas like collars or facings?
For sharply curved areas, it’s generally best practice to use a narrower seam allowance from the start, typically 1/4″ (6mm). Sew accurately directly on the intended stitch line. After sewing but before turning the piece right-side out, proper management of the allowance is critical: clip into inward curves (like necklines) and notch outward curves (like collar points), cutting close to the stitching but not through it. If multiple layers are involved (e.g., fabric plus interfacing), grading the seam allowance layers is essential to reduce bulk and allow the curve to lie flat and smooth once turned.
6.4 Can i change the seam allowance specified on a pattern?
Yes, you can, but it requires careful attention. If you decide to change the seam allowance width on one pattern piece edge (for example, making the side seam allowance on a bodice narrower), you must make the exact same change to the corresponding edge of the piece it will be sewn to (in this case, the side seam of the other bodice piece, or potentially the underarm seam of the sleeve if it joins there).
Failure to adjust all joining edges identically will result in the pieces no longer matching or fitting together correctly. Be cautious about significantly reducing allowances on fabrics prone to fraying or on high-stress seams unless you incorporate reinforcing techniques.
Read more:
Ultimately, seam allowance is a fundamental detail with a disproportionately large impact on the final garment’s fit, durability, and professional appearance. It’s far more than just excess fabric; it’s an integral part of the engineering behind clothing construction.
For any small clothing business striving for high standards and consistent apparel production, mastering the understanding and precise application of seam allowances is not optional – it’s a core skill. By paying close attention to its definition, purpose, appropriate standards, and accurate sewing and finishing techniques, you invest directly in the quality and reliability of your products.
Should you require more tailored advice on pattern adjustments, tech pack creation, or standardizing processes for your specific needs, exploring resources focused on apparel production support can be beneficial. Consider consulting services like Packlove for specialized assistance in streamlining these technical aspects of your clothing business.


