


Sewing Non-Stretch Fabrics: Master the Basics


Navigating the world of fabrics can be tricky, especially when you’re faced with non-stretch options. Many sewers, from beginners to seasoned pros, find themselves wrestling with these rigid textiles. This article is your compass.
Within these digital pages, you’ll gain a clear understanding of what non-stretch fabrics are, why they’re important, and how to conquer their unique challenges. This comprehensive, step-by-step guide will equip you with the essential tips and techniques to master the art of sewing non-stretch fabrics, turning potential frustration into creative fulfillment.
1. Understanding non-stretch fabrics
1.1 What are non-stretch fabrics?
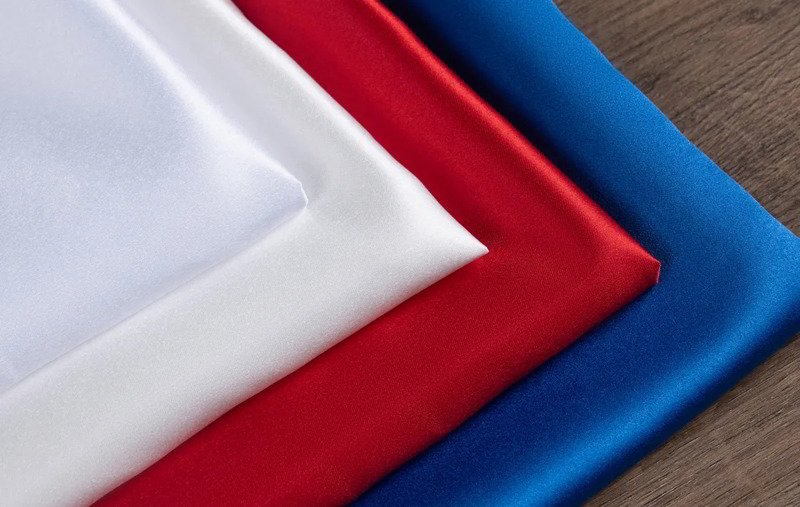
Non-stretch fabrics are woven textiles that lack elasticity. Unlike their stretchy counterparts, they don’t contain elastic fibers like spandex or elastane. This means they hold their shape firmly and don’t easily stretch out of form. Here are some of the most popular non-stretch fabrics:
- Cotton: A soft, breathable, and versatile natural fiber.
- Linen: Known for its strength, durability, and cool feel, especially in warm weather.
- Canvas: A heavy-duty, plain-woven fabric often used for bags and upholstery.
- Denim: A sturdy twill-weave fabric, typically made from cotton.
- Silk: A luxurious natural fiber known for its smooth texture and sheen.
- Rayon: A semi-synthetic fiber made from cellulose, known for its drape and softness.
- Wool: A natural fiber known for its warmth and resilience.
- Burlap: A coarse, strong fabric often used for sacks and rustic décor.
- Taffeta: A crisp, smooth fabric often used for formal wear and linings.
- Broadcloth: A dense, plain woven cloth, historically made of wool. Today, broadcloth can be composed of cotton, silk, or even synthetic fibers.
These fabrics are commonly used in projects where structure and stability are key, such as tailored clothing, home décor, and crafts.
1.2 Non-stretch vs. stretch fabrics: Key differences
The defining feature of non-stretch fabrics is the absence of elastic fibers. Stretch fabrics, on the other hand, incorporate materials like spandex or elastane, giving them the ability to stretch and recover. This fundamental difference impacts several characteristics.
| Characteristic | Non-Stretch Fabric | Stretch Fabric |
|---|---|---|
| Elasticity | No stretch | Stretches and recovers |
| Drape | Tends to be stiffer, holds shape well | Varies, often more fluid and flowing |
| Ease of Sewing | Generally easier to sew, less shifting | Can be trickier, requires special techniques |
| Fitting | Requires precise fitting, less forgiving | More forgiving, conforms to the body |
| Typical Uses | Tailored garments, home décor, crafts | Activewear, fitted clothing, comfortable apparel |
1.3 Why choose non-stretch fabrics?
Designers, brands, and small businesses often opt for non-stretch materials to create a product with lasting structure. Non-stretch fabrics offer many benefits, such as:
- Durability: They tend to be more resistant to wear and tear.
- Structure: They hold their shape exceptionally well, ideal for structured garments.
- Crispness: They create sharp lines and clean edges.
- Classic look: They often have a timeless, traditional appearance.
- Breathability: Many natural non-stretch fabrics, like cotton and linen, are highly breathable.
2. Preparing non-stretch fabrics for sewing
2.1 Pre-washing and drying: Preventing shrinkage
Pre-washing is a vital first step when working with non-stretch fabrics. It helps prevent the unpleasant surprise of your finished garment shrinking after its first wash. Different fabric types require specific pre-washing care:
- Cotton: Machine wash in warm or cold water and tumble dry on medium heat.
- Linen: Machine wash in cold water and tumble dry on low or hang to dry.
- Denim: Wash separately in cold water to prevent dye transfer and tumble dry on low.
- Silk: It’s best to hand wash, as it is very delicate.
2.2 Ironing and pressing: Getting rid of wrinkles and setting the grain
Ironing is essential for removing wrinkles and creating a smooth surface before cutting. Pressing, on the other hand, involves using a lifting and lowering motion with the iron, rather than sliding it, to set seams and shape the fabric during construction. Make sure you adjust your heat settings for different fabric:
- Cotton: High heat with steam.
- Linen: High heat with steam while slightly damp.
- Denim: Medium to high heat.
2.3 Understanding fabric grain: Ensuring proper drape and fit
Fabric grain refers to the direction of the threads in a woven fabric. There are three main types:
- Lengthwise grain: Runs parallel to the selvage (the finished edge of the fabric). This is the strongest and most stable grain.
- Crosswise grain: Runs perpendicular to the selvage. It has slightly more give than the lengthwise grain.
- Bias grain: Runs at a 45-degree angle to the selvage. It has the most stretch and drape.
Following the grainline indicated on your pattern pieces is crucial. It ensures that your garment will hang correctly and fit as intended.
2.4 Interfacing: Adding stability and structure to specific areas
Interfacing is a supportive material used to add stability, shape, and structure to specific areas of a garment. Think collars, cuffs, buttonholes, and waistbands – areas that need a little extra reinforcement. Common types include:
- Fusible interfacing: Has a heat-activated adhesive on one side and is ironed onto the fabric.
- Sew-in interfacing: Is stitched into the garment.
- Lightweight interfacing: Used for delicate fabrics.
- Heavyweight interfacing: Used for heavier fabrics and areas requiring more support.
3. Essential tools and materials
3.1 Sewing machine: Choosing the right settings
To effectively sew non-stretch fabrics, choosing the right sewing machine settings is really important.
- Stitch length: A medium stitch length (around 2.5-3mm) is generally recommended for most non-stretch fabrics.
- Tension: Proper tension is crucial to avoid puckering or loose seams. Test on fabric scraps and adjust as needed.
3.2 Needles and threads: Selecting the perfect match for different fabric types
Choosing the right needle and thread is critical for success. Using the wrong combination can lead to skipped stitches, broken threads, and damaged fabric.
| Fabric Type | Needle Size | Thread Type |
|---|---|---|
| Cotton | 70/10 – 80/12 | All-purpose, Cotton |
| Linen | 80/12 – 90/14 | All-purpose, Cotton, Linen |
| Denim | 90/14 – 100/16 | Denim/Jeans thread |
| Silk | 60/8 – 70/10 | Silk thread |
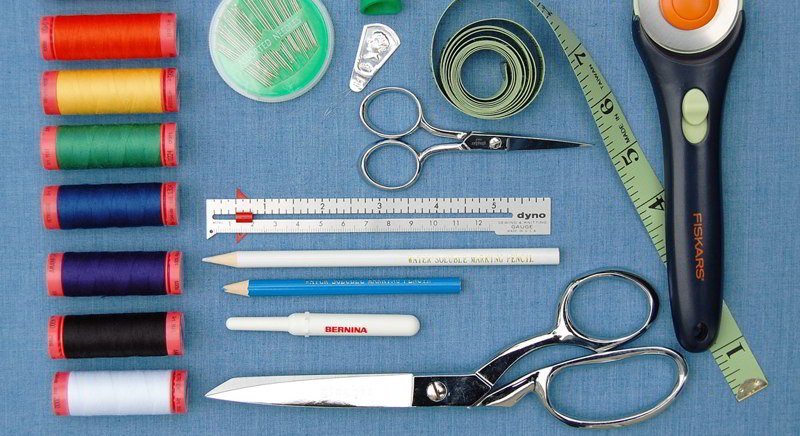
3.3 Cutting tools: Rotary cutters, scissors, and mats for precision
Different cutting tools are used for different fabrics and tasks. Here’s how to pick your cutting tool:
- Rotary cutter: Ideal for cutting straight lines and curves with precision, especially on multiple layers of fabric. Use with a cutting mat.
- Fabric scissors: Essential for cutting pattern pieces and trimming seams. Choose sharp, high-quality scissors.
- Cutting mat: Protects your work surface and provides a grid for accurate cutting when using a rotary cutter.
3.4 Marking tools: Fabric pens, chalk, and tracing paper for accurate transfer of pattern markings
Choose the right marking tool for each fabric and project:
- Fabric pens: Available in various types (washable, disappearing, permanent). Test on a scrap before using.
- Chalk: A good option for marking dark fabrics. Easily brushes off.
- Tracing paper and wheel: Used to transfer markings from a pattern to the fabric by creating a dotted line.
4. Cutting non-stretch fabrics accurately
4.1 Laying out your pattern: Following the grainline for optimal results
Proper pattern layout is the foundation of a well-fitting garment. Carefully place your pattern pieces on the fabric, ensuring that the grainline arrows on the pattern are perfectly aligned with the lengthwise grain of the fabric.
4.2 Pinning techniques: Preventing fabric shifting and maintaining alignment
Pins are your best friends when it comes to keeping your fabric and pattern pieces securely in place during cutting. Insert pins perpendicular to the cutting line, placing them within the seam allowance (the area between the cutting line and the stitching line). This prevents pinholes from showing on the finished garment.
4.3 Cutting with precision: Rotary cutter vs. scissors – choosing the right tool for the job
- Rotary cutter: Best for long, straight cuts and gentle curves. Provides excellent accuracy and speed.
- Fabric scissors: Better for intricate curves, tight corners, and smaller pattern pieces. Offers more control in these situations.
5. Sewing techniques for non-stretch fabrics
5.1 Achieving perfect seams: Stitch length and tension adjustments
To achieve perfect seams, it’s essential to apply the machine settings discussed earlier. A medium stitch length (around 2.5-3mm) is a great starting point for most non-stretch fabrics. However, consider shortening the stitch for better control on curves. For tension, always test on a fabric scrap first. Adjust the dial until the top and bobbin threads lock evenly between the fabric layers, creating a smooth, pucker-free seam.
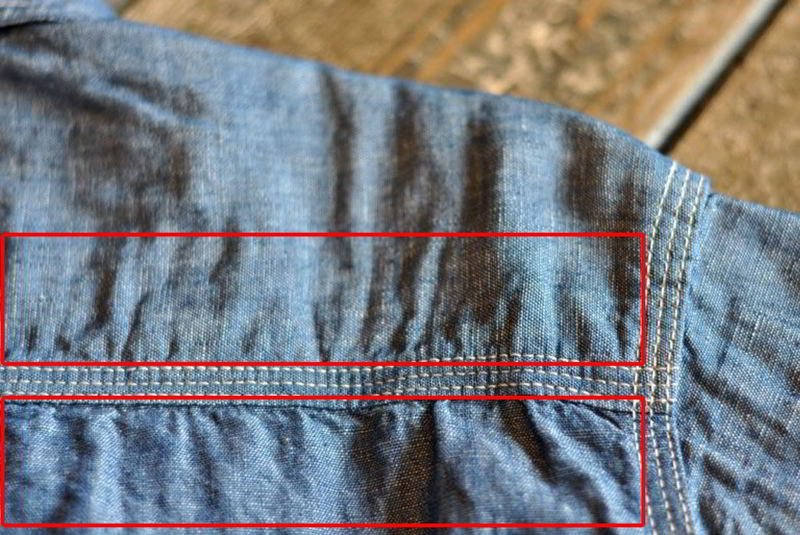
5.2 Preventing puckering: Tips and tricks for smooth, flat seams
Puckering occurs when the fabric gathers or wrinkles along the seam line. Here are some tips to prevent this issue:
- Use the correct needle and thread for your fabric.
- Adjust your sewing machine tension properly.
- Use a walking foot (if available), which helps feed the fabric evenly from the top and bottom.
- Handle the fabric gently, avoiding stretching or pulling it as you sew.
5.3 Sewing straight lines: Maintaining accuracy and consistency
Use a seam guide on your sewing machine (a magnetic guide or a built-in guide) to help you maintain a consistent seam allowance. Guide the fabric gently, letting the machine do the work. Avoid pushing or pulling the fabric. Maintain a steady speed and focus on keeping the edge of the fabric aligned with your seam guide.
5.4 Sewing curves and corners: Mastering the technique for clean edges
- Curves: Shorten your stitch length slightly for better control. Clip into the seam allowance of concave curves (curves that curve inward) and notch out small wedges of fabric from convex curves (curves that curve outward). This allows the fabric to lie flat when turned.
- Corners: Stop sewing with the needle down at the corner point. Lift the presser foot, pivot the fabric, lower the presser foot, and continue sewing.
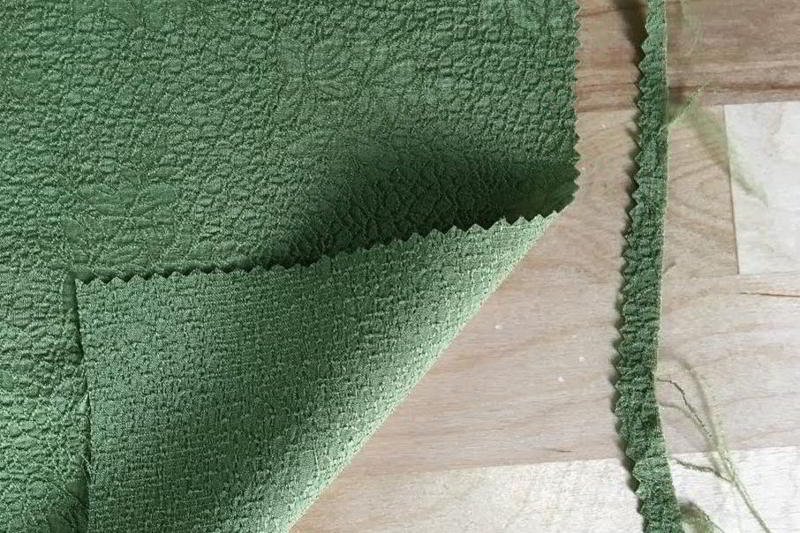
5.5 Dealing with fraying: Seam finishes
Seam finishes prevent the raw edges of non-stretch fabrics from fraying.
- Serging: Creates a professional, overlocked edge using a serger machine.
- Zig-zag stitch: A simple and effective finish using a standard sewing machine.
- Pinking shears: Special scissors that create a zig-zag edge, minimizing fraying.
- Bias tape: A narrow strip of fabric, cut on the bias (diagonal to the grain), that is folded and used to enclose a raw edge.
6. Pressing techniques for a professional finish
6.1 Pressing seams: Setting the stitches and creating crisp edges
Pressing seams after sewing is essential. Press seams open (pressing both seam allowances flat to opposite sides) for most seams. This reduces bulk. Press seams to one side (pressing both seam allowances together in one direction) for certain areas, like enclosed seams or areas where you want a smoother finish.
6.2 Pressing darts and pleats: Creating shape and dimension
Press darts towards the center of the garment or downwards. Press pleats according to the pattern instructions, usually in one direction.
6.3 Using a pressing cloth: Protecting your fabric from shine and damage
A pressing cloth (a piece of cotton or muslin) is placed between the iron and the fabric. This prevents scorching, shine, and water spots, especially on delicate fabrics like silk.
7. Troubleshooting common problems
7.1 Puckering seams: Causes and solutions
- Causes: Incorrect tension, wrong needle/thread, improper fabric handling.
- Solutions: Re-thread your machine, adjust tension, use the correct needle and thread, handle fabric gently, use a walking foot.
7.2 Skipped stitches: Identifying and fixing the issue
- Causes: Incorrect needle, dull needle, incorrect threading, machine problems.
- Solutions: Replace the needle with the correct type and size, re-thread the machine, check for lint buildup, consult your machine manual.
7.3 Uneven seams: Achieving consistent results
- Causes: Inconsistent seam allowance, fabric shifting, poor guiding.
- Solutions: Use a seam guide, pin carefully, guide the fabric gently, maintain a consistent sewing speed.
7.4 Fabric shifting: Preventing and correcting
- Causes: Slippery fabric, incorrect pinning.
- Solutions: More pins (and closer together), basting (long, temporary stitches to hold layers together), using a walking foot.
8. Project ideas with non-stretch fabrics
8.1 Beginner projects: Tote bag, pillowcase
- Tote bag: A simple, practical project that allows you to practice straight seams and basic construction.
- Pillowcase: Another beginner-friendly project that involves straight seams and simple finishing techniques.
8.2 Intermediate projects: Simple skirt, pajama pants
- Simple skirt: Involves sewing straight seams, curves, and possibly a waistband or zipper.
- Pajama pants: Requires sewing straight seams, curves, and an elastic waistband.
8.3 Advanced projects: Tailored shirt, lined dress
- Tailored shirt: Includes sewing collars, cuffs, buttonholes, and set-in sleeves.
- Lined dress: Requires sewing darts, zippers, and a lining, which involves more advanced techniques.
9. Related questions
9.1 Can I use a regular sewing machine for non-stretch fabrics?
Yes, a regular sewing machine can be used for most non-stretch fabrics. However, you may need to adjust the settings (stitch length, tension) and use the appropriate needle and thread.
9.2 What is the best seam finish for delicate non-stretch fabrics?
For delicate fabrics like silk, a French seam (an enclosed seam) or a narrow zig-zag stitch is often recommended.
9.3 How do I prevent my non-stretch fabric from unraveling while I’m working with it?
You can use a temporary seam sealant or a small amount of clear nail polish on the raw edges to prevent unraveling, especially on fabrics that fray easily.
Read more:
Sewing with non-stretch fabrics is a rewarding skill. The key lies in understanding the unique properties of these materials and applying the right techniques. Careful preparation, accurate cutting, proper sewing methods, and diligent pressing are all essential steps.
Remember, practice makes perfect. Don’t be afraid to experiment and learn from your mistakes. With patience and persistence, you’ll master the art of sewing non-stretch fabrics and create beautiful, durable garments and projects.


