


What Is A Bobbin Case: Beginner Guide For Flawless Stitches


A presser foot might look small, but it plays a big role in your sewing projects. If you are new to sewing, understanding this part can make a big difference. This guide will help you learn all about sewing machine presser feet.
1. What is a presser foot? Getting started
Learning about your sewing machine can feel like a lot at first. Let’s start with a key part: the presser foot. It’s easier to understand than you might think!
1.1. Simple answer: What is a presser foot?
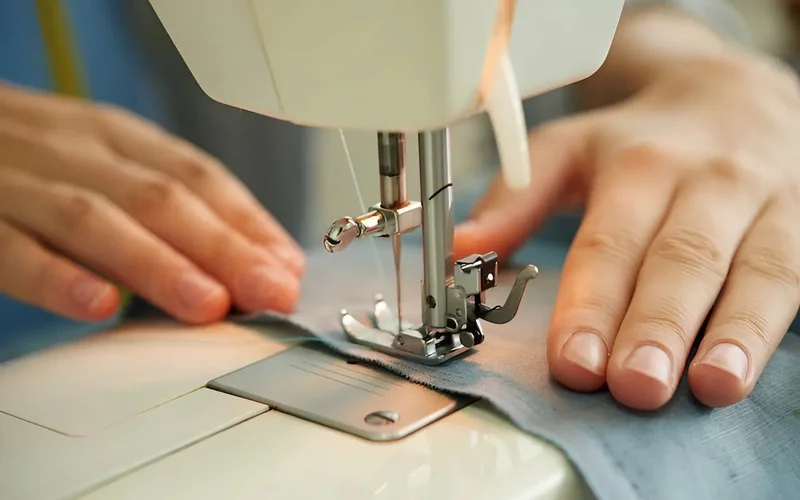
A presser foot is a small but very important part that attaches to your sewing machine, right next to the needle. Its main job is to gently hold the fabric down flat against the machine while the needle stitches. This helps you sew straight and evenly. Even though it’s small, it’s essential for good sewing.
1.2. Why it’s a small but mighty part of your sewing machine
Without a presser foot, sewing would be very difficult. This little part does a lot:
- It helps make your stitches even and neat.
- It stops the fabric from bunching up or slipping around.
- It guides the fabric correctly under the needle.
Even though it is small, the presser foot is essential for good sewing results. It’s a true helper for any sewing project.
1.3. Who this guide will help
This guide is for you if:
- You are new to sewing and wondering about all those bits and bobs.
- You just got a new (or old!) sewing machine.
- You want to learn about cool sewing accessories or crafting tools that can make sewing easier and more fun.
- You dream of making your handmade projects look more professional.
2. The main jobs of a presser foot
A presser foot does more than just sit there. It has important jobs that help your sewing machine work correctly. Let’s look at what it does.
2.1. Holding your fabric still and flat
The presser foot applies gentle pressure downwards onto the fabric. It presses the fabric against the feed dogs (the little teeth under the fabric that help move it) and the throat plate (the metal plate under the needle). This pressure is very important.
This steady hold prevents the fabric from “flagging,” which means moving up and down with the needle. It ensures the needle pierces the fabric cleanly. This leads to consistent stitch formation, meaning your stitches will have the same length and good tension. It also helps prevent puckering or skipped stitches, especially when you are sewing tricky fabrics. Think of it like a gentle hand holding your paper steady while you write.
At Packlove, we often see beginners struggle with uneven stitches. Usually, it’s because the fabric isn’t being held correctly. The presser foot is key to solving this!
2.2. Working with the feed dogs: Moving fabric smoothly
Underneath your fabric, there are little metal teeth called feed dogs. These teeth grip the bottom of your fabric. The presser foot holds the fabric down from the top, while the feed dogs gently pull the fabric from the bottom. They move it forward just the right amount for each stitch.
The presser foot and feed dogs work together like a perfectly timed team. The presser foot adjusts its pressure to allow the feed dogs to do their job smoothly. This teamwork ensures your stitch length is consistent and your fabric moves steadily.
2.3. Different ways presser feet attach: Understanding shank types
The presser foot doesn’t just float; it attaches to a part of your machine called the presser bar or shank (the vertical metal bar that holds the presser foot). It’s super important to know what type of shank your machine has because presser feet are not one-size-fits-all!
Here are the main shank types:
- Low Shank: Many home sewing machines use this. The distance from the screw that holds the foot (or the foot holder) to the bottom of the foot when it’s lowered is about 1/2 inch.
- High Shank: Some larger, older, or more industrial-style machines use a high shank. The distance is about 1 inch.
- Snap-On: These are very common on modern low-shank machines. The foot itself doesn’t screw on. Instead, it “snaps” onto an adapter that is screwed to the shank. This makes changing feet quick and easy!
- Some machines might use a Slant Shank, which is less common and specific to certain older Singer models.
If you buy a foot for the wrong shank type, it just won’t fit or won’t work correctly. It could even damage your machine.
A common question we get at Packlove is “will this foot fit my machine?” The first thing we ask is about the shank type. The best place to find this information is your sewing machine’s manual. If you don’t have it, try searching online for your machine’s brand and model along with ‘shank type’.
3. Common types of presser feet and what they do
There are many different presser feet, each designed for a special job. Let’s look at some of the most common ones.
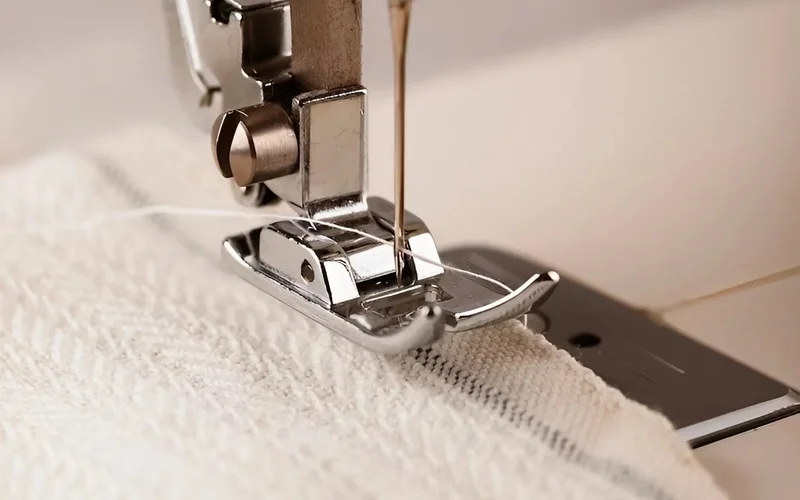
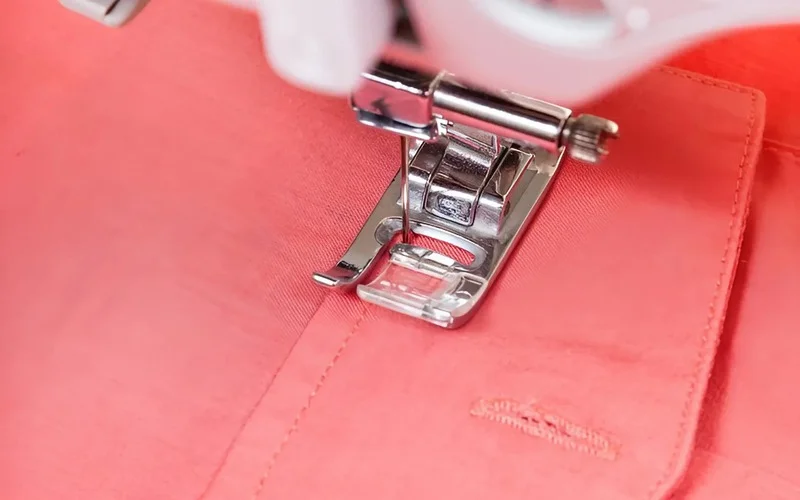
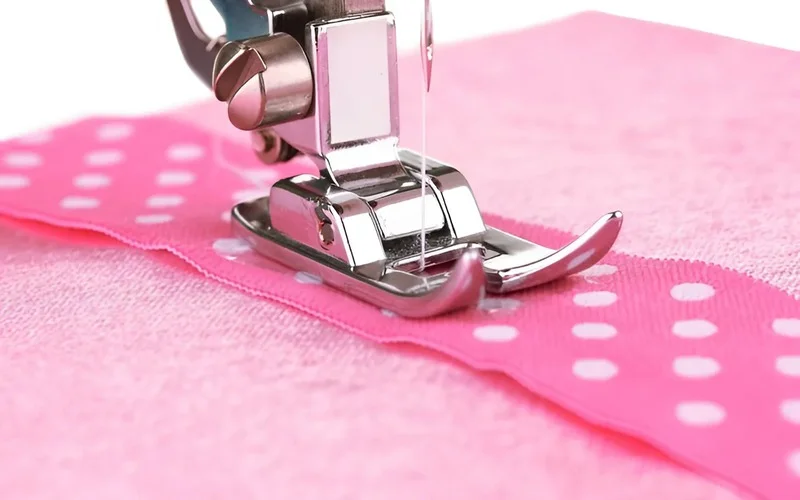
3.1. The standard foot
- What it looks like: This is usually the foot that comes already on your sewing machine when you buy it. It’s typically metal and has a relatively wide opening or slot for the needle. This slot allows the needle to move side-to-side.
- What it’s for: It’s your main workhorse! You’ll use it for most of your basic sewing tasks, like sewing straight stitches and zigzag stitches.
- Why it helps: The wide slot allows the needle to move left and right to create zigzag stitches or other simple patterns. It gives good, even pressure for many common fabrics. This is often called a stitching foot.
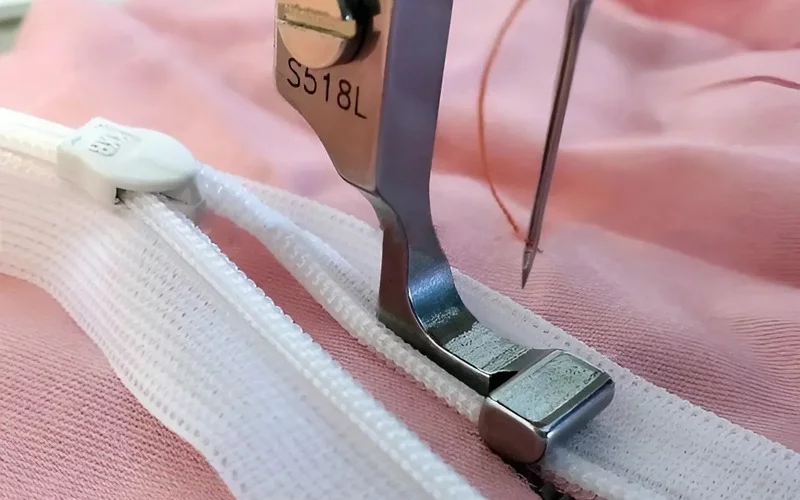
3.2. Zipper foot
- What it looks like: This foot is much narrower than the standard foot. It might have one “toe” or be adjustable to sit on the left or right of the needle. Its slim profile is key.
- What it’s for: Its main job is to let you sew very close to raised edges, like the teeth of a zipper. It’s also great for making and attaching piping (cording covered in fabric) or sewing close to other bulky trims.
- Why it helps: Because it’s so narrow, you can stitch right beside the zipper teeth without the foot hitting them. This gives you a neat, professional finish.
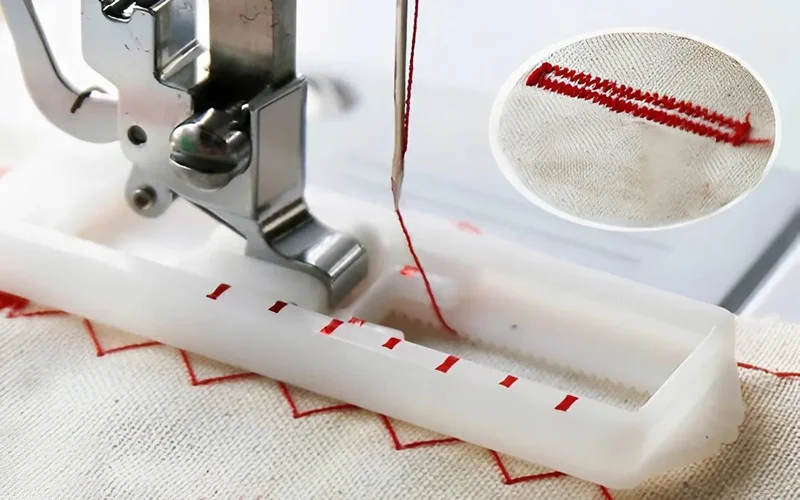
3.3. Buttonhole foot
- What it looks like: These can look a bit different depending on your machine. Some are long and might have markings or a sliding part. Automatic ones often have a space to place the button to set the size.
- What it’s for: As the name says, this foot is designed to help you sew perfect buttonholes easily and consistently.
- Why it helps: It holds the fabric securely and guides it precisely as the machine makes all the stitches for the buttonhole. Many buttonhole feet work with your machine to create the right size buttonhole automatically or in a few simple steps.
3.4. Walking foot
- What it looks like: This foot is usually bigger and looks more complicated than other feet. It has its own set of ‘feed dogs’ on top that look like little teeth or grippers.
- What it’s for: It’s fantastic for sewing multiple layers of fabric together, like when you’re quilting. It’s also great for tricky fabrics that tend to slip or stretch, like velvet, some knits, or vinyl. It helps a lot when you need to match patterns like stripes or plaids perfectly.
- Why it helps: The walking foot has its own mechanism that works with your machine’s feed dogs. So, it grips and pulls the top layer(s) of fabric at the same speed as the machine’s feed dogs are pulling the bottom layer. This ‘even feed’ action prevents the layers from shifting or puckering.
For anyone making bags or items with multiple layers, like our customers at Packlove who create detailed pouches or lined totes, a walking foot can be a game-changer for professional results.

3.5. Blind hem foot
- What it looks like: This foot usually has a metal or plastic guide in the center or to one side. It also has a specific shape to help fold the fabric correctly.
- What it’s for: It helps you sew a ‘blind hem,’ which is a type of hem where the stitches are almost invisible from the right side of the fabric. It’s great for finishing the bottom of trousers, skirts, dresses, and curtains for a very professional look.
- Why it helps: The guide on the foot helps you keep the folded edge of the fabric perfectly aligned. The machine then makes a stitch that mostly catches the hem allowance on the inside, with just a tiny stitch catching a thread or two on the outside.
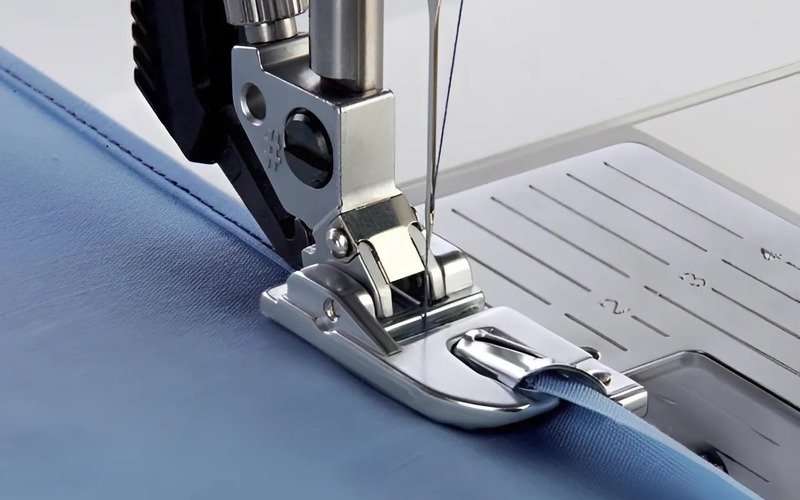
3.6. Overedge/overcast foot
- What it looks like: This foot often has a small bar, pins, or a brush near the needle opening. It’s designed to guide the fabric edge.
- What it’s for: It’s used to finish the raw edge of fabric to prevent it from fraying or unraveling. It creates a stitch that wraps around the very edge of the fabric, similar to what a serger machine does (but simpler).
- Why it helps: The guide or bar on the foot ensures the needle makes stitches right on the edge. Sometimes it helps to prevent the fabric edge from curling or tunneling under while it’s being stitched.
3.7. Satin stitch foot (appliqué foot)
- What it looks like: These are often made of clear plastic, which is great for visibility. They usually have a groove or channel on the underside. Some have an open toe for an even clearer view.
- What it’s for: This foot is perfect for sewing dense decorative stitches, like satin stitch (a close zigzag). It’s also excellent for appliqué (sewing pieces of fabric shapes onto a larger piece of fabric).
- Why it helps: The clear material lets you see exactly where you’re stitching. This is important for precise decorative work and appliqué. The groove on the bottom allows the thick satin stitches to pass under the foot easily without getting squashed or stuck.
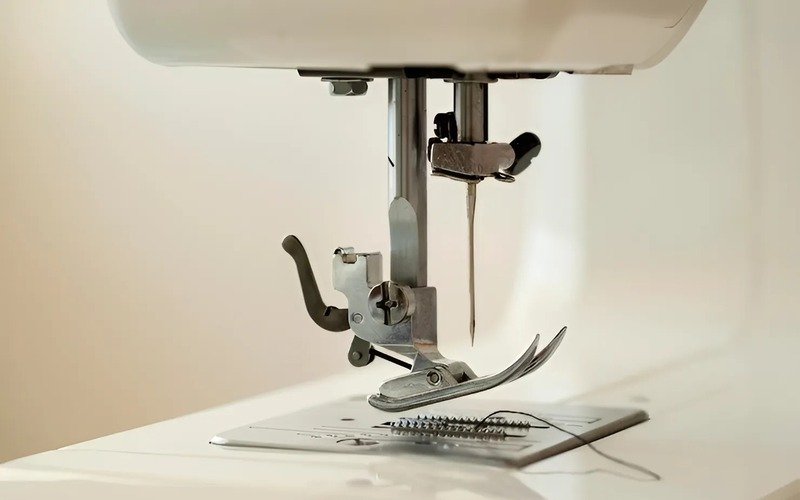
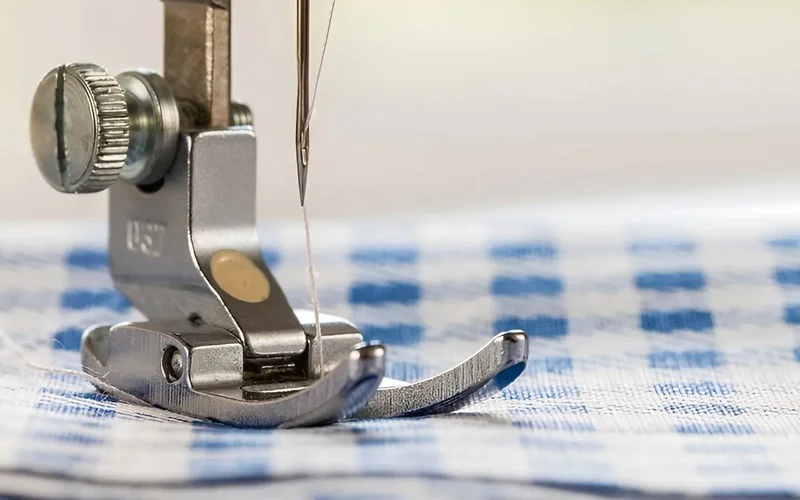
3.8. Straight stitch foot
- What it looks like: This foot has only one very small, round hole for the needle, instead of a wide slot like the standard foot.
- What it’s for: It’s designed for sewing perfectly straight stitches. It’s wonderful for tasks like topstitching (visible stitches on the outside of a project), quilting, sewing very fine or delicate fabrics, and piecing quilt blocks.
- Why it helps: The small hole gives maximum support to the fabric all around the needle as it stitches. This prevents the fabric from being pushed down into the feed dogs. This can happen with delicate fabrics or when using a wide-slotted foot for straight stitches. This results in very precise, even straight stitches.
- Important Warning: You must only use the straight stitch setting on your machine with this foot. If you accidentally select a zigzag or other side-to-side stitch, the needle will hit the foot, break, and could damage your machine!
Excited to try some of these? Many sewing machine brands offer sets of common presser feet, or you can buy them individually. Just remember to check for your machine’s shank type!
4. How to choose the right presser foot for your sewing project
With so many feet available, how do you pick the right one? Think about your fabric and your task.
4.1. Think about your fabric type
Different fabrics behave differently under the needle. The right presser foot can make a huge difference in how easily and well you can sew them.
- Lightweight & Delicate Fabrics (e.g., silk, chiffon, organza): These can slip or pucker easily. A straight stitch foot gives excellent support. For layers, a walking foot can help prevent shifting.
- Stretchy Fabrics (e.g., jersey knits, spandex): These can stretch out of shape or cause skipped stitches. A walking foot is often your best friend here, as it helps feed the fabric evenly. Some machines also have a special ‘knit foot’.
- Thick & Heavy Fabrics (e.g., denim, canvas, wool): Your standard foot might work for a few layers. For multiple thick layers, a walking foot provides better feeding. A ‘jeans foot’ (often has a flatter sole) can also be good.
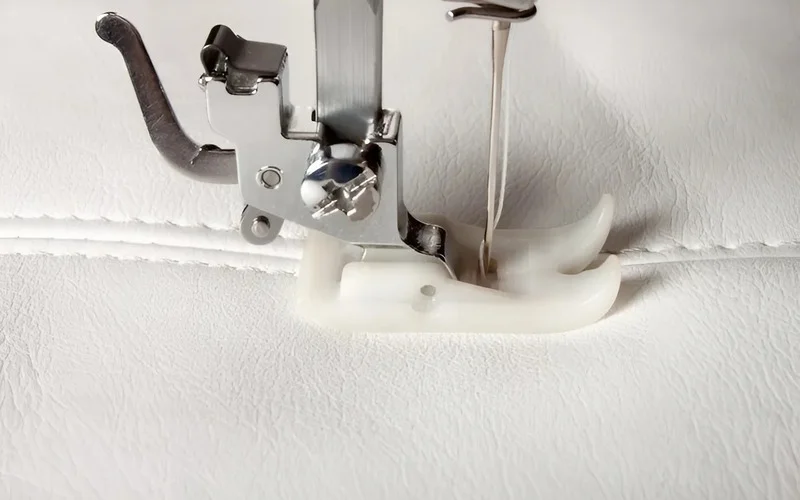
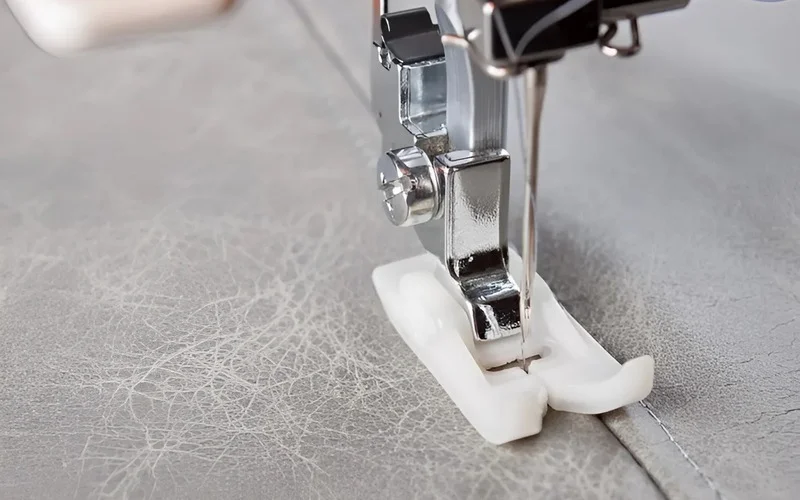
- Sticky & Coated Fabrics (e.g., vinyl, leather, laminated cotton): These can stick to a metal presser foot, causing uneven stitches. A Teflon foot (also called a non-stick foot, often white and made with a special slippery material) or a roller foot will glide over these surfaces much more smoothly.
We’ve seen many Packlove customers who were frustrated sewing vinyl for their bag projects until they discovered the magic of a Teflon foot. It really makes the job much less of a struggle!
4.2. What sewing task are you doing?
The task itself is the primary driver for foot selection. What do you want to do?
- Want to sew in a zipper? You’ll need a zipper foot.
- Planning to make buttonholes? Grab your buttonhole foot.
- Starting a quilt project? A walking foot (even feed foot) will be essential for sewing through layers.
- Need to stop fabric edges from fraying? An overedge/overcast foot is the tool for the job.
- Adding pretty decorative stitches or appliqué? A satin stitch foot (appliqué foot) will give you the best view and stitch quality.
- Just doing general straight or zigzag sewing on cotton? Your standard foot (zigzag or all-purpose foot) is perfect.
4.3. Sewing on labels: A special case
Adding a custom label is like signing your artwork – it makes your handmade items look polished and professional!
When sewing on woven or fabric labels, like those from Packlove, the right presser foot helps.
- Standard foot (all-purpose/zigzag foot): Often, your standard foot (zigzag or all-purpose foot) works perfectly fine for sewing a simple straight stitch around the edges of a label, especially if the label isn’t too tiny.
- Straight stitch foot: For the neatest, most precise stitches, especially on high-quality woven labels or when attaching labels to delicate fabrics, a straight stitch foot is an excellent choice. The small needle hole gives superior control.
- Satin stitch foot (appliqué foot), especially clear ones: If your satin stitch foot (appliqué foot) is clear, it can also be very helpful. You can see exactly where your needle is going. This ensures your label is perfectly placed and stitched.
Here are some tips for sewing on labels:
- Choose a stitch length that looks balanced on your label and fabric (usually around 2.0-2.5mm).
- Consider using a thread color that matches your label or your garment for a subtle look. Or use a contrasting color for a pop!
- Go slowly for best results, especially around corners.
Attaching your brand identity, such as your beautiful custom woven labels from Packlove, is a crucial final step. Using the right presser foot ensures this is done neatly and securely. This reflects the quality of your work and your brand.
At Packlove, we understand that how a label is attached is just as important as the label itself. Many of our customers who create apparel or high-end crafts prefer a straight stitch foot for attaching their Packlove labels. It gives that really crisp, professional stitched edge.
Ready to give your handmade items that professional brand recognition? Explore Packlove’s range of beautiful custom woven labels and other branding solutions!

5. Easy steps: How to change a presser foot
Changing a presser foot is easy once you know how. Follow these simple steps.
5.1. Safety first: Turn off your machine!
This is the most important step. Before you even think about touching the presser foot or needle area, always turn off the main power switch on your sewing machine. Some people even unplug it for extra safety. This prevents the machine from accidentally starting while your fingers are near the needle.
5.2. Removing the old foot
First, raise the needle to its highest position using the handwheel (the large wheel on the right side of your machine). Then, raise the presser foot lifter lever (usually behind or to the side of the needle area).
- Snap-on feet: Look for a small lever or button, usually at the back of the foot holder (the part the foot snaps onto). Press this lever or button, and the foot should drop off.
- Screw-on feet: Find the small thumbscrew (you can usually loosen it with your fingers) or regular screw (you might need a small screwdriver that came with your machine) on the side of the presser foot holder. Loosen this screw a few turns until the foot comes off. You don’t usually need to remove the screw completely.
5.3. Attaching the new foot
- Snap-on feet: Place the new foot on the throat plate, directly under the foot holder. Make sure the little bar on the top of the presser foot is lined up with the groove or ‘claw’ of the foot holder. Slowly lower the presser foot lifter lever, and the foot should ‘snap’ into place. Give it a gentle tug to make sure it’s secure.
- Screw-on feet: Position the new foot onto the holder, aligning its arm with the shank. Re-tighten the thumbscrew (or regular screw) firmly but don’t overtighten.
After attaching any foot, always gently turn the machine’s handwheel towards you by hand for one full stitch cycle. This makes sure the needle goes down and up smoothly without hitting any part of the new presser foot. This is a crucial safety and machine-care step.
6. More about presser feet: Materials and special features
Presser feet come in different materials and some have special features for specific jobs.
6.1. What are presser feet made of?
- Metal (e.g., steel): Most standard presser feet are made of strong metal. They are durable and last a long time.
- Clear Plastic: Some feet, like many appliqué or satin stitch feet, are made from clear plastic. The big advantage is that you can see your fabric and stitches much better, which is great for precise work.
- Teflon® (or similar non-stick coating): These feet are usually white or a light color and have a super smooth, slippery coating on the bottom. They are designed for fabrics that tend to stick to metal feet, like vinyl or leather.
Different materials are used for reasons like visibility or non-stick properties.
6.2. Special feet for tricky jobs
There are even more specialized feet beyond the common ones.
- Teflon® foot / Non-stick foot: We mentioned this earlier for sticky fabrics like vinyl or leather. It really does glide right over them!
- Roller foot: This foot has small rollers on the bottom. It’s helpful for sewing over very thick seams or uneven surfaces. It also helps with some sticky or textured fabrics like velvet or leather, as the rollers help move the fabric along.
These feet solve specific problems and can make difficult tasks much easier.
7. Your presser foot questions answered (FAQs)
Here are answers to some common questions about presser feet.
7.1. Are all presser feet the same?
No, definitely not! The most important thing to check is if a foot is compatible with your machine’s shank type (like low shank, high shank, or snap-on). While some very basic snap-on feet are sometimes called ‘universal’ because they fit many common low shank snap-on machines, it’s always best to double-check compatibility for your specific machine model before you buy any new foot.
7.2. How do I know my machine’s shank type?
The very best place to look is in your sewing machine’s manual. It should tell you. If you don’t have the manual, try searching online for your machine’s brand name (like Singer, Brother, Janome, etc. – these are common sewing machine brands) and the model number, followed by the words ‘shank type’. For example, search ‘Singer Model XXX shank type’.
7.3. Do I really need lots of different presser feet?
Not at all, especially when you’re starting out! Your machine probably came with a standard foot (zigzag or all-purpose foot), and that will handle most basic sewing. A zipper foot and a buttonhole foot are often the next most useful ones to get. Only buy more specialized feet as you decide to try new sewing techniques or projects that need them. It’s better to learn how to use a few feet well first!
7.4. Where can I find presser feet?
You can usually find presser feet at stores that sell sewing machines, local fabric and craft stores, and from many online retailers that specialize in sewing supplies. Just make sure you know your machine’s shank type and, if possible, its brand and model to ensure you get a compatible foot.
8. You’ve mastered presser feet basics!
You now know a lot about these important sewing machine parts.
8.1. Recap: Why presser feet matter
Congratulations! You now know a lot more about those small but mighty presser feet! As you’ve learned, they are essential for controlling your fabric, making neat and even stitches, and opening up a whole world of different sewing techniques. Understanding and using the right presser foot really helps achieve better sewing results and makes sewing more enjoyable.
8.2. Keep practicing and exploring
The best way to become truly comfortable with presser feet is to use them! Don’t be afraid to experiment with different feet for different projects. Always check they are compatible with your machine and stitch selection first. You’ll soon discover which feet become your favorites and how much they can improve your sewing.
8.3. A final tip for branding your creations
Knowing your sewing machine well, including how to use different presser feet effectively, is a fantastic skill. It not only helps you create beautiful items but also allows you to add those all-important professional branding touches with precision.
For instance, when you’re ready to add your unique identity with custom woven labels or printed fabric labels from Packlove, choosing the right presser foot (like a straight stitch foot for crispness or a clear appliqué foot for perfect visibility) will ensure your labels are attached beautifully. This attention to detail makes your brand look polished and high-quality.
Read more:
At Packlove, we’re passionate about providing you with top-quality branding solutions like custom labels, tags, and packaging that make your creations stand out. Knowing how to apply them skillfully using your sewing machine and the right tools is key to showcasing their full potential.
Ready to elevate your brand and make your amazing creations truly unforgettable? Explore Packlove’s full range of custom labels, tags, and packaging solutions today! Visit Packlove to get started.


