What Is A Sewing Pattern: Beginner’s Guide To Understanding And Using
Welcome to the exciting world of sewing! Ever wondered how clothes get their perfect shape? The secret often starts with a sewing pattern. This guide is here to explain what sewing patterns are. We will look at why they are important. We will also see how they help you make clothes and other fabric items. By the end, you’ll understand what a sewing pattern is and feel ready to start your sewing journey. Let’s dive in!
1. What exactly is a sewing pattern?
A sewing pattern is like a map or a recipe for making clothes. Think of it as a garment template or a dressmaking blueprint. Usually, a sewing pattern is made of large sheets of thin paper, similar to tissue paper. Sometimes, it’s a digital file (like a PDF) that you print yourself.
These patterns have different pieces. Each piece is a template for a part of the item you want to make. For example, there will be pieces for a sleeve, a shirt front, or a collar. You use these paper pieces to cut your fabric to the exact shape needed. So, a sewing pattern is a guide or plan. It helps you turn flat fabric into items you can wear or use.
The main purpose of a sewing pattern is to help you create clothes or other sewn items accurately. This is key for garment making. Patterns ensure that all the parts of your garment will fit together correctly. They also help you make the same item many times, and it will look the same each time. In short, a sewing pattern guides you from a flat piece of fabric to a three-dimensional item that fits.
2. Why should you use a sewing pattern? The big benefits
Using a sewing pattern offers many advantages, especially when you are starting out. They are valuable garment creation resources and essential fashion design tools. Here are the main benefits:
- Accuracy and fit: Patterns help you cut fabric very precisely. This leads to clothes that fit much better. Pattern designers understand body shapes and how clothes should fit. Patterns usually include a size range based on different body measurements. Trying to get a good fit without a pattern can be very tricky.
- Saves time and effort: The pattern does the hard work of figuring out all the shapes and sizes. This means you don’t need skills like pattern drafting (creating patterns from scratch) when you begin. This reduces mistakes, saving you fabric and time. It’s much faster than trying to invent a design from scratch every time.
- Consistency: Patterns help you make items that look neat and professional, even if you are a beginner. If you want to make several of the same item, like for gifts or to sell, a pattern ensures they all look the same.
- Guidance: Most patterns come with instructions. These are step-by-step guides on how to sew the item. This is very helpful for learning new sewing techniques.
3. What’s inside a sewing pattern? Unpacking the essentials
When you buy a printed sewing pattern from a store, it usually comes in an envelope. This envelope contains several important items. Understanding commercial sewing patterns and their parts is key. Let’s look at what you’ll typically find:
3.1 The pattern envelope (for printed patterns)
The envelope is like the pattern’s cover.
Front: The front usually shows a photo or drawing of the finished item or items. Often, it shows different ‘views’ or styles you can make with that pattern, like a dress with short sleeves or long sleeves.
Back: The back of the envelope is packed with information:
- Description: A brief description of the apparel types (e.g., Dress, Trousers) or garment type (e.g., shirt, dress) the pattern makes.
- Size chart: This chart lists body measurements (like chest, waist, and hips). You use this to choose the correct pattern size for you.
- Fabric suggestions: The pattern will suggest suitable types of fabric (for example, “use cotton for this skirt”). This helps with choosing the right fabric for projects.
- Notions list: This lists all the extra things you’ll need, called notions (buttons, zippers, etc.). This can include items like elastic, thread, buttons, or zippers.
- Yardage requirements: This tells you how much fabric you need to buy. It will specify amounts for your chosen size and based on standard fabric widths.
3.2 The instruction sheet
This is your main guide for sewing the project! The instruction sheet is a key component of any sewing pattern.
- It contains step-by-step directions for constructing the garment. A dressmaker follows the sewing pattern instructions.
- It often includes diagrams (pictures) to help you understand each step.
- Sometimes, it includes a glossary of sewing terms.
- Fabric layout diagrams: These show you the best way to place your pattern pieces on your fabric. This is an important cutting layout feature. It helps you save fabric and make sure the pieces are aligned correctly with the fabric grain.
- Information about the seam allowance (the amount of fabric beyond the stitching line) is usually found here or directly on the pattern pieces.
3.3 The pattern pieces
These are the actual templates you will use to cut your fabric. Each piece represents a part of the garment, like a sleeve, collar, or pocket.
- Printed tissue patterns: Most commercial patterns are printed on large, thin sheets of tissue paper. You might need to carefully separate the pieces for your chosen size and view.
- Digital PDF patterns: These are computer files. You typically print them on your home printer using A4 or Letter-sized paper. Then, you tape the pages together to create the full-size pattern pieces. Some digital patterns also include a large A0 file. You can take this file to a copy shop to have it printed on one large sheet, which means no taping.
- All pattern pieces have lines and symbols on them. These are called pattern markings, and we’ll explain them next.
4. Understanding sewing pattern markings and symbols
Pattern pieces have various lines, symbols, and words on them. These pattern markings are like a special code. They tell you how to cut your fabric and sew the pieces together. Don’t worry, they are easy to learn with a bit of practice! Understanding these symbols is key to how to read sewing pattern symbols and makes the sewing pattern explained simply.

Here are some of the most important markings to know:
Grainline:
- What it looks like: A long, straight line, often with arrows at one or both ends.
- What it means: This is crucial! It shows you how to place the pattern piece on your fabric. The grainline must be parallel to the fabric’s edge (called the selvage). This ensures your garment hangs correctly and doesn’t twist.
Cutting lines:
- What it looks like: Solid lines, usually at the very edge of the pattern piece.
- What it means: This is the line you cut along. If the pattern includes multiple sizes, there will be different lines (like dotted, dashed, or different solid lines) for each size. The pattern key will explain which line is for your size.
Stitching lines (seam lines):
- What it looks like: Dashed lines or sometimes lighter solid lines found INSIDE the cutting line.
- What it means: This is where you will sew your seam. The space between the cutting line and the stitching line is called the seam allowance.
Notches (triangles/diamonds):
- What it looks like: Small triangles or diamond shapes printed on the cutting edges.
- What it means: Notches help you match pattern pieces together correctly. For example, a double notch on a sleeve piece will match up with a double notch on the armhole of the shirt body.
Dots/squares/circles:
- What it looks like: Small filled or outlined circles, squares, or dots.
- What it means: These mark important points on your pattern. They might show where to place a pocket, where to start or stop sewing, or the top of a pleat.
Darts:
- What it looks like: Wedge-shaped markings, usually a triangle formed by two lines meeting at a point.
- What it means: Darts are folds that are sewn into the fabric to give it shape and curves. They are often used at the bust, waist, or shoulders to help the garment fit the body better.
Buttonholes and button placements:
- What it looks like: Buttonholes are usually shown as a line with a bar at each end (like an ‘I’ turned on its side). Button placements are often marked with an ‘X’ or a dot.
- What it means: These markings show you exactly where to make buttonholes and where to sew on your buttons.
Lengthen/shorten lines:
- What it looks like: Two parallel lines running across a pattern piece, often labeled ‘Lengthen or Shorten Here’.
- What it means: If you need to make a pattern piece longer or shorter (like a sleeve or a pant leg), you can make the adjustment between these lines.
Fold line:
- What it looks like: A line with bracketed ends or an arrow pointing to one edge, labeled ‘Place on Fold’ or ‘Cut on Fold’.
- What it means: You place this edge of the pattern piece directly on the fold of your fabric. When you cut it out, you will have one large, symmetrical piece (like a shirt front that is identical on both sides).
5. How to use a sewing pattern: A basic workflow
Now that you know what’s in a pattern and what the markings mean, let’s go over the basic steps for using one. This section will help you with understanding garment construction from start to finish.
5.1 Step 1: Prepare your pattern
- Choose your size: Look at the size chart on the pattern envelope. You’ll need to take your body measurements (usually chest/bust, waist, and hips). For guidance, you can search for “How to take body measurements for sewing”. Compare your measurements to the chart to find your size. If you’re between sizes, the pattern instructions might offer advice.
- Trace or cut (for multi-size patterns): If your pattern sheet has many sizes printed on it, you have two choices. You can carefully cut out the lines for your chosen size. Or, to save all the sizes for future use, you can trace your size onto separate tracing paper.
- Press tissue patterns: If your tissue paper pattern pieces are wrinkled, gently press them with a cool, dry iron (no steam!). This will make them flat and easier to work with.

5.2 Step 2: Prepare your fabric
- Pre-wash and iron fabric: This is important! Wash and dry your fabric the same way you plan to wash the finished garment. Many fabrics shrink the first time they are washed. Pre-washing prevents your finished item from shrinking and not fitting. After washing and drying, iron your fabric so it’s smooth.
- Lay out fabric: Follow the fabric layout guide in your pattern instructions. This diagram shows how to fold your fabric and arrange the pattern pieces. This helps save fabric and makes sure the grainline is correct on each piece.
5.3 Step 3: Pin and cut
- Pin pattern pieces to fabric: Place the paper pattern pieces onto your fabric according to the layout guide. Make sure the grainline arrow on each piece is parallel to the fabric’s selvage (the finished edge) or the fold. Pin the pieces flat to prevent them from moving.
- Cut out fabric pieces: Use sharp fabric scissors or a rotary cutter (with a cutting mat). Carefully cut along the correct cutting line for your size. The sewing pattern guides the fabric cutting process.
5.4 Step 4: Transfer markings
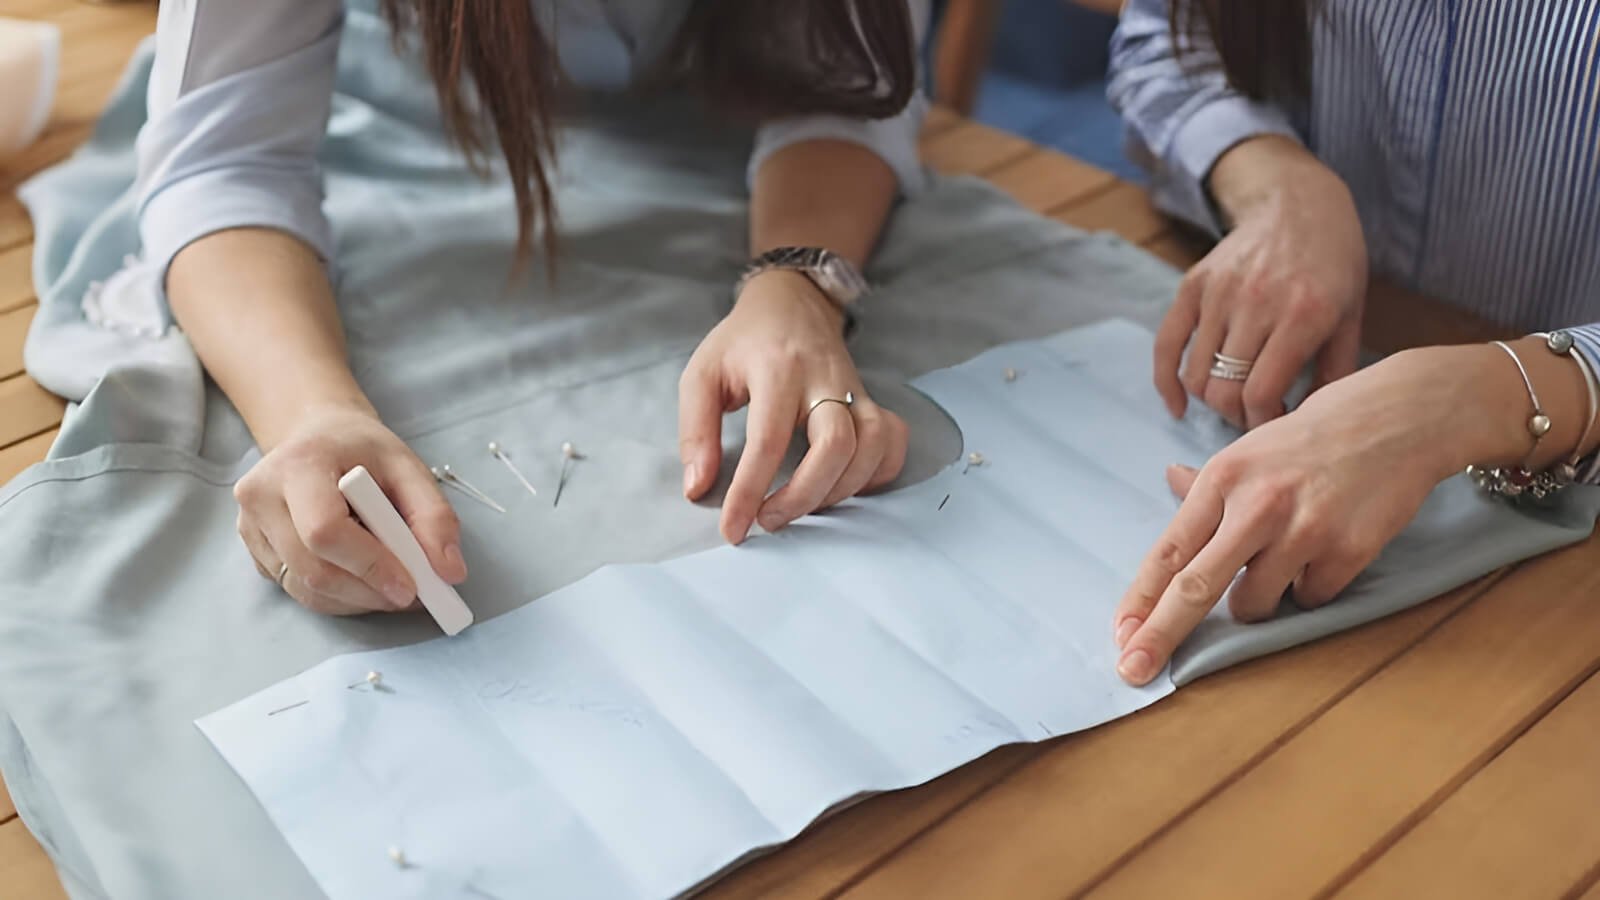
- Why transfer? Before you unpin the paper pattern pieces from your fabric, you need to transfer important pattern markings. These include darts, dots, and notches. Transferring these markings to your fabric shows you where to sew or match pieces together.
- How to transfer: There are several ways to do this. You can use tailor’s chalk or a special fabric pen (always test it on a scrap of your fabric first to make sure it can be removed!). For notches, you can make tiny snips into the seam allowance. For dots, you can push a pin through the dot on the pattern and mark the fabric on both sides.
5.5 Step 5: Sew your garment
- Follow instructions: Now it’s time to sew! Carefully read your pattern’s instruction sheet step-by-step. A creator uses a sewing pattern and its instructions.
- Read ahead: It’s a good idea to read all the steps for a particular section before you start sewing it.
- Organize pieces: Keep your cut fabric pieces organized so you know which piece is which.
- This is where your basic sewing techniques will come into play.
6. Types of sewing patterns
Sewing patterns come in different formats. The main types are printed patterns and digital PDF patterns.
Printed patterns:
- These are often called “commercial patterns” and are what you typically find in fabric or craft stores. Most are printed tissue patterns.
- Common brands independent pattern designers also offer their patterns in printed format.
Digital PDF patterns:
- Digital PDF patterns are bought online and downloaded to your computer.
- Print-at-home (PAH/Tiled): You print these on standard A4 or Letter-sized paper. Then you trim the edges of the pages and tape them together to create the full-size pattern.
- Copy shop (A0/Large Format): These patterns include a large file (often A0 or Arch E size) that you can take to a copy shop or printing service to have printed on one very large sheet of paper. This means no taping pages together.
- Layered PDF pattern options: Some PDF patterns are “layered.” This cool feature allows you to select and print only your specific size, making the pattern less cluttered.
- Digital patterns are very popular, especially from independent pattern designers.
- A newer option for digital PDF patterns is “projector files for cutting.”
- These are special digital files designed to be used with a home projector. You project the pattern lines directly onto your fabric and cut following the projected lines. This method eliminates the need for paper patterns altogether but requires a specific setup.
7. Choosing your first sewing pattern: Tips for beginners
Choosing the right first pattern is important for a good experience. You want something that is beginner-friendly. Here are some tips to help you pick a pattern that’s perfect if you’re wondering what is a sewing pattern for beginners:
- Look for ‘beginner’ labels: Many patterns are labeled. Look for terms like “Easy,” “Beginner,” “Learn to Sew,” or “Quick Sew” on the pattern envelope or in the online description.
- Start with simple shapes: Choose patterns that have simple shapes and not too many pattern pieces. Good first projects include elastic-waist skirts, simple pajama pants, tote bags, aprons, or basic tops with few seams. Avoid complicated collars or sleeves for your first few projects.
- Avoid complex details: Initially, try to avoid patterns that involve set-in sleeves (sleeves that are sewn into a curved armhole), complex collars, lots of buttonholes, or very fitted styles.
- Check fabric recommendations: Pick patterns that suggest easy-to-sew fabrics. Good choices for beginners are quilting cotton, cotton poplin, or stable linen blends. Try to avoid very slippery fabrics (like silk or satin) or very stretchy knit fabrics until you have more experience. This relates to choosing the right fabric for projects.
- Read reviews (if possible): If you’re looking at patterns online, especially from independent designers, check for reviews. Other sewers’ experiences can give you clues about how easy the pattern is to follow.
- Look at line drawings: Most patterns include technical line drawings of the garment. These can often give you a clearer idea of the garment’s construction and complexity than styled photos.
8. Beyond the pattern: Adding the finishing touches to your handmade item
There’s a special pride that comes with making something by hand using a sewing pattern. Once your item is complete, you might think about adding some finishing touches, especially if you plan to sell your creations or give them as special gifts. These touches can add a professional look and make your item uniquely yours. This is important for branding handmade clothing.
At Packlove, we love supporting creators just like you! As you grow in your sewing journey, we can help you add that professional polish to your handmade items:
- Custom woven labels: These are soft, fabric labels that you sew into your garments, just like the ones you see in store-bought clothes. They can feature your brand name or logo. A woven label (a label made by weaving threads together, like on clothing necklines) gives a very professional finish. Your garment made from a pattern can be beautifully branded with a woven label.
- Heat transfer labels (tagless tags): A heat transfer label (a label applied to fabric using heat and pressure, often tagless) is ironed directly onto the fabric. They are great for a smooth, “tagless” feel, perfect for kids’ clothes or t-shirts.
- Hang tags: These are cardboard or paper tags that you can attach to your items. They’re perfect for displaying your logo, item details, price, or a personal message.
- Care tags: Small tags that provide washing and care instructions for your handmade item. A handmade item (from a pattern) also requires a care tag.
- Solutions for new designers: Packlove provides small quantity packaging solutions, great for new designers using sewing patterns. We understand you might not need thousands of labels when you’re starting out.
- Sustainable options: If you’re focused on eco-friendly sewing, Packlove has eco-friendly tag and packaging options for sustainable sewing projects.
- Complete branding: For your finished garment, brand identification is key. If you plan to ship your items, Packlove can also help with a custom poly mailer. A clothing designer (using patterns) often needs packaging like a custom poly mailer.
9. Frequently asked questions (FAQs)
9.1 What is seam allowance?
Seam allowance is the extra fabric between the stitching line (where you sew) and the cutting edge of your fabric. This extra fabric gets enclosed inside the seam when you sew. Most patterns include seam allowance, and the instructions will tell you how much it is. Common seam allowances are 1.5cm (5/8 inch) or 1cm (3/8 inch).
9.2 Do I need to wash my fabric before using a pattern?
Yes, usually! Many fabrics, especially natural fibers like cotton and linen, can shrink the first time they are washed. If you don’t pre-wash your fabric, your finished garment might shrink after its first wash and no longer fit. Always wash and dry your fabric the same way you intend to care for the finished item, before you cut out your pattern pieces.
9.3 Can I reuse a sewing pattern?
Definitely! Printed tissue patterns can be delicate, so handle them with care. If you plan to use a pattern many times, you might consider tracing it onto sturdier paper. Digital PDF patterns can simply be reprinted whenever you need them.
9.4 What are “notions”?
Notions (buttons, zippers, etc.) are all the small supplies you need for a sewing project besides the fabric and the pattern itself. Examples include thread, buttons, zippers, elastic, hooks and eyes, snaps, interfacing (a fabric used to add stiffness), and ribbons. The pattern envelope will list all the notions required for that specific project.
9.5 Where can I buy sewing patterns?
You can find sewing patterns in several places. Fabric and craft shops often carry patterns from big companies. Online is a huge source! Many independent pattern designers sell their patterns (often as digital PDF patterns) on their own websites or on platforms. The big pattern companies also sell their patterns online.
Explore more:
Sewing patterns are essential garment creation resources and amazing fashion design tools that open up a world of creative possibilities. Understanding what a sewing pattern is, its different parts, and how to read its markings is the first big step on your sewing journey.
Don’t be afraid to pick a simple pattern and give it a try. Sewing is a fun, rewarding, and incredibly useful skill. We hope this guide has helped you understand sewing patterns and feel more confident to start your own sewing adventure. Happy sewing from all of us at Packlove! Enjoy the wonderful process of making things with your own hands.


