


Design Your Own Poly Mailers: Complete Guide for Branding


For e-commerce businesses, entrepreneurs and Etsy sellers, packaging is more than just a way to ship products; it’s a crucial part of the customer experience and a powerful branding tool. Are you currently using plain, generic poly mailers and missing out on a valuable opportunity to connect with your customers? Perhaps you’re unsure how to design effective, visually appealing packaging, or you’re overwhelmed by the printing options and costs. This guide is for you.
Custom-designed poly mailers can create a positive first impression, reinforce your brand identity and set you apart from the competition. We’ll walk you through the entire process, from defining your brand’s visual style to choosing the right printing method and materials. You’ll gain the knowledge and confidence to create custom packaging that elevates your brand, enhances the unboxing experience and leaves a lasting positive impression on your customers.
1. Beyond the plain poly mailer – The power of customization
Poly mailers are a staple of e-commerce shipping. They’re lightweight, durable, cost-effective and water-resistant, making them ideal for shipping clothing, accessories and other non-fragile items. But plain, unbranded poly mailers are a missed opportunity.
Custom poly mailers, printed with your brand’s logo, colors and unique design, transform a purely functional item into a key element of your branding, marketing and overall customer experience. This guide provides a comprehensive overview of designing and printing customized packaging, empowering you to create branded mailers that make a statement.
2. Why design your own poly mailers? The benefits of branded packaging
Investing in custom-designed poly mailers offers significant advantages for your business.
2.1 First impressions matter: Creating a memorable unboxing experience
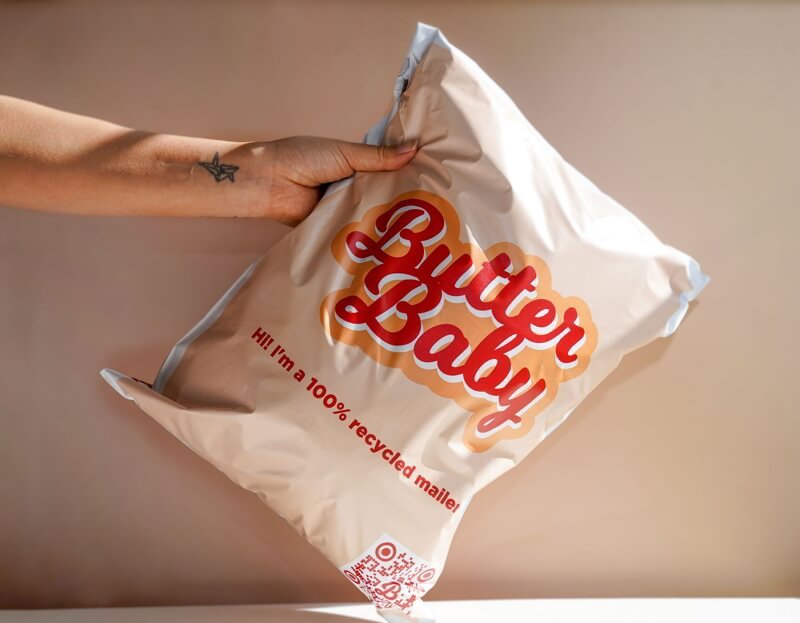
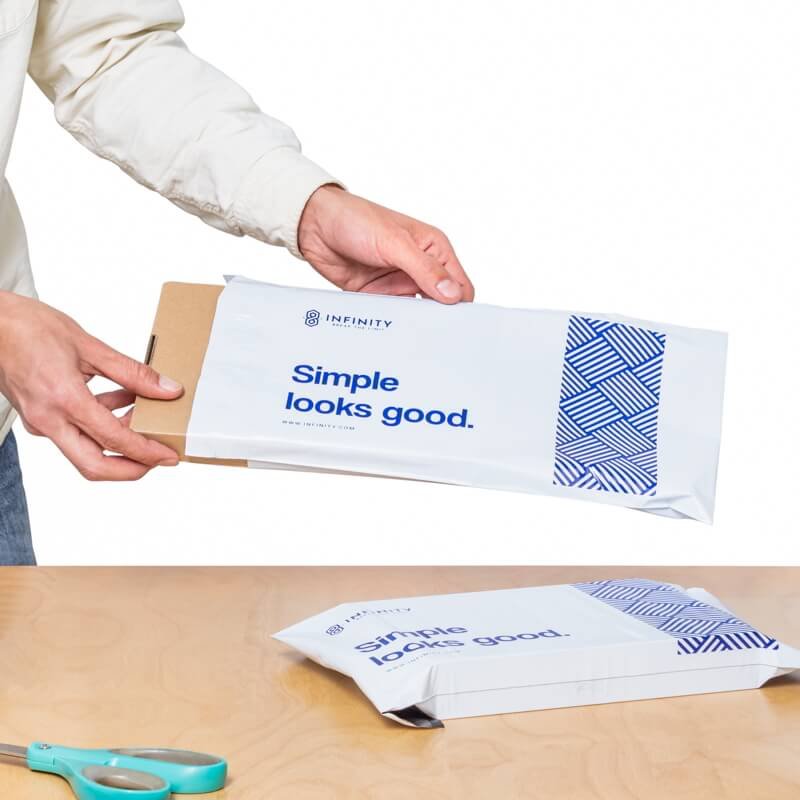
For online businesses, the poly mailer (or other packaging) is often the first physical interaction a customer has with your brand. A plain, generic mailer does little to create excitement or reinforce your brand identity. A custom-designed mailer, on the other hand, creates a much more professional, memorable and positive unboxing experience. It shows attention to detail and care, making the customer feel valued and appreciated. This positive first impression can significantly impact customer satisfaction and brand perception.
Think of your packaging as an extension of your brand’s personality. It’s the first thing your customer sees when their order arrives, so make it count! A well-designed poly mailer can create a positive and memorable unboxing experience that sets you apart.
2.2 Brand recognition and awareness: Turning packaging into marketing
Custom poly mailers are a powerful tool for reinforcing your brand identity. By consistently using your logo, brand colors, fonts and overall aesthetic on your mailers, you significantly increase brand recognition. Every package you ship becomes a mini-billboard, promoting your brand wherever it goes. This consistent branding across all touchpoints (your website, social media, packaging) strengthens brand awareness and helps customers easily identify your products.
Your poly mailer is essentially free advertising space. Use it wisely! A well-designed mailer with your logo and brand colors can significantly increase brand recognition and make your shipments instantly identifiable.
2.3 Differentiation: Standing out from the crowd in a competitive market
In today’s crowded online marketplaces, differentiation is crucial. Many e-commerce sellers use plain, generic packaging. By investing in custom mailers, you can immediately stand out from the competition. It shows that you care about presentation and the customer experience, creating a more premium feel and a distinctive brand identity.
In a sea of plain poly mailers, a custom-designed one will instantly grab attention. It’s a simple but effective way to differentiate your brand and show customers that you care about the details.
2.4 Customer connection and loyalty: Building relationships through packaging
Personalized packaging, even something as simple as a custom-printed poly mailer, can create a stronger connection with your customers. It makes them feel valued and appreciated, demonstrating that you’ve put thought and care into every aspect of their experience.
This can lead to increased customer loyalty, repeat purchases and positive word-of-mouth referrals. Adding a small, personalized touch, like a thank-you message or a unique design element on your mailer, can make a big difference.
Don’t underestimate the power of thoughtful packaging. A custom-designed poly mailer can be a small but significant way to show your customers that you care and to build a stronger relationship with them.
2.5 Marketing value
Packaging has a significant impact on customer perception and purchasing decisions. In fact, 72% of Americans say that product packaging influences their purchasing decisions, and three out of every 10 businesses noticed an increase in revenue after improving packaging quality and style.
3. Before you design: Essential considerations and planning
Before diving into the design process, it’s crucial to lay a solid foundation. This involves defining your brand identity, understanding your printing needs and budget and considering sustainability.
3.1 Defining your brand identity: Consistency is key
Your poly mailer design should be an extension of your overall brand identity. Before you start designing, make sure you have a clearly defined:
- Logo: A well-designed, memorable logo is essential.
- Color palette: Choose a set of colors that represent your brand and use them consistently.
- Fonts: Select fonts that are legible and reflect your brand’s personality.
- Brand message and aesthetic: What is the overall feeling you want to convey? (e.g., minimalist, playful, luxurious, eco-conscious, modern, vintage, etc.)
Your poly mailer design should seamlessly integrate with all your other branding materials, including your website, social media presence, business cards and any other marketing collateral. This consistency creates a cohesive brand experience and strengthens brand recognition.
Your poly mailer design should be an extension of your overall brand identity. It should instantly communicate who you are and what you stand for. Make sure it aligns seamlessly with your website, social media and any other marketing materials.

3.2 Determining your printing needs and budget: Practical considerations
Before you start designing, consider these practical factors:
- Quantity: How many poly mailers do you need? This will significantly influence your choice of printing method. Some methods are much more cost-effective for large quantities, while others are better suited for small runs.
- Budget: How much can you realistically afford to spend on custom printing? Set a budget before you begin designing to avoid overspending and to guide your choices regarding materials, printing methods and finishes.
- Timeline: How quickly do you need the finished mailers? Some printing methods have longer turnaround times than others. Consider both production time and shipping time.
Before you get carried away with design ideas, figure out your practical constraints: how many mailers you need, how much you can spend and when you need them. This will help you choose the right printing method and avoid disappointment.
3.3 Sustainability matters: Eco-friendly options for conscious brands
Sustainability is an increasingly important consideration for businesses and consumers alike. When designing your custom poly mailers, explore eco-friendly options:
- Recycled poly mailers: Choose mailers made from 100% recycled plastic content, or at least a high percentage of recycled content. This reduces reliance on virgin plastic and minimizes environmental impact.
- Eco-friendly inks: Opt for printers that use water-based inks, soy-based inks, or other plant-based inks. These inks are less harmful to the environment than traditional solvent-based inks, which release volatile organic compounds (VOCs).
- Reusable features: Consider poly mailers with a second adhesive strip. This allows customers to easily reuse the mailer for returns or other purposes, extending its lifespan and reducing waste.
- Biodegradable/compostable options: While less common for poly mailers, some biodegradable or compostable options are emerging. However, it’s crucial to understand the specific conditions required for these materials to break down properly. Many require industrial composting facilities, not just a backyard compost heap.
Consumers are increasingly concerned about sustainability. Choosing eco-friendly options for your poly mailers can not only reduce your environmental impact but also enhance your brand image and appeal to environmentally conscious customers.
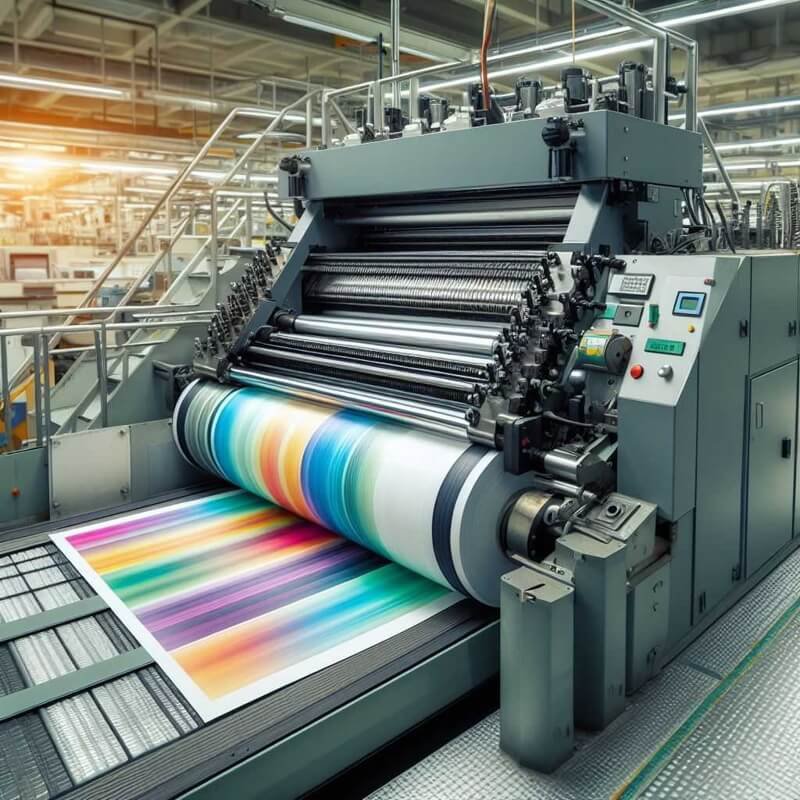
4. Printing methods for custom poly mailers: Choosing the right technique
Several printing methods are suitable for customizing poly mailers. Each has its own advantages, limitations and cost implications. Choosing the right method depends on your design, quantity, budget and desired print quality.
4.1 Inkjet printing: Small batches, quick turnaround and variable data
Description: Inkjet printing is a digital printing technology. It works by propelling tiny droplets of solvent-based ink directly onto the poly mailer surface. The ink dries quickly, creating a waterproof and smudge-free image. It’s important to note that regular water-based inkjet inks used for paper printing are not suitable for printing on most poly mailers (which are non-porous). Specialized solvent-based or UV-curable inks are required.
Benefits:
- Good for small quantities: Inkjet printing is feasible for very small print runs, even just a few mailers.
- Fast turnaround times: Digital printing is generally quick, as there are no plates or screens to create.
- Relatively inexpensive for low volumes: The per-unit cost can be higher than other methods, but the lack of setup costs makes it economical for small batches.
- Variable data printing: Inkjet allows for variable data printing, meaning each mailer can have a different design, address, or personalized message. This is useful for targeted marketing campaigns or customized packaging.
- Good for prototyping: Allows for quickly and easily testing different designs before committing to a large print run.
Limitations:
- Lower print quality: Compared to other methods like screen printing or flexography, inkjet printing may have slightly lower print quality, especially for very fine details, small text and large, solid areas of color.
- Can be expensive for larger quantities: The per-unit cost can become less competitive as the quantity increases.
- Ink durability: While solvent-based inks are waterproof, they may not be as durable or scratch-resistant as some other printing methods.
When to use:
- Ideal for small businesses, individuals, or startups needing a small number of custom mailers quickly.
- Good for special events, limited product launches, or personalized gifts.
- Suitable for testing designs before committing to a large print run with a different method.
- Frequent design changes and low volume needs.
Inkjet printing is a great option for prototypes, small runs, or when you need to personalize each mailer.
4.2 Screen printing: Durable prints for simple, bold designs
Description: Screen printing is a traditional printing method that has been used for centuries. It involves creating a stencil (the “screen”) on a fine mesh stretched over a frame. Ink is then forced through the open areas of the stencil onto the poly mailer. A separate screen is required for each color in the design, making it more suitable for designs with limited colors.
Benefits:
- Durable and long-lasting prints: Screen-printed inks are typically thick and adhere well to the poly mailer surface, making them resistant to scratching, fading and wear.
- Good for bold, simple designs: Screen printing excels at reproducing solid colors and bold graphic elements.
- Cost-effective for larger quantities: Once the screens are made, the per-unit cost of screen printing decreases significantly with larger print runs.
- Reusable screens: The screens can be cleaned and reused for future print runs of the same design, making it a cost-effective option for repeat orders.
- Versatile: Can be used on various poly mailer sizes and thicknesses.
Limitations:
- Not ideal for complex designs: Screen printing is not well-suited for designs with gradients, fine details, or photographic images.
- Limited to a small number of colors: Typically 1-3 colors are most practical and cost-effective. Each additional color requires a new screen, increasing setup costs and complexity.
- Setup costs: Creating the screens can be relatively expensive, making it less economical for small print runs.
- Slower turnaround time: Than inkjet printing, due to the setup and manual printing process.
- Requires manual effort and prepress work.
When to use:
- Best for simple designs with one, two, or a limited number of solid colors.
- Ideal for printing logos, taglines and bold graphic elements.
- Suitable for larger print runs where the setup cost is justified.
- Similar artwork like logos and taglines used repeatedly.
Screen printing is a classic and reliable choice for bold, simple designs that need to be durable and long-lasting.
4.3 Flexographic printing: High-volume, high-speed and cost-effective
Description: Flexographic printing (often called “flexo”) is a high-speed printing process that uses flexible relief plates, similar to rubber stamps, mounted on rotating cylinders. The raised areas of the plate pick up ink and transfer it to the poly mailer material. Flexo is widely used for large-scale printing on packaging materials, including poly mailers, labels and flexible films. It’s often combined with inline processes like cutting, creasing and sealing.
Benefits:
- Very fast printing speeds: Flexo presses can print thousands of mailers per hour, making it highly efficient for large volumes.
- Cost-effective for very large quantities: The per-unit cost is very low for large print runs, due to the speed and efficiency of the process.
- Good for printing on a wide range of materials: Including different thicknesses of poly mailers and other flexible substrates.
- Can achieve good print quality: With solid colors and some halftones (images with shades of color created by tiny dots).
- Can be combined with heat sealing: In the same process, streamlining production.
- Compatible with water-based inks
- Can achieve HD prints with UVC inks.
Limitations:
- High setup costs: Creating the flexible plates is a significant upfront investment, making it uneconomical for small quantities.
- Not ideal for small quantities or designs with frequent changes: The cost and time involved in making new plates make it impractical for short runs or designs that need to be updated frequently.
- Less precise: Than some other methods for very fine details or complex gradients.
- Typically limited to a few colors: Often 3 or fewer, although more colors are possible with additional print stations.
- Requires setup, tooling and plate making
When to use:
- Best for large businesses, organizations, or e-commerce companies that need to print thousands of poly mailers with the same design.
- Ideal for high-volume production where speed and cost-effectiveness are paramount.
- Solid colors over large surfaces.
Flexographic printing is the workhorse of the packaging industry. It’s incredibly efficient and cost-effective for large-scale printing, but the high setup costs make it unsuitable for small runs or frequent design changes.
4.4 Offset printing: High-quality for large quantities (often with labels)
Description: Offset printing (also called offset lithography) is a widely used printing technique known for its high quality and versatility. It’s an indirect printing process, meaning the ink is not transferred directly from the plate to the printing surface. Instead, the inked image is first transferred (offset) from a metal plate to a rubber blanket and then from the blanket to the poly mailer (or, more commonly, to a label that is then applied to the mailer).
Benefits:
- Excellent print quality: Offset printing produces sharp, clear images with fine details, accurate colors and smooth gradients.
- Cost-effective for large quantities: Once the printing plates are made, the per-unit cost of offset printing decreases significantly with larger print runs.
- Versatile: Can print on a wide range of materials, including paper, cardstock and some plastics (though for poly mailers, it’s often used for printing labels that are then applied).
Limitations:
- High setup costs: Creating the metal printing plates is a significant upfront investment, making it uneconomical for small quantities.
- Not economical for small quantities or designs with frequent changes: The cost and time involved in making new plates make it impractical for short runs or designs that need to be updated frequently.
- May not be as readily available for printing as other methods (like flexography or screen printing). It’s more commonly used for printing labels or sheets of material that are then converted into mailers.
When to use:
- Best for large print runs where high image quality is essential (e.g., detailed photographs, intricate designs, precise color matching, or small, crisp text).
- Often used for printing high-quality labels that are then applied to poly mailers, rather than printing directly onto the mailer itself.
- Large volume printing where satisfactory image quality is acceptable
Offset printing is a great choice for large quantities where excellent print quality is a top priority, but the setup costs make it unsuitable for small runs.
4.5 Rotogravure printing: Top-tier quality for massive runs (rare for poly mailers)
Description: Rotogravure printing (often called gravure) is a high-quality, high-speed printing process that uses engraved copper cylinders to transfer ink to the printing surface. The image is etched or engraved onto the surface of the cylinder and the recessed areas hold the ink. A rotary press is used to print the image onto the substrate (in this case, potentially poly mailer material).
Benefits:
- Exceptional print quality: Rotogravure is known for producing the highest quality print results of all the methods discussed. It can reproduce very fine details, smooth gradients and vibrant, saturated colors with exceptional clarity and consistency.
- Very durable prints: The ink used in rotogravure printing is typically very durable and resistant to fading, scratching and wear.
- Very high printing speeds: Rotogravure presses can print at incredibly high speeds, making it efficient for extremely large print runs.
- Cost-effective for extremely large quantities: The per-unit cost is very low for massive print runs (millions of impressions), due to the speed and efficiency of the process.
- Prints on various thicknesses.
- Consistent quality over long runs.
Limitations:
- Very high setup costs: Engraving the copper cylinders is a complex and expensive process, making it completely uneconomical for small or even medium print runs.
- Long lead times: The process of creating the cylinders and setting up the press takes time.
- Typically not used for poly mailers directly: Due to the very high setup costs and the nature of the material, rotogravure is rarely used for direct printing on poly mailers. It’s more commonly used for high-volume printing of flexible packaging materials (like food wrappers or labels) that require exceptional print quality.
When to use:
- Best for very large corporations or organizations that need to print millions of identical items (e.g., packaging for mass-produced consumer goods) and require the absolute highest print quality.
- Almost never used for direct printing on poly mailers.
Rotogravure printing is the gold standard for image quality, but it’s only cost-effective for enormous print runs and is rarely used directly on poly mailers.
5. Designing your poly mailer: Creating a visual impact that represents your brand
With a printing method chosen, it’s time to focus on the design itself. Your poly mailer’s design should be visually appealing, brand-consistent and effectively communicate your message.
5.1 Choosing the right design tools: Software and online platforms
You have several options for creating your poly mailer design, depending on your design skills, budget and desired level of customization:
Professional graphic design software:
- Adobe Illustrator: The industry-standard vector graphics editor. Ideal for creating logos, illustrations and scalable designs that can be resized without losing quality. It offers the most control and flexibility but has a steep learning curve.
- Adobe Photoshop: Primarily a raster graphics editor (for editing photos), but can also be used for creating designs. Best for incorporating photographic images into your mailer design.
- Adobe InDesign: Primarily for page layout and desktop publishing, but can be used for creating print-ready files for packaging designs.
These professional tools offer the most power and flexibility, but they require a paid subscription and significant design expertise.
Online design tools:
- Canva: A user-friendly, web-based design platform with a drag-and-drop interface and a vast library of templates, fonts, icons and stock photos. Offers both free and paid plans (with more features and assets in the paid plans). Excellent for beginners and those with limited design experience.
- Adobe Express: A simplified version of Adobe’s professional design tools, offering a more user-friendly interface and templates. Also has free and paid options.
- Sticker Mule Studio: A design tool specifically focused on creating custom packaging and labels. Offers templates and tools tailored to packaging design.
- Placeit: A design tool that allows users to create mockups.
These online tools are generally much easier to use than professional software and many offer free plans or affordable subscriptions. They are a great option for beginners, small businesses, or anyone who needs to create designs quickly and easily.
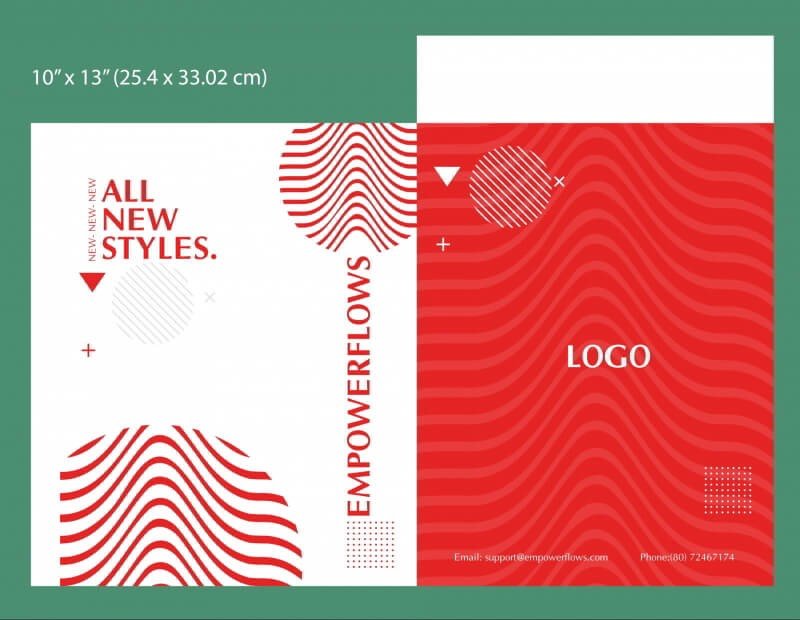
5.2 Working with templates: Ensuring correct sizing and placement
Whenever possible, use pre-designed templates provided by your chosen printing company or online design tool. Templates are incredibly helpful because they:
- Ensure correct sizing: The template will be pre-set to the exact dimensions of the poly mailer you’ve selected, preventing any sizing errors.
- Show print specifications: Templates typically include guides for bleed, trim lines and safe areas, which are crucial for ensuring your design prints correctly (explained in detail below).
- Simplify the design process: Templates provide a starting point, making it easier to arrange your design elements and ensure proper placement.
5.3 Key design elements: Logo, colors, fonts and imagery
Here’s how to effectively incorporate key design elements into your poly mailer:
Logo: Your logo is the most important visual element of your brand identity.
- Place it prominently on the mailer.
- Ensure it’s large enough to be easily recognizable.
- Use a high-resolution version of your logo (preferably a vector file) to avoid any pixelation or blurriness.
- Consider the placement in relation to other design elements – don’t overcrowd it.
Brand colors: Use your brand’s established color palette consistently throughout your poly mailer design. This reinforces brand recognition and creates a cohesive look.
- Choose colors that are visually appealing and work well together.
- Ensure sufficient contrast between text and background colors for readability.
- Consider the psychology of color and how different colors evoke different emotions and associations.
Fonts: Choose legible fonts that are consistent with your brand’s overall aesthetic and easy to read, even at small sizes.
- Avoid using too many different fonts (usually 2-3 fonts maximum is a good guideline).
- Select fonts that are appropriate for your brand’s personality (e.g., a modern, minimalist font for a tech company, a playful, handwritten font for a children’s brand).
Imagery (optional): If you choose to use images (photographs or illustrations), make sure they are:
- High-quality: Use high-resolution images that won’t appear blurry or pixelated when printed.
- Relevant: Choose images that relate to your brand, product, or message.
- Don’t overcrowd the design: Keep the overall design clean and uncluttered. Use imagery strategically to enhance, not overwhelm, the message.
5.4 Understanding print specifications: Bleed, trim and safe area
These are crucial concepts in print design and understanding them is essential for ensuring your poly mailer design prints correctly:
- Bleed: The bleed is an area of the design that extends beyond the trim line (the final edge of the mailer). It’s essentially extra background area that will be trimmed off after printing. The purpose of the bleed is to prevent any unprinted white edges from appearing on the finished mailer if the cutting is slightly off. A typical bleed is 0.125 inches (1/8 inch) on all sides, but this can vary depending on the printer, so always check their specific requirements.
- Trim line: The trim line is the intended final size of the mailer after cutting. This is where the mailer will be cut.
- Safe area: The safe area is an area inside the trim line. All important design elements (text, logos, critical parts of images) must be placed within the safe area to ensure they are not cut off during the trimming process. A typical safe area might be 0.125 inches or 0.25 inches inside the trim line.
Templates provided by printing companies usually clearly indicate the bleed, trim line and safe area. Always keep critical elements within the safe area to avoid them being trimmed off or appearing on an unprinted white border.
5.5 File format and resolution: Preparing your artwork for printing
To ensure your design prints clearly and accurately, you need to prepare your artwork file correctly:
Vector graphics (recommended for logos and text):
- What they are: Vector graphics are made up of mathematical equations that define lines, curves and shapes. This means they can be scaled infinitely (made larger or smaller) without losing quality.
- File formats: Common vector file formats include: .AI (Adobe Illustrator), .EPS (Encapsulated PostScript), .PDF (Portable Document Format) – Note: PDFs can contain both vector and raster elements, so make sure your PDF is saved as a vector file if your design is vector-based.
- Why they’re preferred: Vector graphics are ideal for logos, text and illustrations because they will always print sharply, regardless of the size.
Raster graphics (for photographs):
- What they are: Raster graphics (also called bitmap images) are made up of a grid of tiny squares called pixels. Photographs are raster images.
- File formats: Common raster file formats include: .JPG (Joint Photographic Experts Group), .PNG (Portable Network Graphics), .TIFF (Tagged Image File Format)
- Resolution is crucial: The quality of a raster image depends on its resolution, measured in DPI (dots per inch) or PPI (pixels per inch). For print, you generally need a resolution of at least 300 DPI at the final print size. A low-resolution image will appear blurry or pixelated when printed.
Color mode:
- CMYK (cyan, magenta, yellow, black): This is the standard color model for print. Printers use these four ink colors to create a wide range of colors.
- RGB (red, green, blue): This is the standard color model for screens (computer monitors, phones, etc.).
Always design your poly mailer in CMYK color mode. If you design in RGB, the colors may look different when printed.
5.6 Finalizing your design: Proofreading and saving
Before you send your design to the printer, take these final steps:
- Proofread carefully: Check for any typos, errors, or inconsistencies in your text.
- Get feedback: Ask others to review your design for any potential issues or areas for improvement.
- Outline text: In vector graphics software (like Adobe Illustrator), convert all text to outlines (also called “creating outlines” or “converting to curves”). This turns the text into shapes, preventing any font substitution issues if the printer doesn’t have the specific fonts you used.
- Save a copy in the correct file format as required by your printer.
6. Choosing a printing service and placing your order
6.1 Researching and selecting a printer: Key considerations
Once your design is finalized, you’ll need to choose a printing company. Here are key factors to consider:
Print quality:
- Look for reviews or testimonials about the printer’s quality.
- If possible, request samples of their work, preferably on poly mailers or similar materials.
- Ask about their printing equipment and processes.
Pricing:
- Get quotes from multiple printers to compare prices.
- Consider the cost per unit, setup fees (if any) and shipping costs.
- Be aware of minimum order quantities (MOQs).
Minimum order quantities (MOQs):
- Some printers have high MOQs, which might not be suitable for small businesses or individuals.
- Look for printers that offer low MOQs or no minimums if you only need a small quantity.
Turnaround time:
- How long will it take to receive your finished mailers after placing the order?
- Consider both production time (the time it takes to print the mailers) and shipping time.
- Ask about expedited options if you need the mailers quickly.
Customer service:
- Look for a printer that is responsive, helpful and provides good customer support.
- Read reviews to gauge their customer service reputation.
Material options:
- Ensure the printer offers the specific poly mailer materials, sizes and finishes (e.g., matte, glossy) that you need.
- If sustainability is a priority, ask about recycled poly mailer options and eco-friendly inks.
Sustainability practices:
- If important to you, inquire about the printer’s environmental practices.
- Do they use eco-friendly inks?
- Do they offer recycled or sustainable materials?
- Are they committed to reducing waste?
6.2 Getting a proof: Ensuring accuracy before production
Before your entire order is printed, it’s crucial to request and carefully review a proof. A proof is a sample of your design, either digital or physical, that allows you to check for any errors and ensure everything looks as expected.
Digital proof: This is usually a PDF file that shows how your design will look when printed, including the bleed, trim lines and safe area. Review it carefully for:
- Typos and errors: Check all text for accuracy.
- Color accuracy: Make sure the colors look as you intended (keeping in mind that colors can appear differently on screen versus in print).
- Placement of elements: Verify that all design elements are correctly positioned and within the safe area.
Physical proof: This is an actual printed sample of your poly mailer. It’s the most accurate way to check the print quality, color reproduction and overall appearance. Physical proofs may cost extra, but they are highly recommended for large or complex orders, or if color accuracy is critical.
Never approve a proof until you are completely satisfied that everything is correct. This is your last chance to catch any mistakes before the full print run.
6.3 Placing your order and production time: Final steps
Once you’ve thoroughly reviewed and approved the proof, you can place your order with the printing company.
- Confirm the final price: Make sure you understand all costs, including any setup fees, material costs, printing costs and shipping charges.
- Confirm the estimated production time: How long will it take for the printer to produce your mailers?
- Confirm the shipping time: How long will it take for the finished mailers to be shipped to you?
- Get a clear understanding of the total turnaround time: From order placement to delivery.
7. Packlove – Providing service for poly mailer and packaging
Packlove specializes in providing high-quality packaging solutions for the garment industry, including a wide range of poly mailers in various sizes and styles, processing labels, tags, zipper bags.
With more than 8 years of experience in the industry, particularly in working with clothing brands, we understand the importance of impactful and functional packaging. We can guide you through the entire process of creating custom-printed poly mailers, from design assistance to material selection and printing.
We offer:
- Competitive pricing
- High-quality printing
- Fast turnaround times
- Low minimum order quantities (for many products)
- Eco-friendly options (recycled poly mailers, sustainable inks)
- Design assistance
Contact us today for a free consultation and quote on your custom poly mailer project! Let us help you create packaging that makes a lasting impression. Visit our website at Packlove.
Read more:
Custom poly mailers offer a powerful way to elevate your brand and enhance the customer experience. They move beyond mere function, becoming integral to your branding and marketing. By thoughtfully designing your mailers, choosing the right printing method and understanding key print specifications, you create a positive first impression and reinforce brand recognition.
Don’t underestimate the impact of packaging! Invest in custom-designed poly mailers to differentiate your brand, communicate your values and build customer loyalty. Start designing your custom mailers today and transform your shipments into memorable brand experiences.


