


How to Sew a Patch on a Hat: A Step-by-Step Guide


Adding a patch to your favorite hat is a simple yet effective way to personalize your style, repair damage, or add a unique touch. Whether you’re looking to mend a tear, express your personality, or simply refresh an old favorite, sewing on a patch offers a rewarding and customizable solution. This comprehensive guide provides step-by-step instructions, covering everything from gathering the necessary supplies to mastering various stitching techniques. Whether you’re a seasoned sewer or just starting out, this guide will equip you with the knowledge and skills to achieve a professional-looking result and proudly display your personalized headwear.
1. Gathering your supplies for patch sewing
1.1 Essential materials for hand sewing
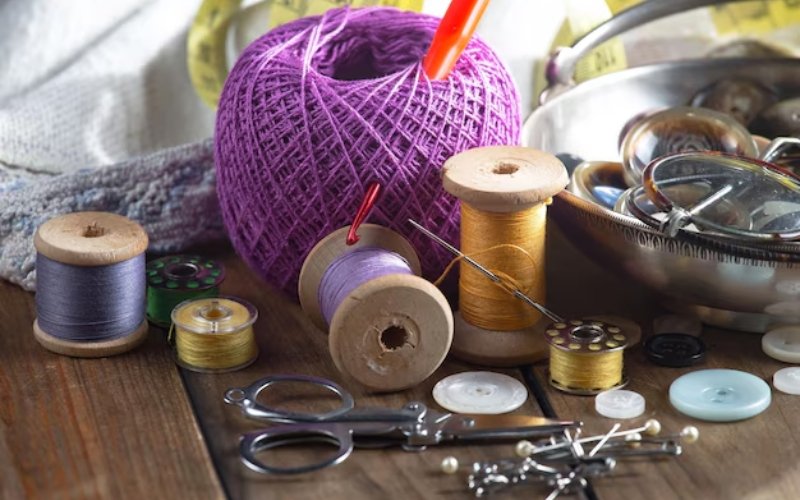
Before you begin sewing a patch onto your hat, gather a few essential supplies. You’ll need a sewing needle (size 10 is generally recommended), thread that complements both your patch and hat fabric, sharp scissors for trimming excess thread, a thimble to protect your finger while sewing, the patch you’re attaching, and the hat itself. Having these basic tools readily available ensures a smooth and efficient patching process. Choosing a thread color that blends well with both the patch and the hat creates a more polished and professional finish. These basic materials form the foundation for a successful patch application.
1.2 Optional materials for enhanced hand sewing
While the essential materials are sufficient for basic patch application, a few optional items can enhance the process and add a touch of personalization. Embroidery floss offers a thicker, more decorative stitching option compared to standard thread. A curved needle proves invaluable for navigating curved seams or hard-to-reach areas on the hat.
Fabric glue provides a temporary hold, securing the patch in place before you begin sewing, preventing shifting and ensuring accurate placement. Pins are helpful for complex designs or larger patches, keeping the patch aligned and preventing wrinkles during stitching. These optional tools, while not essential, can significantly improve the ease and precision of your patch sewing project.
1.3 Materials for machine sewing a patch
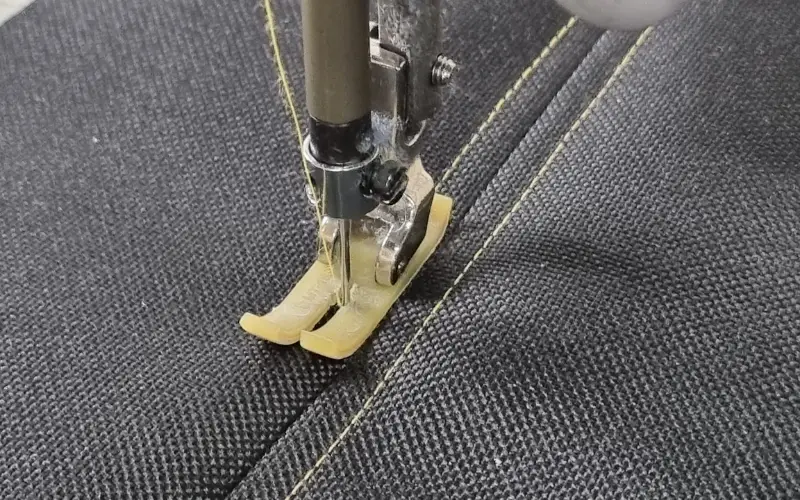
Machine sewing offers a faster alternative for attaching patches to hats. Ensure your sewing machine is equipped with a heavy-duty needle, particularly if working with thicker fabrics like denim or canvas. An open-toe foot provides better visibility of the stitching area, enhancing precision.
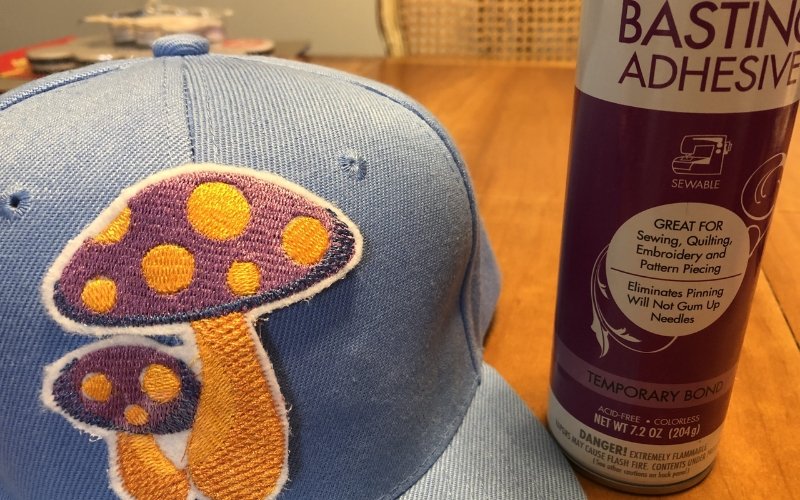
To prevent the patch from shifting during machine stitching, use either spray adhesive or double-sided tape to secure it firmly in place. These adhesives provide a temporary bond that holds the patch steady while the machine stitches it to the hat, ensuring accurate placement and a clean, even stitch line. Preparing your machine and materials correctly streamlines the process and contributes to a professional-looking result.
2. Preparing your hat and patch
2.1 Choosing the perfect patch placement
Thoughtful patch placement is crucial for a polished and professional finish. Before you begin sewing, take a moment to consider the hat’s style, the patch’s size and design elements, and the overall aesthetic you want to achieve. Different hat styles lend themselves to different patch placements.
A baseball cap, for example, might look best with a patch on the front, side, or back, while a beanie might suit a patch on the front or side. Use a mirror to visualize the patch in different positions and ensure a balanced and symmetrical look, if desired.
Consider the patch’s design and how it interacts with the hat’s existing features, such as logos or seams. Careful planning and visualization ensure the patch complements the hat’s style and creates a visually appealing final product.
2.2 Securing the patch before sewing
After determining the ideal patch placement, secure the patch temporarily to prevent shifting during sewing. Fabric glue offers a convenient solution, providing a temporary bond that holds the patch in place. Ensure the glue dries completely before you begin stitching to avoid gumming up your needle or creating a messy finish.
For thicker fabrics or intricate placements where precise alignment is crucial, pins offer a more secure and adjustable temporary hold. Pins allow you to reposition the patch if needed and ensure accurate placement before committing to permanent stitching. Securing the patch beforehand, whether with glue or pins, simplifies the sewing process and ensures a clean, even result.
3. Hand-Sewing a patch onto a hat: A step-by-step guide
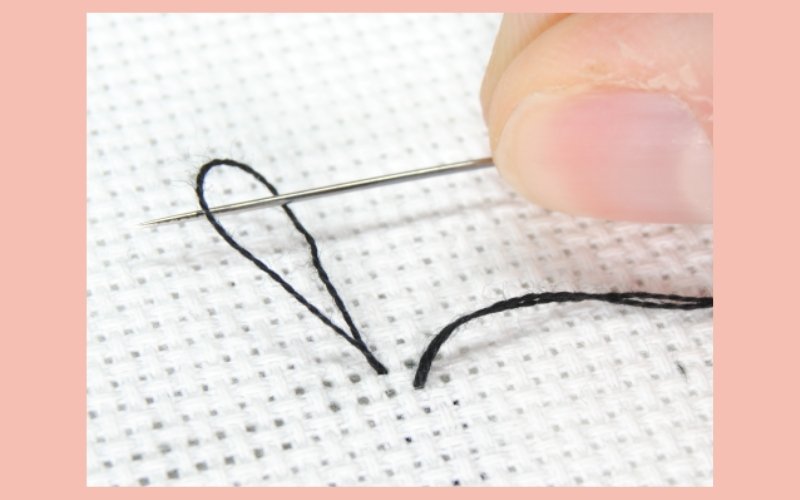
3.1 Threading the needle and starting your stitch
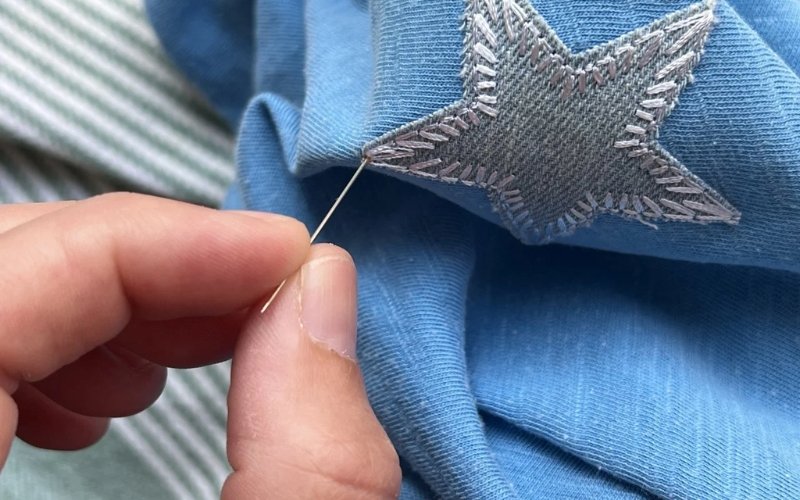
With your patch securely positioned, thread your needle with a length of thread suitable for the patch’s size (approximately 24 inches is a good starting point). Tie a knot at the end of the thread to secure it. Begin stitching from the inside of the hat, pushing the needle up through both the hat fabric and the patch material.
Once the needle and thread have emerged on the front side, create a backstitch to anchor the thread and prevent it from unraveling. This initial stitch forms the foundation for the rest of your sewing and ensures a secure attachment. Starting from the inside of the hat creates a cleaner finish, concealing the knot and ensuring the visible stitching is neat and uniform.
3.2 Sewing around the patch: techniques and tips
Several stitching techniques work well for attaching patches to hats, each offering a different look and level of durability. The whipstitch, a simple yet effective method, involves passing the needle over the edge of the patch and through the hat fabric, creating a series of diagonal stitches that resemble a braided rope.
The blanket stitch, slightly more decorative, provides a more pronounced border and added durability. This stitch involves looping the needle over the edge of the patch, creating a series of overlapping stitches that resemble a blanket’s edge.
For a less visible stitch, the running stitch, a simple straight stitch, can be used. Regardless of your chosen stitch type, maintaining even stitch length and tension throughout the process creates a professional and polished finish. Consistency in your stitching enhances the patch’s appearance and ensures a secure attachment.
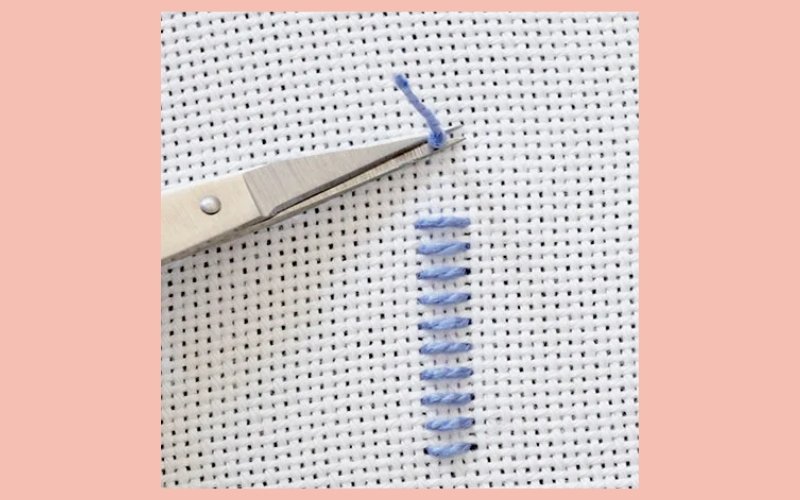
3.3 Finishing the hand-sewn patch
After completing the stitching around the entire perimeter of the patch, securely fasten the thread on the inside of the hat. Create a knot close to the fabric, ensuring it’s tight and won’t unravel. For added security, you can create a second knot adjacent to the first.
Once the thread is securely knotted, trim any excess thread close to the knot, being careful not to cut the knot itself or any of the surrounding stitches. Trimming the excess thread creates a clean finish and prevents loose threads from catching or becoming unsightly. This final step completes the patch application process, leaving you with a securely attached and professionally finished patch on your hat.
4. Machine-sewing a patch onto a hat (Optional)
4.1 Setting up your sewing machine for patch application
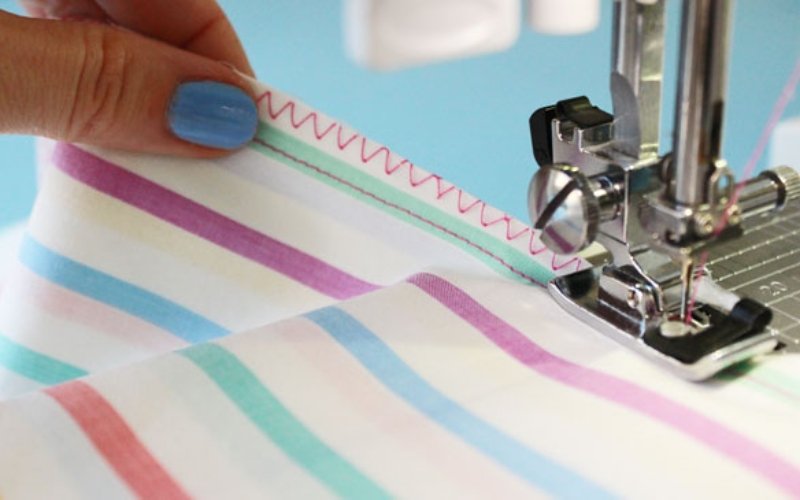
Before using a sewing machine for patch application, configuring the machine correctly ensures optimal results. Select a stitch type appropriate for attaching patches; a straight stitch provides a clean, basic seam, while a zigzag stitch offers added durability and flexibility, especially for heavier fabrics or patches with intricate edges.
Adjust the stitch length and thread tension according to your fabric type and thread weight. A shorter stitch length creates a tighter, more secure seam, while a longer stitch length provides more flexibility. Proper thread tension prevents the thread from bunching or breaking, ensuring a smooth and even stitch.
Selecting the correct needle type is also important; a heavy-duty needle is recommended for thicker fabrics like denim or canvas. Testing your stitch settings on a scrap piece of fabric before sewing on the patch allows you to fine-tune the settings and achieve the desired stitch quality.
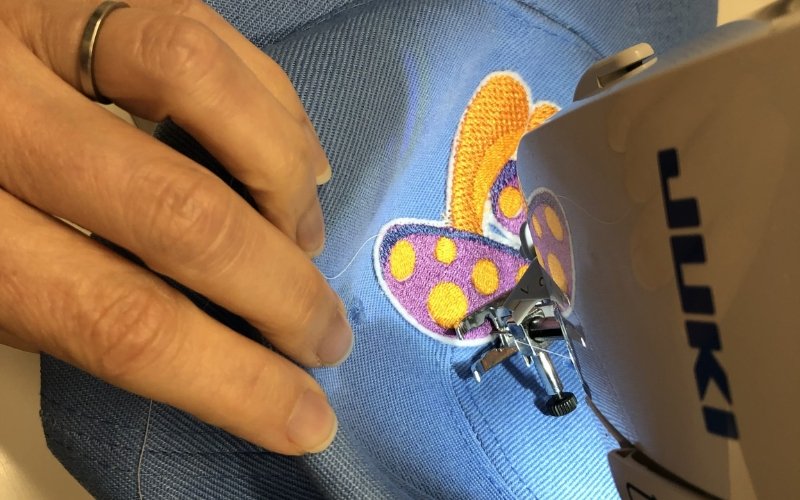
4.2 Machine sewing the patch: A step-by-step process
With your sewing machine properly configured and the patch securely adhered to the hat, begin sewing around the patch’s perimeter. If using a straight stitch, maintain a consistent distance from the edge of the patch, creating a clean, even seam.
For added durability, use a zigzag stitch, allowing the edges of the stitch to overlap the edge of the patch. Backstitching at the beginning and end of your seam reinforces the stitching and prevents unraveling. Maintain a steady but controlled sewing speed, allowing the machine to feed the fabric smoothly.
Avoid sewing too quickly, as this can lead to uneven stitches or fabric bunching. Careful and controlled stitching ensures a professional-looking result and a securely attached patch.
4.3 Finishing touches for machine-sewn patches
Once you’ve finished machine stitching the patch, trim any loose threads close to the fabric, ensuring a neat and polished appearance. Secure the stitches by tying off the thread ends or using a locking stitch function if your machine has one.
If you used adhesive to secure the patch before sewing, carefully remove any remaining residue. Depending on the adhesive type, you might be able to peel it away or use a gentle adhesive remover, always testing on an inconspicuous area first. These final touches complete the patch application process, leaving you with a securely attached and professionally finished patch on your hat.
5. Final touches and care tips
5.1 Inspecting your finished work
After completing the patch application, carefully inspect your finished work to ensure a high-quality result. Check for any loose threads that might need trimming or re-securing. Examine the stitching around the entire perimeter of the patch, looking for any gaps or uneven stitches that might weaken the attachment.
Addressing these minor imperfections ensures the patch remains securely affixed and maintains a professional appearance over time. This final quality control check guarantees the longevity of your handiwork and the pristine appearance of your personalized hat.
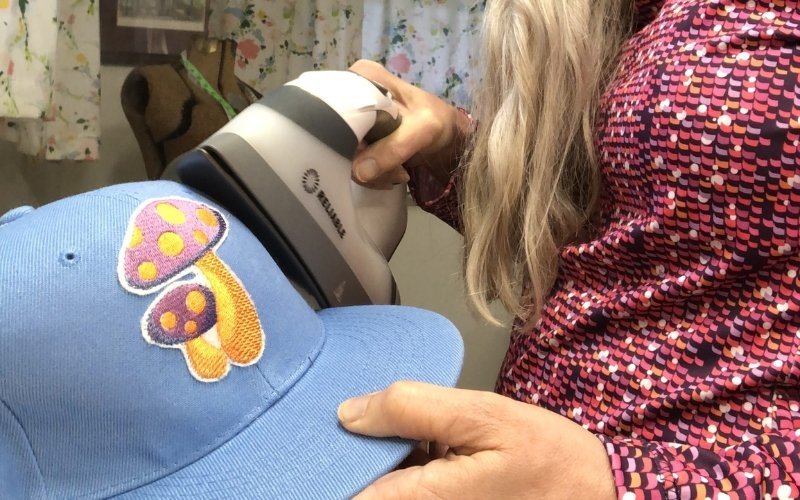
5.2 Ironing and maintaining your patched hat
If your hat became wrinkled during the patch application process, carefully use a steam iron to restore its original shape. Pay close attention to the hat’s fabric type and adjust the iron’s temperature accordingly to avoid scorching or damage.
For delicate fabrics, using a pressing cloth between the iron and the hat provides an extra layer of protection. Regularly cleaning your patched hat, following the manufacturer’s care instructions, helps maintain its appearance and prolong the life of the patch.
Avoid harsh scrubbing or abrasive cleaners that could damage the patch or the surrounding fabric. Proper care and maintenance ensure your personalized hat remains a cherished accessory for years to come.
6. FAQs about sewing patches onto hats
6.1 What type of needle is best for sewing a patch onto a hat?
A size 10 needle is generally suitable for most fabrics. For thicker materials like denim or leather, use a heavier needle.
6.2 How do I prevent the patch from puckering when sewing?
Ensure proper tension and secure the patch firmly before and during sewing.
6.3 Can I sew a patch onto a leather or suede hat?
Yes, but use a leather needle and strong thread designed for leather.
6.4 What if my hat is curved? How do I sew a patch onto a curved surface?
Use a curved needle and smaller stitches. Clip curves as needed.
6.5 What kind of thread should I use for sewing a patch onto a hat?
All-purpose thread usually works well. For extra durability or decorative effects, use heavier thread or embroidery floss.
7. MyPackLove – Providing services for custom patches and printing
mypacklove.com offers high-quality custom patch creation and printing services. We specialize in creating unique, personalized patches, including embroidered patches, woven labels, and more. Visit our website today to explore our customization options and bring your patch ideas to life! Contact us at [email protected] or 928-351-9531.
Read more:
- Are poly mailers recyclable? A complete guide
- Shipping with poly mailers: Guide to sizes, types & benefits
- How to make custom poly mailers: Design, print & order
- Best poly mailers for Poshmark: Size, tips and where to buy
Sewing a patch onto a hat is a rewarding and accessible way to personalize your style. With a little practice and patience, you can confidently add patches to any type of hat. Explore My Pack Love for more inspiration and discover our range of custom patch options to make your headwear truly unique!


