


How to Iron Different Fabrics: Settings & Tips Guide

11 April, 2025
Ironing can seem like a chore, and the fear of damaging clothes is real. Different fabrics react differently to heat, and using the wrong setting can lead to irreversible damage, from unsightly scorch marks to melted fibers. Achieving perfectly pressed clothes isn’t just about removing wrinkles; it’s about garment care.
This article provides the core knowledge to confidently iron various fabrics. Readers will gain a detailed understanding of iron settings, preparation techniques, and fabric-specific methods, ensuring their clothes stay in pristine condition.
1. Understanding Your Iron and Ironing Tools
Choosing the right tools and understanding how they work is the foundation of successful ironing. It’s not just about applying heat; it’s about applying the right heat in the right way.
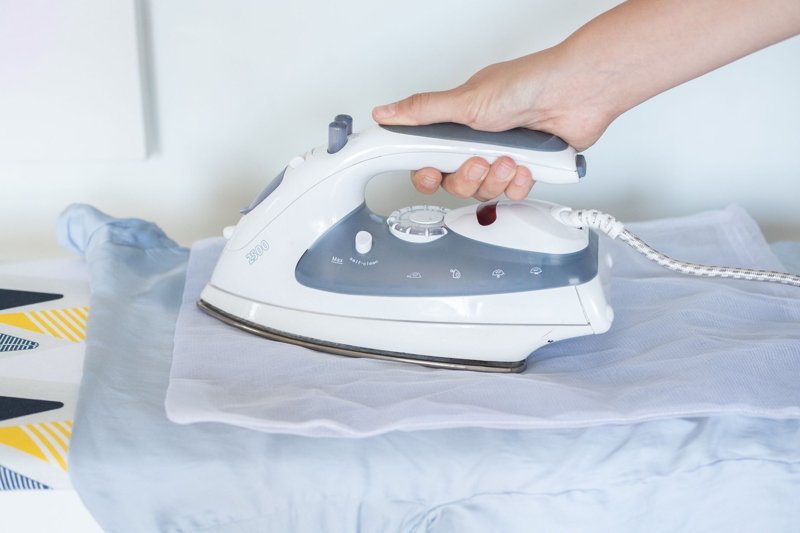
1.1 Types of Irons: Dry vs. Steam
Irons come in two main varieties: dry and steam. Dry ironing uses heat alone to relax fabric fibers. These are perfect for delicate materials. Steam ironing, on the other hand, incorporates moisture. The steam penetrates the fabric, making it more pliable and speeding up wrinkle removal. Steam is beneficial for tougher fabrics. Steam has the advantage on more substantial materials like cotton and linen, while dry ironing is safe for delicate fabrics.
1.2 Key Iron Features and Settings
Modern irons offer a range of features. The temperature dial is crucial, usually marked with fabric types or numbered settings. Match this setting to the garment’s care label. Steam control lets you adjust the amount of steam or turn it off completely.
The soleplate, the iron’s flat bottom, comes in various materials (aluminum, ceramic, stainless steel) affecting heat distribution and glide. Auto shut-off is a vital safety feature, turning off the iron if left unattended. These settings impact how fabrics respond to heat. Lower temperatures are for delicate items.
1.3 Essential Ironing Tools
Beyond the iron, several tools enhance the process:
- Ironing board: Provides a stable, heat-resistant surface.
- Pressing cloth: A piece of fabric (usually cotton or muslin) placed between the iron and the garment to prevent scorching and shine, especially on delicate fabrics.
- Spray bottle: Used to lightly dampen fabrics, making wrinkle removal easier.
- Distilled water: Using distilled water in steam irons is critical. Tap water contains minerals that can build up inside the iron, blocking steam vents and potentially spitting onto clothes.
- Starch: Optional, but starch adds crispness and helps clothes resist wrinkles.

2. Preparing to Iron: Essential Steps
Proper preparation is key to efficient and damage-free ironing. It’s not just about plugging in the iron; it’s about setting the stage for success.
2.1 Reading Fabric Care Labels
The garment care label is your first point of reference. It provides vital ironing instructions, often using universal ironing symbols. These symbols indicate whether an item can be ironed, the recommended temperature (low heat, medium heat, high heat), and whether to use steam or dry clean only. Ignoring these instructions risks damaging the garment. A crossed-out iron means “do not iron.”
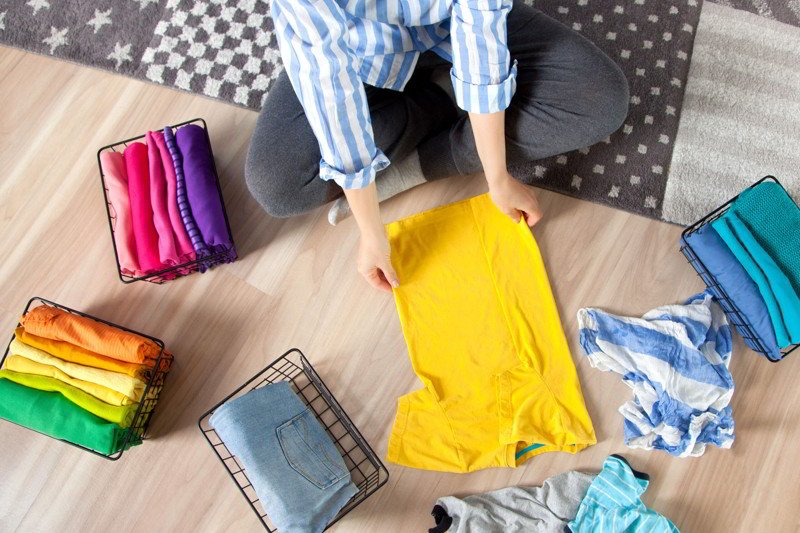
2.2 Sorting Clothes by Fabric Type
Sorting laundry before ironing is crucial. Different fabric types require different ironing temperatures. Ironing everything at the same setting is a recipe for disaster. Start with items needing low heat (synthetics like nylon and acetate) and gradually work up to those requiring high heat (linen and cotton). This prevents damage from exposing delicate fabrics to excessive heat and avoids scorching.
2.3 Pre-treating Stains and Preparing Garments
Always iron clean clothes. Ironing over stains can bake them into the fabric, making them permanent. For effective wrinkle removal, many fabrics benefit from being slightly damp. Use a spray bottle to lightly mist the garment before ironing. However, avoid over-wetting, and never dampen fabrics that are prone to water spots (like silk).
3. Ironing Techniques for Different Fabrics: A Detailed Guide
This section provides specific instructions for ironing a variety of common fabrics. Each fabric has unique properties that require a tailored approach. Consistency is key, so a standard format is beneficial.
3.1 Cotton
- Recommended Iron Setting: High heat (400°F/204°C)
- Steam: Yes
- Pressing Cloth: Recommended for dark colors
- Specific Instructions:
- Lightly dampen the cotton garment with a spray bottle or use the steam function on your iron.
- For dark-colored cotton, turn the garment inside out to prevent shine marks.
- Iron in long, smooth strokes, following the grain of the fabric.
- Apply firm pressure.
- Tips & Tricks: Cotton can withstand high heat, making it relatively easy to iron. Stubborn wrinkles may require extra steam or a second pass.
3.2 Linen
- Recommended Iron Setting: High heat (445°F/230°C)
- Steam: Yes
- Pressing Cloth: Recommended for dark colors
- Specific Instructions:
- Iron linen while it’s still damp. Use a spray bottle if needed.
- Turn dark-colored linen garments inside out to prevent shine.
- Use a firm, consistent pressure.
- Iron until the fabric is smooth but not completely dry. Allowing linen to air dry slightly helps prevent stiffness.
- Tips & Tricks: Linen wrinkles easily, so don’t be afraid to use plenty of steam and high heat.
3.3 Silk
- Recommended Iron Setting: Low heat (300°F/148°C)
- Steam: No
- Pressing Cloth: Yes
- Specific Instructions:
- Iron silk inside out.
- The fabric should be completely dry. Avoid using steam, as it can cause water spots.
- Place a pressing cloth between the iron and the silk.
- Use gentle, even pressure. Avoid letting the iron sit in one place for too long.
- Iron in the direction of the grain.
- Tips & Tricks: Silk is very delicate. Always test a hidden area first. If the fabric puckers or shrinks, lower the heat further.
3.4 Wool
- Recommended Iron Setting: Medium heat (300°F/148°C)
- Steam: Yes
- Pressing Cloth: Yes
- Specific Instructions:
- Turn the wool garment inside out.
- Place a damp pressing cloth between the iron and the wool. This is crucial to prevent shine and scorching.
- Use the steam setting on your iron.
- Press the iron down firmly, then lift and move to the next section. Avoid sliding the iron back and forth, which can stretch the fabric.
- Tips & Tricks: Never iron wool directly. The pressing cloth and steam are essential.
3.5 Polyester
- Recommended Iron Setting: Low to medium heat (300°F/148°C)
- Steam: Optional, or light steam
- Pressing Cloth: Recommended
- Specific Instructions:
- Turn the polyester garment inside out.
- A pressing cloth is recommended.
- Use a low to medium heat setting. Test a small, hidden area first.
- If using steam, use it sparingly. Too much moisture can sometimes cause the fabric to pucker.
- Keep the iron moving to avoid melting the fibers.
- Tips & Tricks: Polyester is relatively wrinkle-resistant, so it often requires minimal ironing. Avoid high heat.
3.6 Rayon (Viscose)
- Recommended Iron Setting: Low to medium heat (375°F/190°C)
- Steam: No
- Pressing Cloth: Recommended
- Specific Instructions:
- Iron rayon inside out.
- The fabric should be dry.
- Use a pressing cloth.
- Iron in small sections, avoiding stretching the fabric.
- Keep the iron moving.
- Tips & Tricks: Rayon can be prone to shine, so always use a pressing cloth and avoid steam.
3.7 Acetate
- Recommended Iron Setting: Low heat (290°F/143°C)
- Steam: No
- Pressing Cloth: Yes
- Specific Instructions:
- Iron acetate inside out.
- The fabric should be dry or only very slightly damp.
- Always use a pressing cloth.
- Use a very low heat setting.
- Keep the iron moving to prevent melting.
- Tips & Tricks: Acetate is very sensitive to heat. If unsure, start with an even lower temperature than recommended and test a hidden area.
3.8 Nylon
- Recommended Iron Setting: Low heat (275°F/135°C)
- Steam: No
- Pressing Cloth: Yes
- Specific Instructions:
- Iron nylon inside out.
- The fabric should be dry.
- Always use a pressing cloth.
- Use the lowest heat setting.
- Keep the iron moving quickly.
- Tips & Tricks: Nylon melts very easily. It’s crucial to use a pressing cloth and low heat.
3.9 Acrylic
- Recommended Iron Setting: Low heat (275°F/135°C)
- Steam: No
- Pressing Cloth: Yes
- Specific Instructions:
- Iron acrylic inside out.
- The fabric should be dry.
- Always use a pressing cloth.
- Use a low heat setting.
- Keep the iron moving.
- Tips & Tricks: Similar to nylon, acrylic is heat-sensitive and prone to melting.
3.10 Lycra/Spandex
- Recommended Iron Setting: Low heat (275°F/135°C)
- Steam: No
- Pressing Cloth: Yes
- Specific Instructions:
- Iron Lycra/Spandex blends inside out.
- The fabric should be dry.
- Always use a pressing cloth.
- Use the lowest heat setting possible.
- Keep the iron moving.
- Tips & Tricks: Lycra/Spandex is often blended with other fabrics. Always follow the care instructions for the most delicate fiber in the blend. Avoid ironing if possible.
3.11 Corduroy
- Recommended Iron Setting: Medium heat (300°F/148°C).
- Steam: Yes/Optional.
- Pressing Cloth: No, but specific technique required.
- Specific Instructions:
- Place the corduroy garment inside out on a plush, clean, white towel. The towel’s texture helps prevent crushing the pile.
- Iron on the wrong side of the fabric, using gentle pressure.
- After ironing the inside, turn the garment right-side out.
- Use the steam function without letting the iron’s soleplate touch the fabric. Hold the iron slightly above the surface and allow the steam to penetrate and refresh the pile.
- Tips & Tricks: Avoid direct contact between the iron and the right side of corduroy to prevent crushing the pile and creating shiny spots.
3.12 Lace
- Recommended Iron Setting: Low heat (up to 300°F/148°C).
- Steam: No.
- Pressing Cloth: Yes.
- Specific Instructions:
- Place a pressing cloth between the iron and the lace. This is crucial to prevent snags and damage.
- Iron on the wrong side of the fabric if possible.
- Use gentle pressing motions; avoid sliding the iron, which can distort the delicate lace pattern.
- Tips & Tricks: For intricate lace, consider using a pressing cloth on both sides of the fabric for extra protection.
3.13 Beaded or Sequined Fabrics
- Recommended Iron Setting: Lowest possible heat, or steam only.
- Steam: Steam only, without touching the fabric.
- Pressing Cloth: Yes, on the back side.
- Specific Instructions:
- Turn the garment inside out.
- Place a thick, soft towel on the ironing board.
- Place a pressing cloth over the back of the embellished area.
- If using an iron (on the lowest setting), do not let it touch the fabric. Hover the iron above the pressing cloth and use steam to relax wrinkles.
- Preferably, use a garment steamer, holding it a few inches away from the fabric.
- Tips & Tricks: Direct heat can melt or damage beads and sequins. It’s often best to avoid ironing these embellishments altogether. Spot-steaming from a distance is the safest approach.
3.14 Cashmere
- Recommended Iron Setting: Low heat (around 300°F/148°C) or steam only.
- Steam: Preferably steam only, without touching the fabric.
- Pressing Cloth: Yes, if using the iron directly.
- Specific Instructions:
- For light wrinkles, use a garment steamer, holding it a few inches away from the fabric.
- For more set-in wrinkles, turn the garment inside out.
- Place a pressing cloth between the iron (on a low setting) and the cashmere.
- Do not press down hard. Use light pressure and quick motions.
- Allow to dry flat.
- Tips & Tricks: Direct contact with the iron can damage cashmere fibers. Steam is generally preferred.
3.15 Damask
- Recommended Iron Setting: Medium to High heat (depending on the fiber content – check the care label).
- Steam: Yes/Optional.
- Pressing Cloth: Yes, to prevent snagging.
- Specific Instructions:
- Use a pressing cloth between the iron and the fabric. This is important because damask often has long, floating threads that can easily snag.
- Iron on the wrong side of the fabric if possible.
- Use steam if needed to help remove wrinkles.
- Tips & Tricks: Check the fiber content of your damask fabric (cotton, linen, silk, or blends). Adjust the iron temperature accordingly.
3.16 Ramie
- Recommended Iron Setting: Medium to high heat (up to 400°F/204°C, similar to cotton).
- Steam: Yes.
- Pressing Cloth: Optional, but recommended for dark colors.
- Specific Instructions:
- Iron ramie while it’s still slightly damp.
- Iron on the wrong side of the fabric, especially for darker colors, to prevent shine.
- Use firm pressure and steam to remove wrinkles.
- Tips & Tricks: Ramie is similar to linen in its tendency to wrinkle and its ability to withstand high heat.
3.17 Velvet
- Recommended Iron Setting: Steam Only. Avoid direct contact with the iron.
- Steam: Yes, essential.
- Pressing Cloth: Not applicable, as the iron should not touch the fabric.
- Specific Instructions:
- Hang the velvet garment.
- Use a garment steamer or the steam function of your iron without letting the soleplate touch the velvet.
- Hold the steamer or iron several inches away from the fabric, allowing the steam to penetrate and release wrinkles.
- For severe wrinkles, you can place the velvet inside out on a plush white towel, and use very gentle pressure.
- After steaming, gently brush the velvet pile in its natural direction with a soft brush.
- Tips & Tricks: Never iron velvet directly, as this will crush the pile and create irreversible marks.
3.18 Woven Wool
- Recommended Iron Setting: Medium heat (300°F/148°C).
- Steam: Yes.
- Pressing Cloth: Yes, damp.
- Specific Instructions:
- Turn garment inside out.
- Place a damp pressing cloth between iron and wool fabric.
- Press, do not slide.
- Lift and repeat.
- Tips & Tricks: Always use a damp pressing cloth.
3.19 Synthetic blends
- Recommended Iron Setting: Low to medium heat (refer to the care label for the most delicate fiber in the blend).
- Steam: Optional, use with caution.
- Pressing Cloth: Yes.
- Specific Instructions:
- Identify the most delicate fiber in the blend (e.g., if it’s a polyester-cotton blend, treat it like polyester).
- Turn the garment inside out.
- Use a pressing cloth.
- Keep the iron moving to prevent overheating any one area.
- Tips & Tricks: When in doubt, start with a lower temperature and gradually increase it if needed. Always test a hidden area first.
4. Ironing Safety and Maintenance
Ironing involves high heat, so safety is paramount. Proper maintenance extends the life of your iron and ensures consistent performance.
4.1 Safety Precautions
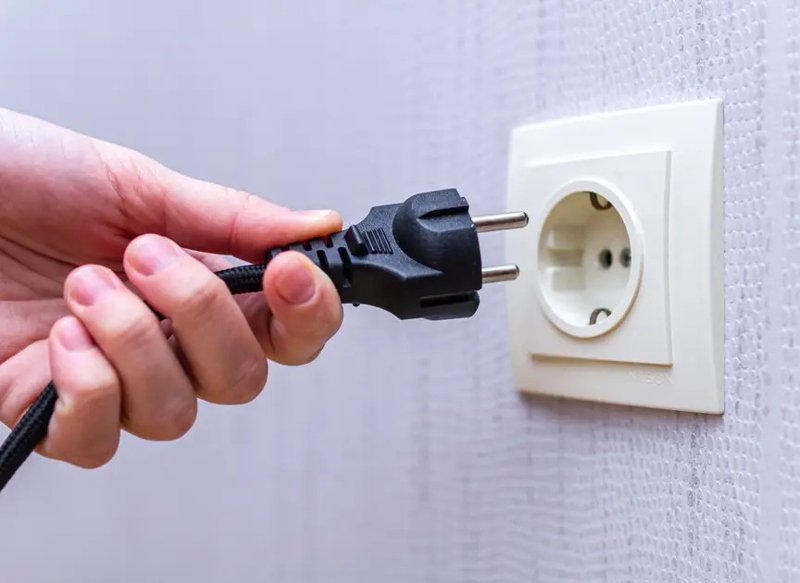
- Unplug when not in use: Always unplug the iron when you’re finished ironing or if you need to step away, even for a moment.
- Keep away from children and pets: A hot iron is a serious burn hazard. Keep the iron and cord out of reach of children and pets.
- Stable surface: Use a sturdy ironing board or a heat-resistant surface. Never iron on an unstable or flammable surface.
- Cool down: Allow the iron to cool down completely before storing it.
- Cord safety: Never let the cord dangle where it could be pulled. Inspect the cord regularly for damage (fraying, exposed wires). Do not use an iron with a damaged cord.
- Never leave unattended: Never leave the iron face down.
4.2 Cleaning and Maintaining Your Iron
Regular cleaning prevents mineral buildup and keeps the soleplate smooth.
- Empty the water tank: After each use, empty the water tank to prevent mineral deposits and mildew.
- Clean the soleplate: A clean soleplate glides smoothly and prevents staining. If residue builds up, let the iron cool completely. Make a paste of baking soda and a few drops of water. Gently rub this paste onto the soleplate, then wipe clean with a damp cloth. For stubborn residue, you can use a mixture of distilled white vinegar and water.
- Prevent mineral buildup: Use distilled water in your steam iron to minimize mineral deposits. If you live in an area with hard water, consider flushing the iron occasionally with a solution of distilled white vinegar and water (check your iron’s manual for specific instructions).
- Proper Storage: Ensure the iron is completely cool and dry before storing.
5. Related Questions
This section addresses common questions and concerns related to ironing.
5.1 How do I remove scorch marks from fabric?
Act quickly! Light scorch marks can sometimes be removed. For washable fabrics, try treating the area with white vinegar. Dampen a clean cloth with vinegar and gently dab the scorch mark. Rinse thoroughly. For more stubborn marks, you can try a solution of hydrogen peroxide (test in an inconspicuous area first). Baking soda paste can also help. However, severe scorching often causes irreversible damage.
5.2 Can I iron clothes without an ironing board?
Yes, but with caution. You’ll need a flat, heat-resistant surface. A thick towel placed on a table or countertop can work. Ensure the surface is sturdy and won’t be damaged by heat or moisture. This method is best suited for touch-ups or small items, and it’s generally more effective on sturdy fabrics like cotton or linen. Avoid using this method on delicate fabrics.
5.3 What’s the best way to store my iron and ironing board?
Ensure the iron is completely cool and the water tank is empty. Store the iron upright in a safe, dry place, out of reach of children and pets. Folding ironing boards can be stored in a closet or behind a door.
5.4 What is a pressing cloth, and when should I use one?
A pressing cloth is a piece of fabric, usually cotton, linen, or muslin. It is placed between the iron and the garment. A pressing cloth protect delicate fabrics from direct heat. Use pressing cloths with silk, wool, and synthetics.
5.5 Is steaming better than Ironing?
Steaming is better for delicate fabrics. Ironing is better for creating crisp, flat. Steam does not replace ironing, they work best together.
Read more:
Mastering ironing techniques takes practice, but with the right knowledge and tools, anyone can achieve perfectly pressed clothes. Understanding fabric types, using the correct iron settings, and practicing safe ironing habits are crucial for effective garment care. Don’t be intimidated by a pile of wrinkled clothes – embrace the process and enjoy the confidence that comes with a well-presented wardrobe.