How to Iron Patches on Bomber Jacket: Easy and Safe Guide
Bomber jackets have become a true fashion icon, a blank canvas for personal expression. And what better way to make a statement than with carefully chosen iron-on patches? Whether you’re looking to add a touch of vintage flair, showcase your favorite band, or simply create a unique look, applying patches can completely transform your jacket.
However, the process can seem daunting. A misplaced patch, a scorched jacket, or a patch that peels off after a few wears – these are all potential pitfalls. This comprehensive guide will provide you with everything you need to know to safely and effectively personalize your bomber jacket with iron-on patches.
Through this article, you will learn about proper patch selection, meticulous jacket preparation, precise application techniques, and essential aftercare, all of which are crucial to increase the lifespan of the patches.
1. Choosing the Right Patch and Preparing Your Jacket
1.1 Selecting the Right Patch:
Material Compatibility:
Different patches are made with different materials and, of course, bomber jackets too. This is the most important step before you decide to embellish your outerwear. Let’s take a look at some common patch materials:
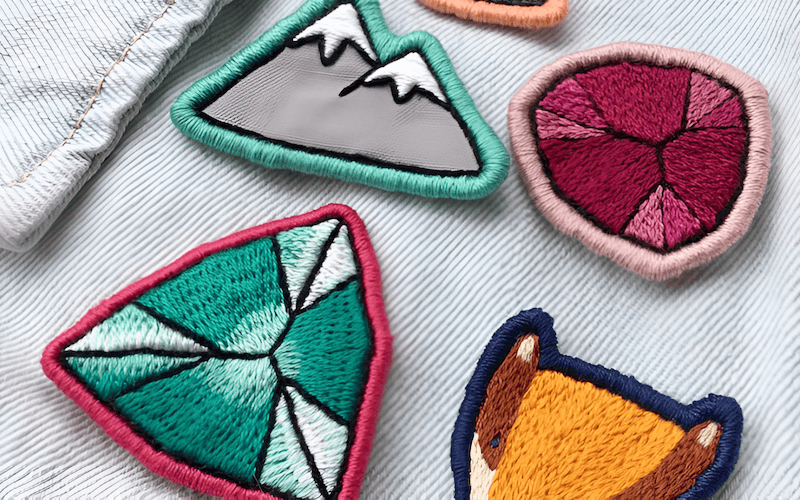
- Embroidered patches: These are the most common type, known for their textured look and durability. They’re made by stitching threads onto a backing fabric (the substrate – which influences the patch’s overall heat resistance). They’re generally a good choice for cotton, polyester, and denim bomber jackets.
- Woven patches: These patches use thinner threads, allowing for finer details and a smoother surface compared to embroidered patches. They can be suitable for nylon jackets, but you’ll need to be extra careful with heat application.
- PVC patches: Made from polyvinyl chloride (a type of plastic), these patches are waterproof and highly durable. They often have a more modern, 3D look. However, they can be more sensitive to heat, so lower temperatures and careful application are key.
| Patch Material | Texture | Heat Sensitivity | Recommended Jacket Fabrics |
|---|---|---|---|
| Embroidered | Textured | Moderate | Cotton, Polyester, Denim |
| Woven | Smooth | Moderate to High | Cotton, Polyester, Denim, Careful Nylon |
| PVC | Smooth, 3D | High | Cotton, Polyester, Denim, Careful Nylon |
It’s critical to consider the patch substrate. A thicker, more heat-resistant substrate will provide better protection for your jacket during the ironing process. For example, a patch with a felt backing will generally withstand higher temperatures than one with a thin plastic backing.

Design Considerations:
Your bomber jacket is your personal style canvas. Selecting a patch design is where your personality truly shines. Are you a vintage enthusiast? Look for retro-inspired designs. Are you a music lover? Express it with a band patch. Into pop culture? There are endless options available.
When applying multiple patches, consider the overall theme and visual balance. Do you want a cohesive look, or a more eclectic, anything-goes vibe? Don’t be afraid to experiment with different arrangements before committing to a final layout. Place the patches on your jacket and take a step back to see how they look together.
Size and Shape: Thinking strategically about size and shape is not just about aesthetics; it can directly impact the application process. Larger patches, especially those intended for the back of the jacket, can be more challenging to adhere evenly, particularly if the jacket has seams or curves. Smaller patches are generally easier to work with and offer more flexibility in placement, such as on sleeves or the front of the jacket.
Consider the contours of your bomber jacket. Curved surfaces, like sleeves, may require smaller or more flexible patches to avoid wrinkles or bubbling during application. Thicker materials, like leather, may also benefit from smaller patches as they can be easier to secure without excessive heat.
1.2 Preparing Your Bomber Jacket
Cleaning the Jacket:
This might seem like a minor detail, but it’s absolutely essential for optimal adhesion. Any dirt, dust, oils, or residue on the jacket’s surface can act as a barrier, preventing the patch’s adhesive from properly bonding with the fabric.
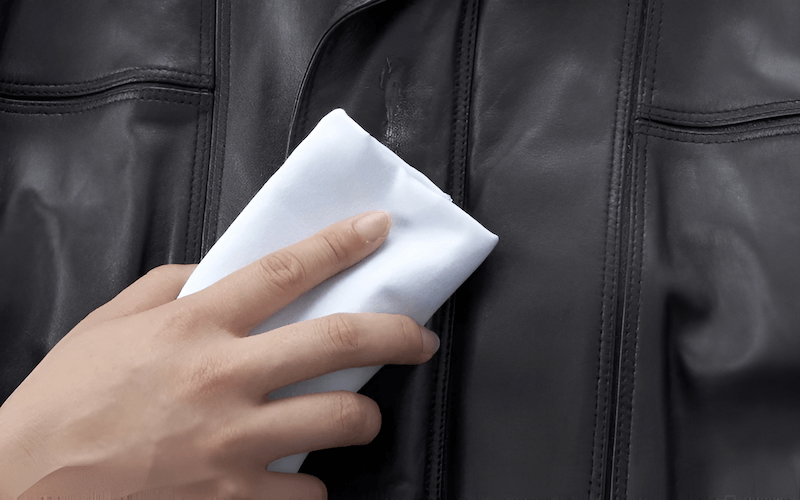
Always refer to your jacket’s care label for specific cleaning instructions. Some jackets may be machine washable, while others (like leather) require special care. Use an appropriate fabric cleaner based on the jacket’s material. For spot cleaning, a damp cloth with a mild detergent is often sufficient. Make sure the area is completely dry before proceeding.

Ironing the Jacket (Pre-Application):
Think of this step as creating the perfect foundation for your patch. Just like an artist prepares a canvas, you need to ensure the jacket’s surface is smooth and wrinkle-free. Wrinkles or creases can create uneven contact between the patch adhesive and the fabric, leading to weak adhesion or air bubbles.
A smooth surface maximizes contact, resulting in a stronger, more durable bond. Use an iron on the appropriate setting for your jacket’s material (refer to the care label!). Pay close attention to areas where the patch will be placed, ensuring they are perfectly flat.
Identifying the Jacket Material:
This step is crucial. It dictates the heat setting and ironing technique. Different materials react differently to heat, and using the wrong setting can lead to irreversible damage.
Here are some tips on identifying some common bomber materials:
- Nylon: Often has a smooth, slightly shiny appearance. It can feel slick or slippery to the touch. Nylon is generally lightweight and may have a slight “crinkling” sound when crumpled.
- Leather: Has a distinctive smell and texture. It can be smooth, textured, or have a pebbled grain. Genuine leather feels warm and pliable, while synthetic leather (faux leather) may feel cooler and stiffer.
- Cotton: Typically has a soft, matte finish. It feels comfortable against the skin and is generally breathable. Cotton can wrinkle easily.
- Polyester: Often has a slightly smoother feel than cotton and may have a subtle sheen. It’s generally wrinkle-resistant and dries quickly.
- Blends: Combining two or more fabric types, it will have characteristics of the materials that make them up.
If the care label is missing, it is best to use the lowest heat setting. For valuable jackets, it’s always recommended to consult a professional cleaner or tailor for advice.
2. Step-by-Step Guide: Ironing the Patch
2.1 Gathering Your Materials
Before you begin, gather everything you need. This prevents interruptions and ensures a smooth, efficient process. Here’s your checklist:
- Your Iron-on Patch: Obviously!
- Your Bomber Jacket: Ready to be customized.
- An Iron: A standard household iron will do.
- An Ironing Board: Provides a firm, heat-resistant surface.
- A Pressing Cloth: This is crucial – a thin cotton cloth (like a pillowcase or handkerchief) or a piece of parchment paper. Never skip this!
- A Timer: Your phone’s timer works perfectly.
- Pins (Optional): Straight pins can help secure the patch in place, especially on slippery fabrics.
- Fabric Tape (Optional): A temporary adhesive that can also help hold the patch in position.
2.2 Setting Up
Ironing Board Setup:
Choose a stable, heat-resistant surface. Your ironing board should be sturdy and level. Avoid using a soft or uneven surface, as this can lead to uneven heat distribution and poor adhesion. A firm surface allows you to apply the necessary pressure for a secure bond.
Patch Placement:
This is where your artistic vision comes to life. Carefully position the patch on your bomber jacket. Do you want it on the sleeve, the back, or the front? Once you’ve decided, use pins or fabric tape to temporarily hold the patch in place.
This prevents shifting during the ironing process. Step back and look at the jacket from different angles. Make sure the patch is straight, centered, and exactly where you want it. A crooked patch is difficult to fix later!
Iron Settings:
This is critical for success. Never use steam when applying an iron-on patch. Steam can interfere with the adhesive and prevent a strong bond. A general guideline is to use a medium-high heat setting, but this is just a starting point. Always, always, always check your jacket’s care label for specific heat recommendations.
Different fabrics have different heat tolerances. If the care label is missing or unclear, start with a lower setting and gradually increase it if needed. Remember, it’s always better to start with too little heat and increase it gradually than to use too much heat and damage your jacket.
2.3 Applying the Patch
Placing the Pressing Cloth:
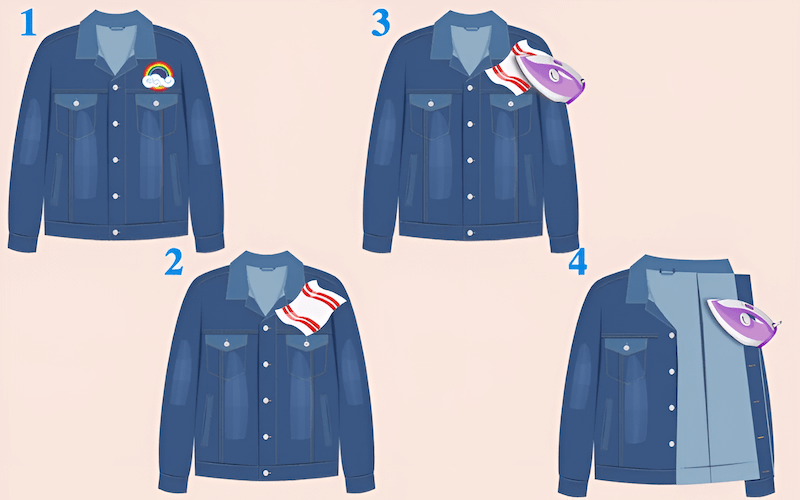
This step is absolutely essential for protecting both your jacket and the patch. The pressing cloth (a thin cotton cloth or parchment paper) acts as a barrier, preventing direct contact between the hot iron and the materials. This prevents scorching, melting, or other damage to the jacket fabric, especially delicate materials like nylon or leather. It also protects the patch itself from discoloration or damage to the design.
Ironing Technique:
This is where precision is key. Place the hot iron directly on top of the pressing cloth, covering the entire patch. Apply firm, even pressure. Do not slide the iron around like you would when ironing clothes. Sliding can shift the patch and create uneven adhesion.
Instead, press straight down and hold the iron in place. A good starting point for the ironing time is 30-60 seconds, but this will vary depending on the jacket material (more on that later!). Make sure to apply heat to the entire patch surface, paying particular attention to the edges. The edges are most prone to lifting, so they need extra attention.
Checking Adhesion:
After the initial ironing time, carefully remove the pressing cloth. Gently try to lift an edge of the patch. If it lifts easily, it hasn’t adhered properly. If it’s sticking, you’re on the right track! If any areas haven’t adhered, replace the pressing cloth and repeat the ironing process, focusing on the areas that are not sticking. Don’t be afraid to apply more heat and pressure, but always use the pressing cloth!
Cooling Time:
This step is often overlooked, but it’s crucially important. Once you’re satisfied with the adhesion, let the patch cool down completely before handling or wearing the jacket. This allows the adhesive to fully set and harden, creating the strongest possible bond. Resist the temptation to touch or move the patch while it’s still warm. Patience is key!

2.4 Material-Specific Instructions
Nylon Bomber Jackets:
Nylon is a synthetic fabric that’s highly sensitive to heat. It can melt or scorch easily, so extreme caution is required. Use the lowest effective heat setting on your iron. Start with a very short ironing time, such as 15-20 seconds.
Use a thick pressing cloth, or even multiple layers, to provide extra protection. Check the adhesion frequently and increase the heat or time very gradually only if needed. If you’re unsure, it’s always best to err on the side of caution and use less heat.
Leather Bomber Jackets:
Leather requires special care. It’s a natural material that can be easily damaged by heat. Use a low heat setting on your iron. Use a thick pressing cloth and consider adding a heat-resistant barrier, such as a Teflon sheet, for extra protection.
Strongly recommended: Before applying the patch to a visible area, test the iron and a small piece of the patch (or a similar material) on an inconspicuous area of the jacket, such as the inside of the jacket or on a hem.
This will allow you to assess the heat tolerance of the leather and ensure that the iron won’t cause any damage. If you’re unsure or if the jacket is very valuable or delicate, seek professional help from a tailor or leather specialist.
Cotton and Polyester Bomber Jackets:
Cotton and polyester are generally more heat-resistant than nylon or leather, making them easier to work with. You can use a medium-high heat setting and a standard ironing time of 30-60 seconds. However, you still need to use a pressing cloth to protect the jacket and the patch from direct heat. While these fabrics are more forgiving, it’s still possible to damage them with excessive heat, so always be mindful of the iron settings and application time.
3. Troubleshooting: Common Problems and Solutions
3.1 Patch Not Sticking
This is a common frustration, but thankfully, it usually has a straightforward solution. Here are the most likely culprits and how to fix them:
Insufficient Heat: The iron wasn’t hot enough to melt the adhesive properly.
- Solution: Gradually increase the iron temperature, always referring to your jacket’s care label for the maximum safe heat setting. Reapply the iron with the pressing cloth, using firm pressure.
Uneven Pressure: You may not have applied consistent pressure across the entire patch, especially the edges.
- Solution: Re-iron the patch, focusing on applying firm, even pressure to all areas, particularly the edges. Make sure the jacket is on a firm, flat surface.
Dirty Surface: Dirt, oil, or residue on the jacket prevented the adhesive from bonding.
- Solution: Thoroughly re-clean the area where the patch will be applied, following the cleaning instructions for your specific jacket material. Allow it to dry completely before re-attempting to apply the patch.
Incorrect Fabric Setting: The iron setting was too low for the jacket’s material, or possibly too high, damaging the adhesive.
- Solution: Double-check the care label on your jacket and ensure your iron is set to the appropriate temperature for the fabric. If you suspect the adhesive has been damaged by excessive heat, you may need a new patch.
Old or Low-Quality Patch: The adhesive on the patch may have degraded over time or may be of poor quality.
- Solution: Unfortunately, if the adhesive is simply too old or ineffective, the best solution is to use a new patch. Consider purchasing patches from reputable sources to ensure quality.
Moisture: The area is damp or not completely dry
- Solution: Ensure that area is bone-dry before applying
3.2 Jacket Damage
Prevention is always better than cure, but accidents can happen. Here’s how to minimize damage:
Scorching or Burning: This usually happens when the iron is too hot or left in one place for too long.
- Solution: Prevention: Always use a pressing cloth and the correct iron setting for your jacket’s fabric. If minor scorching occurs, it may be possible to lighten the mark with gentle cleaning (consult a cleaning professional for valuable jackets). For significant burns, the damage is likely irreversible.
Melting (Synthetic Fabrics): Synthetic fabrics like nylon are particularly prone to melting.
- Solution: Prevention: Use a low heat setting, a thick pressing cloth, and short ironing times. Always test on a hidden area first. If melting occurs, stop immediately. Unfortunately, melted fabric is usually permanently damaged.
4. Alternative Attachment Methods
While ironing is a popular method for applying patches, it’s not always the best or most suitable option. Here are two alternative methods:
4.1 Sewing
Sewing is the most permanent and durable method for attaching patches. It’s an excellent choice for heavier patches, patches that will be subject to a lot of wear and tear (like on a frequently used backpack or jacket), or for jackets made of materials that are unsuitable for ironing (like delicate fabrics or materials with a low heat tolerance).
Sewing provides a secure attachment that can withstand repeated washing and general use. While it requires more time and skill than ironing, it offers the most reliable long-term solution. Sewing is also a good option if you want to be able to remove the patch later without damaging the jacket.

4.2 Fabric Glue
Fabric glue offers a no-sew alternative for attaching patches. It can be a convenient option for quick fixes or for people who are uncomfortable with sewing. However, it’s important to understand that fabric glue is generally less durable than sewing or ironing. It may not withstand repeated washing or heavy use, and the bond may weaken over time.
It’s best suited for smaller, lighter patches or for decorative applications where durability is less of a concern. Always test the glue on an inconspicuous area of the jacket first to ensure it doesn’t damage the fabric or cause discoloration. Choose a fabric glue that is specifically designed for use on fabrics and is washable.
5. Caring for Your Patched Bomber Jacket
5.1 Washing Instructions
Proper washing is crucial to maintaining the appearance and longevity of both your bomber jacket and the patches. The key is to be gentle.
Here’s the recommended approach:
- Turn the jacket inside out: This protects the patches from direct abrasion against other clothes or the washing machine drum.
- Use a gentle cycle: Select a delicate or hand-wash cycle on your washing machine.
- Cold water: Always use cold water. Hot water can damage the patch adhesive, fade the colors, or even shrink the jacket fabric.
- Mild detergent: Use a mild, non-bleach detergent. Harsh chemicals can damage the patch materials and the jacket fabric.
- Avoid harsh chemicals: stay away from using chemicals like bleach
These precautions are necessary because heat, harsh chemicals, and excessive agitation can all weaken the patch adhesive, cause the patch to fray or detach, or damage the jacket material.
5.2 Drying Instructions
Never put a patched bomber jacket in a high-heat dryer. The heat can melt the adhesive, damage the patch, or shrink the jacket. The best method is to air dry the jacket. You can either hang it on a hanger or lay it flat on a clean, dry surface. If you must use a dryer, use the lowest heat setting (air fluff or delicate cycle) and remove the jacket promptly once it’s dry. Even on a low setting, prolonged exposure to heat can still be detrimental.
5.3 Ironing
If you need to iron your bomber jacket after the patch has been applied, be very careful. Never apply direct heat to the patch itself. The heat can melt the adhesive or damage the patch design. Always use a pressing cloth over the area, and use a low heat setting on your iron. If possible, iron from the inside of the jacket, avoiding the patched area altogether. This will protect the patch from direct heat and prevent any potential damage.
6. Related Questions
6.1 Can I remove an iron-on patch from a bomber jacket?
Yes, it’s possible, but it’s not always easy, and there’s a risk of damaging the jacket. The process typically involves reheating the patch to soften the adhesive and then carefully peeling it off. However, there’s often adhesive residue left behind, which can be difficult to remove completely.
The success of removal depends on the type of adhesive, the jacket material, and how long the patch has been attached. It’s often best to try removing a small, inconspicuous area first to assess the risk of damage. Some online methods involve the use of a hairdryer on the reverse side of the garment and solvent. For valuable jackets, consulting a professional cleaner or tailor is recommended.
6.2 How long do iron-on patches typically last?
The lifespan of an iron-on patch varies considerably. Factors influencing longevity include the quality of the patch and adhesive, the frequency of washing and wear, and the application method. A well-applied, high-quality patch on a jacket that’s washed infrequently and gently can last for several years.
However, a patch on a frequently worn and washed item may start to peel or fray within months. Proper application (sufficient heat and pressure) and careful washing (cold water, gentle cycle, air drying) are crucial for maximizing lifespan.
6.3 What are the best types of patches for bomber jackets in terms of durability?
In terms of pure durability, embroidered patches are generally considered the best option. Their thick, stitched construction makes them resistant to wear and tear. Woven patches are a close second, offering good durability and finer detail.
PVC patches are very durable and waterproof, but their heat sensitivity during application can be a drawback. When choosing a patch, consider not only the patch material but also the quality of the adhesive and the application method. Sewing a patch on, regardless of its type, will always be the most durable option.
6.4 Can I iron a patch onto a delicate fabric like silk or satin?
It is strongly advised against ironing patches onto delicate fabrics like silk or satin. These materials are extremely sensitive to heat and can be easily scorched, melted, or otherwise damaged. Even low heat settings can be risky.
For these fabrics, sewing is the only recommended attachment method. If you’re not comfortable sewing, it’s best to seek professional help from a tailor or seamstress. They will have the expertise to attach the patch without damaging the delicate fabric.
6.5 Where is the best place to buy high-quality iron-on patches?
Look for reputable online retailers or craft stores that specialize in patches. Read customer reviews and look for patches made with durable materials and strong adhesives.
Read more:
Customizing a bomber jacket with iron-on patches is a fantastic way to express your individuality and create a truly unique piece of clothing. It’s a way to showcase your personality, interests, and style. Whether you’re adding a vintage touch, a pop culture reference, or a personal design, patches can transform a simple jacket into a statement piece.
This step-by-step guide has covered all the essential aspects of the process: carefully choosing a compatible patch that matches both your style and the jacket’s material; meticulously preparing the jacket to ensure optimal adhesion; applying the patch correctly, using the appropriate technique and heat setting for the specific fabric; understanding how to troubleshoot common problems like a patch not sticking or potential jacket damage; and finally, knowing how to care for your patched garment to maximize its lifespan. Remember, patience and attention to detail are key to a successful and long-lasting application.


