


How to Mail Poly Mailers: The Complete Guide (Shipping and More)

25 March, 2025
Need to mail something using a poly mailer but feeling unsure about the process? Whether you’re an individual sending a gift, an e-commerce business shipping orders, or just need to send something safely and affordably, this guide is for you.
Mailing poly mailers seems simple, but incorrect procedures can lead to returned packages, delayed deliveries, damaged goods, unexpected shipping fees, and a poor customer experience. This wastes time, money, and can harm your reputation.
This comprehensive guide provides a step-by-step approach to mailing poly mailers successfully. You’ll learn how to choose the right mailer, package your items securely, address your package correctly, select the best shipping service, and avoid common mistakes. Gain the confidence to ship with ease, knowing your items will arrive safely and efficiently.
1. Mailing Poly Mailers Made Easy – A Step-by-Step Guide
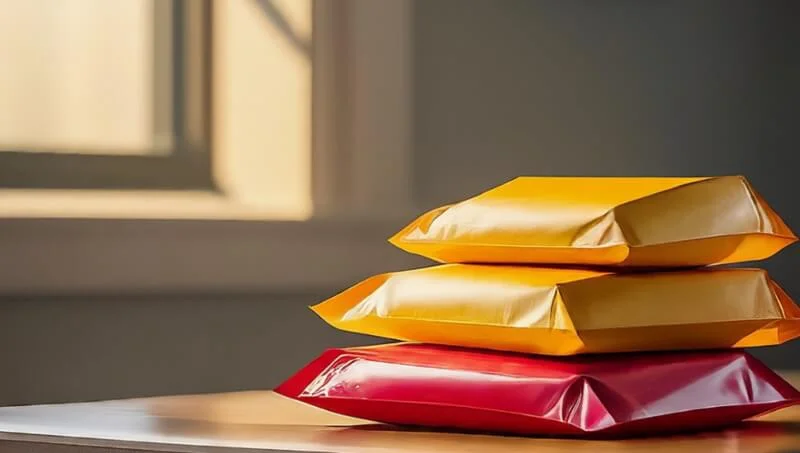
Poly mailers are a popular, convenient, and cost-effective packaging option for shipping lightweight, non-fragile items, particularly clothing and soft goods. Their lightweight nature helps keep shipping costs down, and their water-resistant construction provides protection from the elements.
While mailing them seems straightforward, there are important steps and considerations to ensure successful delivery and avoid common pitfalls. This step-by-step guide provides a comprehensive, easy-to-follow approach to mailing poly mailers, empowering you to ship with confidence. This is a shipping guide to using poly mailers in e-commerce shipping.
2. Step 1: Choosing the Right Poly Mailer – Size, Durability, and Protection
Selecting the right poly mailer is the foundation for a successful shipment. It’s not just about finding a mailer that fits; it’s about choosing one that provides adequate protection and is cost-effective.
2.1 Size Matters: Matching Mailer Dimensions to Contents
The size of your poly mailer is crucial.
- Too Small: A mailer that’s too small can damage your item during packing (forcing it in) or transit (bursting seams). It also makes it difficult to properly seal the mailer.
- Too Large: A mailer that’s too large allows the item to shift excessively during transit, increasing the risk of damage. It can also increase your shipping costs unnecessarily, especially if dimensional weight pricing applies.
How to Choose the Right Size:
- Measure Your Item: Measure the length, width, and height (thickness) of the item you’re shipping.
- Add Extra Room: Choose a poly mailer that’s slightly larger than your item’s dimensions, allowing a little extra room for padding (if needed) and easy sealing. Aim for a snug fit, but avoid overstuffing. You should be able to comfortably seal the mailer without straining the seams or the adhesive strip.
Helpful Tip: Always measure your item before ordering poly mailers.
2.2 Durability and Protection: Considering Your Item’s Needs
Poly mailers come in different thicknesses and with features that offer varying levels of protection:
- Standard Poly Mailers: Typically around 2-2.5 mils thick (a mil is one-thousandth of an inch). These are suitable for lightweight, non-fragile items like clothing, soft goods, and documents that don’t require significant protection from bending, crushing, or punctures.
- Thicker Poly Mailers: 3 mils or higher. These offer increased durability and tear resistance, providing better protection for heavier items or items that are more susceptible to damage.
- Bubble-Lined Poly Mailers: These mailers have a layer of bubble wrap built into the interior lining. This provides excellent cushioning for items that need protection from impacts, bumps, and crushing. They are a good choice for items that are somewhat delicate or have sharp edges.
- Helpful Tip: For anything that could be damaged by bending, crushing, moisture, or rough handling, choose a bubble-lined poly mailer or consider using a cardboard box instead.
2.3 Waterproofing: An Essential Feature for Most Shipments
Most poly mailers are inherently waterproof or water-resistant due to their polyethylene (plastic) construction. This provides essential protection for your contents from rain, spills, and other moisture during transit. This is a key advantage of poly mailers over paper envelopes or cardboard boxes, which can be easily damaged by water.
3. Step 2: Preparing Your Item for Safe Transit – Packaging Inside the Mailer
Properly packaging the item inside the poly mailer is crucial for minimizing the risk of damage during shipping.
3.1 Wrapping for Protection: Preventing Damage During Shipping
Even though poly mailers offer some inherent protection (especially bubble-lined mailers), it’s generally recommended to wrap individual items (or groups of small items) before placing them inside the mailer. This adds an extra layer of cushioning and protection against:
- Bumps and drops: During handling and transit.
- Shifting: Prevents the item from moving around inside the mailer.
- Scratching or abrasion: Protects delicate surfaces.
Suitable wrapping materials:
- Bubble wrap: Excellent for cushioning fragile items or items with sharp edges.
- Tissue paper: Good for protecting clothing and preventing wrinkles, especially for delicate fabrics.
- Packing paper: A versatile option for general wrapping and cushioning.
- Helpful Tip: Even if your item isn’t extremely fragile, wrapping it in a layer of bubble wrap or tissue paper is a good precaution.
3.2 Securing the Item: Filling Empty Space to Prevent Shifting
Once the item is wrapped (if necessary) and placed inside the poly mailer, it’s important to address any empty space. If there’s significant room for the item to move around inside the mailer, it:
- Increases the risk of damage to the item.
- Can put stress on the mailer’s seams, potentially causing it to tear.
Fill any empty space with:
- Packing peanuts: (Though some find them environmentally unfriendly).
- Crumpled paper: A readily available, inexpensive, and recyclable option.
- Air pillows: Lightweight and provide good cushioning.
- Additional bubble wrap: If you’ve already used bubble wrap for wrapping, you can use more to fill voids.
The goal is to create a snug fit so the item is secure and doesn’t shift during transit. You should not be able to shake the item around easily.
Helpful Tip: Make sure your item is snug and secure inside the mailer.
3.3 Sealing the Mailer: Creating a Secure and Tamper-Evident Closure
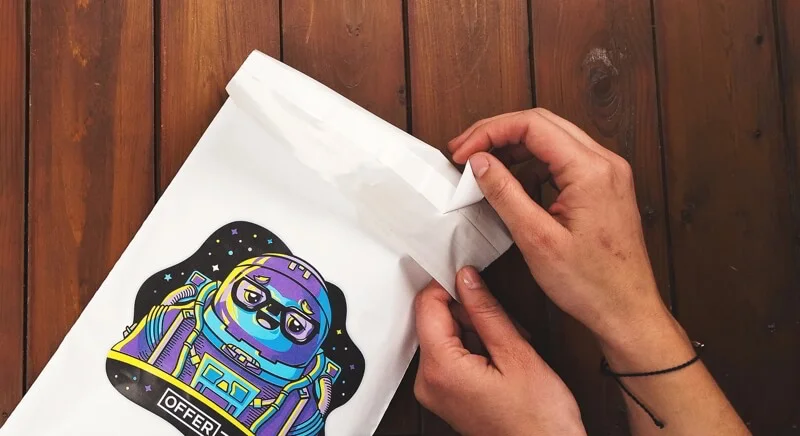
Most poly mailers come with a self-adhesive strip. To seal the mailer:
- Peel off the protective backing strip to expose the adhesive.
- Fold the flap over and press down firmly along the entire length of the strip, creating a tight, secure closure. Make sure the flap is aligned properly and there are no gaps.
- Run your fingers along the seal multiple times to ensure good adhesion.
Reinforce the Seal (Highly Recommended):
For added security, and especially for:
- Heavier items
- Valuable items
- If the self-adhesive strip seems weak or unreliable
- If the package will be going through multiple handling steps (e.g., international shipping)
It’s highly recommended to reinforce the seal with packing tape. Apply a strip of strong packing tape over the entire length of the sealed flap, extending the tape onto the body of the mailer on both sides. This provides an extra layer of protection against the mailer accidentally opening during transit and also offers some degree of tamper evidence.
Helpful Tip: Always reinforce the self-seal strip with packing tape.
4. Step 3: Addressing Your Poly Mailer Correctly – Ensuring Accurate Delivery
Proper addressing is absolutely essential for ensuring your poly mailer reaches its intended recipient without delays or misdelivery.
4.1 Recipient Address: Clear, Complete, and Correctly Formatted
The recipient’s address (the delivery address) should be printed or written clearly and legibly in the center of the poly mailer. Use a permanent marker if handwriting, or preferably, use a printed label.
Required Address Elements:
- Line 1: Recipient’s Full Name (or Company Name, if applicable)
- Line 2: Street Address (or PO Box Number)
- Line 3: Apartment/Suite/Unit Number (if applicable)
- Line 4: City, State, and ZIP Code (use the ZIP+4 code if you know it – it speeds up delivery)
Correct Format:
- Recipient’s Full Name (or Company Name)
- Street Address (or PO Box Number)
- Apartment/Suite/Unit Number (if applicable)
- City, State ZIP Code (or ZIP+4)
Helpful Tip: Double-check the recipient’s address before you write it on the mailer or print the label.
Return Address: Essential for Undeliverable Mail
Always, always include a complete and accurate return address in the upper left corner of the poly mailer. This is your address (the sender’s address). The return address ensures that the package can be returned to you if it’s undeliverable for any reason (e.g., incorrect address, recipient moved, refused delivery, etc.).
Without a return address, an undeliverable package may be discarded by the postal service, and you could lose both the package and its contents.
- Helpful Tip: Never skip the return address!
4.2 Printed Labels: The Professional and Reliable Choice
While you can handwrite the addresses on a poly mailer, using printed address labels is strongly recommended. Printed labels offer several advantages:
- Professional Appearance: They look neater and more professional than handwritten addresses.
- Legibility: Printed labels are generally much easier to read than handwriting, reducing the risk of errors and delays caused by misinterpretation of the address.
- Convenience: Many online postage services and shipping software programs allow you to print address labels directly from your computer, often along with the postage.
- Helpful Tip: Whenever possible, use printed address labels.
4.3 Label Placement: Avoiding Obstructions and Ensuring Visibility
Place the address label (or handwritten address) on the largest, flattest area of the poly mailer, typically the center.
- Avoid:
- Seams
- Folds
- The self-seal flap
- Any area where the label might be obscured or damaged
- Ensure:
- The label is securely attached.
- The label lies flat (no wrinkles or air bubbles).
- The entire label is clearly visible.
5. Step 4: Weighing and Measuring Your Package – Accurate Dimensions for Correct Postage
Accurate weight and dimensions are crucial for calculating the correct postage and avoiding extra fees or delays.
5.1 The Importance of Accuracy: Avoiding Postage Due and Delays
The cost of postage is determined by a combination of factors:
- Weight: The actual weight of the package.
- Dimensions: The length, width, and height of the package.
- Destination: How far the package is traveling (distance, zones).
- Shipping Service: The specific service you choose (e.g., First-Class, Priority, Express).
Inaccurate weight or dimensions can lead to:
- Underpaying for postage:
- Overpaying for postage:
5.2 Weighing Your Poly Mailer: Tools and Techniques
Use a scale to weigh your sealed and addressed poly mailer.
- Kitchen Scale: A digital kitchen scale that can measure in both ounces and grams is usually sufficient.
- Postal Scale: A dedicated postal scale is more accurate and designed for weighing packages.
- Helpful Tip: A kitchen scale that measures in both ounces and grams is perfectly fine for weighing most poly mailers.
Mention an example of weight.
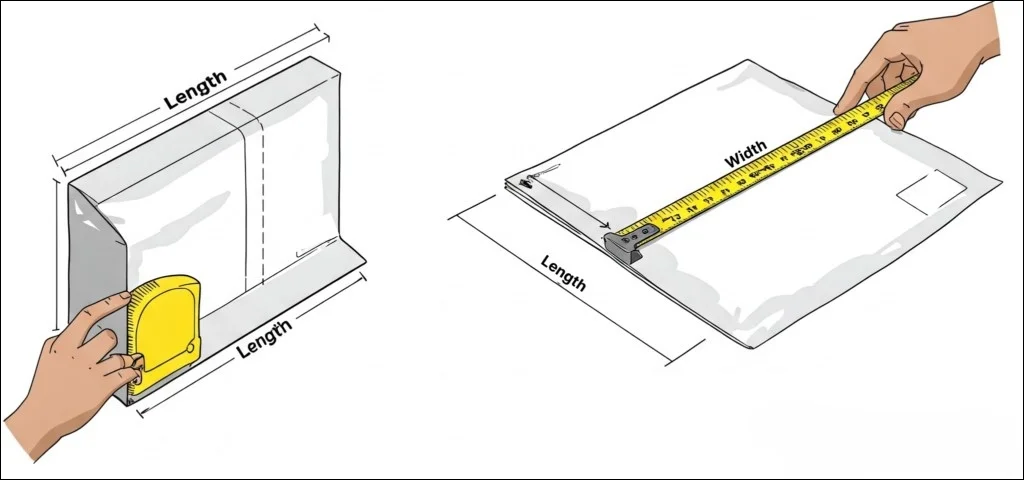
5.3 Measuring Dimensions: Length, Width, and Height (Thickness)
You need to measure the length, width, and height (thickness) of your poly mailer, especially if it’s bulky or irregularly shaped. Even small inaccuracies in dimensions can affect shipping costs, particularly with dimensional weight pricing.
- Length: The longest side of the mailer.
- Width: The shorter side of the mailer.
- Height (Thickness): The distance from the bottom of the mailer to the top when it’s filled with the item and sealed. This is often the most overlooked dimension.
Use a ruler or measuring tape to measure each dimension accurately.
Mention the size limit.
Read more: How to Measure Poly Mailers: Find the Perfect Fit for Shipping
5.4 Recording Your Measurements: For Accurate Postage Calculation
Write down the weight and dimensions of your package before you purchase postage. You’ll need this information to calculate the correct shipping cost.
6. Step 5: Selecting the Right Shipping Service – Balancing Cost, Speed, and Needs
Choosing the right shipping service involves considering cost, delivery speed, and any specific features you need.
6.1 Comparing Shipping Options: Cost, Speed, and Features
Different shipping carriers and service levels offer varying combinations of price, delivery time, and features.
USPS (United States Postal Service):
- First-Class Mail Package Service:
- Suitable for lightweight packages (under 16 ounces).
- Generally the cheapest option for small, light items.
- Slower delivery times (typically 2-5 business days, but can be longer).
- Includes tracking.
- Priority Mail:
- Faster delivery (typically 1-3 business days).
- Includes tracking and up to $50 or $100 of insurance (depending on where/how you purchase postage).
- A good option for heavier poly mailers or when faster delivery is needed.
- Offers both flat-rate options (using specific USPS packaging) and weight/dimension-based pricing.
- Media Mail:
- Only for specific types of media (books, CDs, DVDs, educational materials). Not for general merchandise.
- Much cheaper, but significantly slower delivery times (can take 2-8 business days or longer).
FedEx and UPS:
- Generally better for larger, heavier, or more valuable packages.
- Offer a range of service levels (ground, express, overnight), with varying prices and delivery speeds.
- Generally more expensive than USPS for smaller, lighter items (like those typically shipped in poly mailers).
- Excellent tracking and insurance options.
Helpful Tips:
- For most lightweight items shipped in poly mailers, USPS First-Class Mail Package Service or Priority Mail will be the most cost-effective options.
- Use online shipping calculators to compare rates from different carriers.
- For small businesses, consider using shipping software.
6.2 Tracking and Insurance: Protecting Your Shipment and Providing Peace of Mind
- Tracking: Allows you (and the recipient) to monitor the package’s progress online and see its estimated delivery date. Tracking is usually included with most shipping services (except for some very basic, inexpensive options like USPS First-Class Letter mail).
- Insurance: Protects against financial loss if the package is lost, damaged, or stolen during transit. Some shipping services include a small amount of insurance automatically (e.g., USPS Priority Mail includes up to $50 or $100, depending on how you purchase postage).
7. Step 6: Buying and Applying Postage – Online Convenience vs. Post Office Options
You have two main options for purchasing postage: online or at a post office.
7.1 Purchasing Postage: Online vs. Post Office
- Online:
- Carrier websites: You can purchase postage and print shipping labels directly from the carrier’s website (USPS.com, FedEx.com, UPS.com).
- Online postage services and shipping platforms: Numerous third-party platforms (Stamps.com, Pirate Ship, ShippingEasy, ShipStation, etc.) offer discounted rates and convenient label printing options.
- Benefits of buying postage online:
- Convenience: You can purchase postage and print labels from your home or office, 24/7.
- Discounted rates: Online postage services often offer discounted rates compared to post office prices, especially for USPS services. Commercial rates are usually available.
- Avoid lines: You don’t have to wait in line at the post office.
- Print labels directly: You can print shipping labels directly from your computer.
- At the Post Office:
- You can purchase postage at a post office counter from a postal worker.
- You can use a self-service kiosk (available at many post offices).
- Benefits of buying postage at the post office:
- Assistance: You can get help from a postal worker.
- No printer needed: You don’t need a printer.
- Cash payment: You can pay with cash.
Helpful Tip: Buying postage online is usually the most convenient and often the cheapest option.
7.2 Printing and Applying the Shipping Label
If you purchase postage online, you’ll need to print the shipping label. Most services allow you to print on:
- Plain paper: Print the label on regular printer paper and securely attach it to the poly mailer with clear packing tape.
- Self-adhesive label sheets: Specifically designed for printing shipping labels, with an adhesive backing.
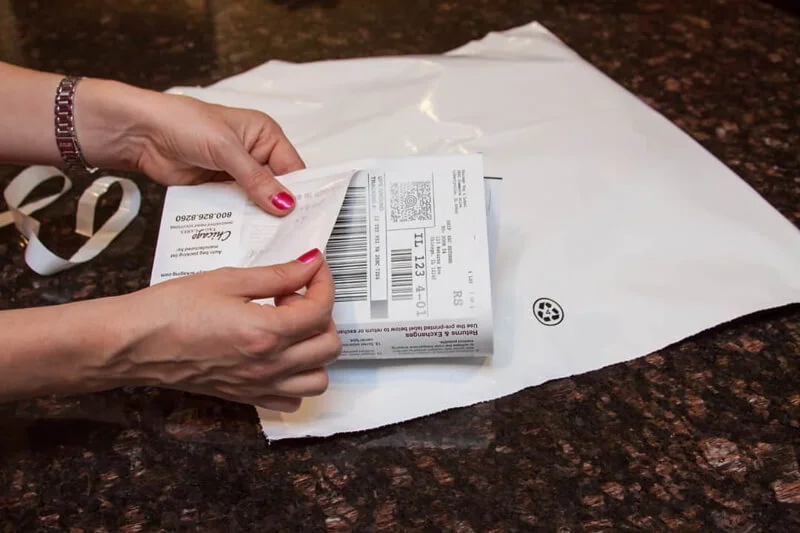
Applying the Label:
- Flat Surface: Place the label on a flat, smooth area of the poly mailer.
- Securely Attach: Make sure the label is securely attached.
- Protection: Cover the entire label with clear packing tape to protect it from smudging, tearing, or water damage.
- Barcode Visibility: Ensure the barcode is completely visible and unobstructed.
8. Step 7: Dropping Off Your Package – Getting it into the Mail Stream
Once your poly mailer is properly packaged, addressed, and has the correct postage applied, it’s time to get it into the mail stream.
8.1 Drop-Off Options: Convenience and Security
Your drop-off options depend on the shipping service you’ve chosen:
- USPS (United States Postal Service):
- Personal Mailbox: For smaller poly mailers with sufficient postage, you can often place them in your own mailbox for your mail carrier to pick up.
- Blue USPS Collection Box: You can drop off smaller poly mailers in a blue USPS collection box. However, be aware of size and weight restrictions, and never deposit mail with metered postage over 13 ounces in a collection box (due to security regulations).
- Post Office Counter: You can always take your package to a post office counter.
- FedEx and UPS:
- Staffed Location: Drop off at a staffed FedEx or UPS location (FedEx Office, The UPS Store, or authorized shipping centers).
- Drop Box: FedEx and UPS also have drop boxes, but these typically have size restrictions.
- Scheduled Pickup: Both FedEx and UPS offer package pickup services, often for an additional fee.
8.2 Obtaining a Receipt and Tracking Number: Proof of Mailing and Peace of Mind
It’s always a good idea to get a receipt or a tracking number when you drop off your package. This provides proof that you mailed the package and allows you to track its progress.
9. Considerations for Shipping in the United States (via USPS)
When shipping with USPS, adhere to their guidelines to avoid packages being returned. Link to official USPS
9.1 Thickness
- Minimum 2 mils for items up to 5 pounds
- 4 mils for items up to 10 pounds.
9.2 Weight Limits
- Less than 16 pounds for First Class Mail
- Less than 70 pounds for Priority Mail
9.3 Size Limits
USPS has size limits. Choosing incorrect sizes can lead to extra charges.
10. Customizing Poly Mailers: Branding and the Customer Experience
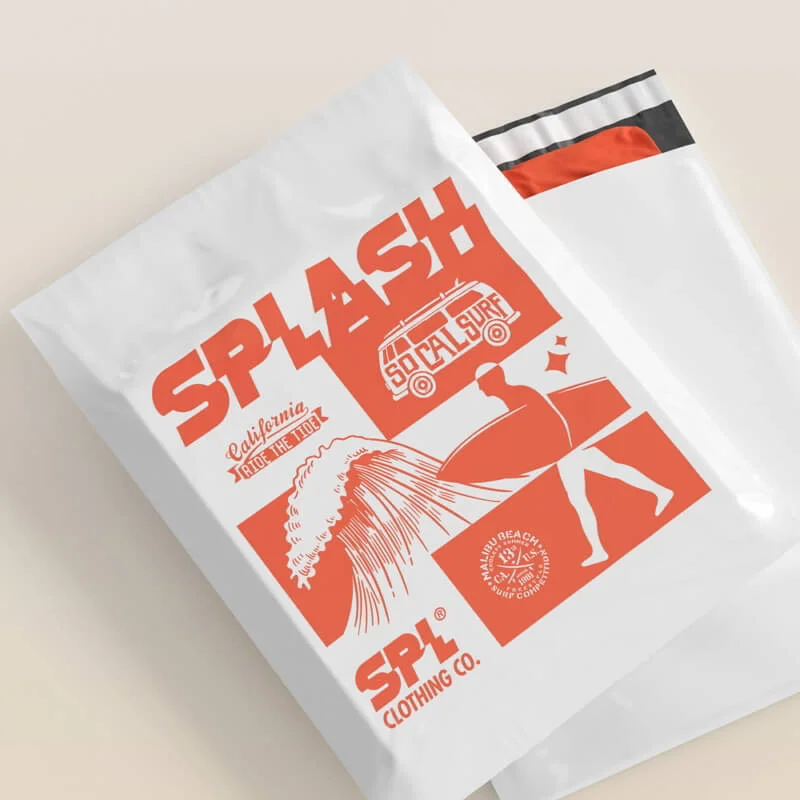
While plain poly mailers are functional, customizing poly mailers with your brand’s logo, colors, and unique design offers significant advantages.
10.1 Enhancing Your Brand Image with Custom Packaging
Custom-printed poly mailers transform a simple shipping container into a powerful branding tool. They create a more professional and memorable unboxing experience, reinforcing your brand identity and showing customers that you care about the details.
10.2 Customer Experience
Custom-printed poly mailers show that you care about customer’s unboxing experience
10.3 Marketing
Custom-printed poly mailers can reinforce marketing strategy.
10.4 Differentiation
Custom-printed poly mailers can differentiate your brand from others.
11. What Products Can You Ship in Poly Mailers?
11.1 Suitable Items: Lightweight, Non-Fragile Goods
Poly mailers are best suited for non-fragile, relatively lightweight items that are not easily crushed, bent, or damaged. Examples:
- Clothing: T-shirts, shirts, dresses, leggings, jeans, sweaters, etc.
- Soft goods: Towels, blankets, scarves, fabric, yarn.
- Books and magazines:
- Documents and printed materials:
- Some packaged non-perishable food items:
- Other non-fragile, relatively flat items.
- Use keywords: suitable items, non-fragile, lightweight, clothing, soft goods, books, documents, apparel, textiles
11.2 Unsuitable Items (Without Extra Protection): Protecting Fragile Goods
Fragile items, sharp objects, liquids (unless very securely sealed), and high-value items are generally not suitable for shipping in poly mailers unless you take extra precautions. Examples:
- Jewelry:
- Glassware and ceramics:
- Electronics:
- Artwork:
- Anything easily broken or damaged.
Use keywords: unsuitable items, fragile items, sharp objects, liquids, high-value items, glassware, electronics, ceramics, breakable items
11.3 Providing Adequate Protection for Fragile Items Within Poly Mailers
If you must ship a more delicate item in a poly mailer (generally not recommended):
- Wrap thoroughly: Multiple layers of bubble wrap.
- Place inside a small, sturdy box.
- Place the box inside the poly mailer.
- Fill remaining space: With packing peanuts or other cushioning.

12. Reusing Poly Mailers: Sustainability and Savings
Poly mailers can be reused if:
- It is clean and undamaged
- Has no leftover labels, remove or cover it with new label.
- Cover any weak spots with tape.
Some custom poly mailers come with two adhesive strips to encourage reuse for returns or re-gifting.
13. Cost-Effectiveness of Poly Mailers
13.1 Lower Shipping Costs
Poly mailers are lightweight, which helps reduce shipping costs compared to heavier packaging options like boxes.
13.2 Inexpensive to Purchase
Poly mailers are generally inexpensive to purchase, especially when bought in bulk.
14. FAQs About Mailing Poly Mailers
14.1 Can I use stamps on a poly mailer?
Yes, you can use stamps on a poly mailer, as long as the total postage value is sufficient.
14.2 Do I need to put a “fragile” sticker on a poly mailer?
Only if the contents are actually fragile. A “fragile” sticker is not a substitute for proper packaging. Use a box for fragile items.
14.3 What happens if my poly mailer is too heavy for First-Class Mail Package Service?
You’ll need to upgrade to a different USPS shipping service (like Priority Mail) or use FedEx/UPS, and pay the additional postage.
14.4 Can I mail a poly mailer internationally?
Yes, but you’ll need to fill out customs forms and pay higher postage rates. Research regulations for the destination country.
14.5 How can I track my poly mailer?
Choose a shipping service that includes tracking (most do). You’ll receive a tracking number to monitor the package online.
14.6 Can I put a box inside a poly mailer?
Yes, for extra protection, but be mindful of size, weight, and dimensional weight. Never combine Flat Rate and non-Flat Rate packaging.
15. Additional Tips
- Package items securely to prevent shifting or damage. Using appropriate size mailer and packing material.
- Check carefully shipping labels to avoid extra charges or delays
- When purchasing items online for resale, like on Mercari shipments, carefully consider guidelines, as they provide helpful information and support for using shipping protection, making it a cost-effective and potentially the best shipping choice.
16. My Pack Love – Providing Service for Poly Mailers and Packaging
My Pack Love specializes in providing high-quality packaging solutions for the garment industry, including a wide range of poly mailers in various sizes and styles. We understand the importance of proper packaging.
We offer:
- Poly mailers for clothes.
- Processing labels
- Processing tags
- Zipper bags
With more than 8 years of experience in the garment industry, we can help you choose the right poly mailers for your needs. Contact us today! Visit our website at mypacklove.com.
Read more:
Mailing poly mailers effectively involves several key steps: choosing the right mailer, properly preparing and protecting your item, addressing it accurately, selecting a shipping service, and purchasing postage. By following this guide, you can ensure your packages arrive safely and on time, while also minimizing costs.
Remember to prioritize secure packaging, accurate addressing, and appropriate postage. With a little care and attention to detail, mailing poly mailers can be a simple and efficient process, whether you’re sending personal gifts or fulfilling orders for your business.