Zipper Insertion: Pro Finish for Garments And Bags


For small businesses involved in creating garments or bags, achieving a consistently high-quality finish is essential, yet sometimes challenging. Proper zipper insertion stands out as a critical skill within garment construction and overall sewing techniques.
A well-inserted zipper contributes significantly to the durability and aesthetic appeal of garments and bags. This guide provides clear, practical instructions on two fundamental methods: the standard centered application and the seamless invisible zipper technique.
Developing proficiency in these areas will allow businesses to enhance their products, achieve a more professional finish, and ultimately improve customer satisfaction. Let’s start!
1. Understanding Zipper Insertion: More Than Just a Closure
Zipper insertion refers to the specific technique of sewing a zipper mechanism into a seam or prepared opening within a piece of fabric. This step is a fundamental component of the broader sewing process and integral to professional garment making. Mastering this skill is essential for anyone creating apparel, bags, or other textile products.
For businesses, the quality of zipper insertion directly impacts product perception and performance. A neatly installed zipper contributes to the item’s overall durability, aesthetic appeal, and perceived value, particularly for clothing closure where function is paramount.
Conversely, a poorly executed zipper—one that is wavy, stiff, or incorrectly aligned—can significantly detract from an otherwise well-constructed piece, potentially leading to customer dissatisfaction and returns. Achieving a professional finish in this area elevates the entire product.
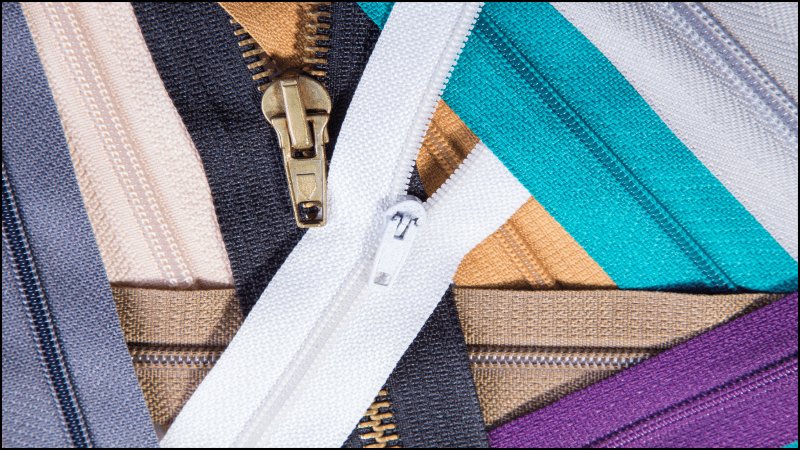
Several zipper types are commonly used, and the choice often depends on the project’s requirements and the desired look. The standard coil or polyester zipper is versatile, featuring visible teeth usually made of coiled polyester.
The invisible zipper is designed so that only the pull tab is visible from the outside when sewn correctly, creating a seamless appearance ideal for dresses and skirts.
For items requiring greater strength, such as jeans or heavy-duty bags, metal teeth zippers offer enhanced durability. Understanding the basic differences helps in selecting the appropriate zipper for the specific fabric and application.
2. Essential Toolkit: Gathering Your Supplies for Zipper Success
Having the appropriate tools on hand streamlines the zipper insertion process and significantly contributes to achieving professional results. Before starting, gather the following essentials:
- Fabric & Zipper: Ensure your chosen fabric is properly prepared (e.g., pre-washed if necessary) and you have the correct type and length of zipper for your project. The zipper tape (the fabric part alongside the teeth) should be compatible with your main fabric weight.
- Sewing Machine: A reliable Sewing Machine in good working order is fundamental.
- Zipper Foot: This specialized presser foot is essential for standard zipper applications. Its design allows the needle to stitch very close to the zipper teeth without obstruction. Different machine brands might have specific names or numbers (like Zipper Foot #4/4D), but its core function is universal – providing clearance on one side of the needle.
- Invisible Zipper Foot: Specifically designed for invisible zippers, this presser foot typically has grooves on the underside that guide the coiled zipper teeth, ensuring the stitching is placed precisely in the ditch beside the coil. Generic versions are widely available, though some machines use specific models (e.g., Invisible-Zipper Foot #35).
- Needles: Use sharp, appropriate Needles for your fabric type and weight. A fresh needle prevents skipped stitches and fabric damage.
- Thread: Select high-quality Thread that matches your fabric color and is suitable for garment construction. Polyester thread is often a good all-purpose choice.
- Pins or Clips: Fine, sharp Pins or fabric clips are necessary for holding the zipper securely in place before and during sewing.
- Marking Tool: A fabric pen, chalk, or pencil for marking placement lines accurately.
- Small Scissors or Snips: Useful for trimming threads neatly.
- Seam Ripper: An indispensable tool for correcting any mistakes in stitching.
- Iron and Ironing Board: Crucial for pressing seams and the zipper tape during the preparation and insertion process.
- (Optional) Basting Tape: Double-sided adhesive tape designed for fabric, such as Dritz Wash Away Wonder Tape, can be very helpful for holding the zipper perfectly in place without pins, especially for slippery fabrics or invisible zippers. The tape dissolves in the wash.
3. Technique 1: The Standard Centered Zipper Insertion
The Standard Centered Zipper application is a common and reliable method often used in garment construction (like skirt or dress backs) and bag making where the zipper is intended to be visible and centered within the seam.
- Prepare the Seam: Sew the Seam where the zipper will be placed, using the designated seam allowance (e.g., 5/8 inch or 1.5 cm). Stitch from the garment edge down to the marking indicating the bottom of the zipper opening. Backstitch securely at this point. Continue sewing the remainder of the seam below the zipper opening.
- Press the Seam Open: Press the seam allowances flat open along the entire length, including the area where the zipper will be inserted. Accurate pressing creates a clear guideline.
- Position the Zipper: Place the Zipper face down onto the pressed-open seam allowances, ensuring the top stop is positioned correctly relative to the garment’s top edge (usually just below the finished edge or waistband seam line). Carefully center the zipper teeth directly over the seam line. Secure the zipper tape to the seam allowances using pins placed perpendicular to the zipper. Alternatively, hand or machine basting stitches can be used for greater stability, stitched only through the zipper tape and seam allowances, not the main garment fabric.
- Attach the Zipper Foot: Install the standard zipper foot onto your sewing machine. Adjust the needle position so it is to one side of the foot, allowing you to stitch close to the zipper teeth.
- Stitch the First Side: Starting from the top of the zipper opening on the outside of the garment, begin Stitching down one side of the zipper. Stitch through the garment fabric, seam allowance, and zipper tape, keeping a consistent distance (typically 1/4 inch or 6mm) from the centered seam line. Ensure your stitches run parallel to the zipper teeth. Stop stitching just below the bottom zipper stop.
- Stitch Across the Bottom: With the needle down, pivot the fabric 90 degrees. Stitch horizontally across the bottom of the zipper, just below the metal stop, connecting your first line of stitching to where the second line will begin.
- Stitch the Second Side: Pivot the fabric again 90 degrees. Stitch up the second side of the zipper, maintaining the same distance from the center seam line as the first side. Ensure symmetry. Backstitch at the top to secure.
- Remove Basting: Carefully remove any temporary basting stitches using a seam ripper. Press the finished application gently from the right side using a press cloth if necessary.
4. Technique 2: Achieving the Invisible Zipper Finish
The Invisible Zipper provides a clean, high-end look for clothing closure, as the zipper mechanism itself is hidden within the seam when closed. This technique is frequently used in dresses, skirts, and blouses.
- Prepare Zipper and Fabric: Unlike standard zippers, invisible zippers are typically inserted before the main seam below the zipper is sewn. Open the Zipper. Gently press the coiled teeth flat with a warm iron (use a low setting appropriate for the zipper material, usually nylon), rolling the teeth away from the zipper tape. This makes it easier for the foot to get close to the coils. Mark the required seam allowances on the wrong side of the Fabric pieces where the zipper will be attached.
- Attach the Invisible Zipper Foot: Install the specialized invisible zipper foot onto your sewing machine. This presser foot has grooves on the underside designed to guide the zipper teeth.
- Stitch the First Side: Place the right side of the open zipper tape onto the right side of one fabric piece, aligning the edge of the tape with the raw edge of the fabric (or align the coil with the seam allowance marking). Ensure the top stop is positioned correctly below the fabric’s finished edge. Place the zipper teeth into the appropriate groove of the invisible zipper foot. Begin Stitching from the top down, allowing the foot to guide the needle right alongside the zipper teeth. Stop stitching near the bottom zipper slider marking. Do not sew over the bottom stop itself yet. Backstitch slightly.
- Stitch the Second Side: Attach the other side of the zipper tape to the second fabric piece in the same manner (right side of zipper tape to right side of fabric). Ensure alignment is perfect, especially at the top edge. Fit the zipper teeth into the other groove of the invisible zipper foot and stitch down this side, stopping parallel to where you finished on the first side. Backstitch.
- Close the Zipper: Carefully close the zipper to check alignment. The seam should meet perfectly with only the pull tab visible.
- Sew the Remaining Seam: Remove the invisible zipper foot and attach your standard zipper foot. Pin the remaining Seam below the zipper together, right sides facing. Start stitching just above and slightly to the side of the last stitches made during the zipper insertion, getting as close as possible to the zipper stitching line. Continue sewing the seam down to the garment hem, following the designated seam allowance. Backstitch at the beginning and end.
- Press: Press the seam below the zipper open. Press the area around the zipper carefully from the wrong side. The bottom zipper stop and tape ends will lie within the seam allowance.
5. Pro Tips from Experience for Flawless Zipper Installation
Achieving a perfect zipper application consistently comes with attention to detail and understanding how materials interact. Here are some insights gathered over time:
Master the Art of Pressing: Proper Pressing is non-negotiable. Press seam allowances open accurately before positioning the Zipper. For invisible zippers, gently pressing the coils flat (using the correct heat setting) makes guiding them through the specialized foot much easier. Use a press cloth on delicate fabrics or directly on the zipper tape if needed.
Prepare Your Zipper: Consider pre-washing zippers if you are using fabrics prone to significant shrinkage (like cotton or linen) to prevent puckering later. Always ensure the zipper tape is smooth and flat before starting.
Consistent Stitches Matter: Use an appropriate stitch length for your fabric – generally a standard construction length (2.5-3mm). Ensure your stitches are straight and evenly distanced from the zipper teeth for a professional look, especially with centered applications.
Thread Choice and Quality: Use good quality Thread that matches your fabric. Poor quality thread can break easily or create tension issues. While matching color is standard, a slightly darker thread often blends better than a slightly lighter one if an exact match isn’t available.
Troubleshooting Common Zipper Problems:
- Waviness/Puckering: Often caused by stretching the fabric or zipper tape during sewing, incorrect machine tension, or the fabric needing stabilization. Consider using interfacing along the seam allowance on lightweight or stretchy fabrics. Basting tape can also help hold things steady.
- Stiffness: May occur if stitches are too close to the teeth (especially metal zippers) or if the fabric is very bulky. Ensure proper foot usage and seam allowance grading if necessary.
Practice Makes Perfect: Don’t expect flawless results on your first try, especially with invisible zippers. Practice the techniques on fabric scraps using the same fabric, interfacing (if used), and zipper type as your final project. This builds muscle memory and helps identify potential issues beforehand.
6. Related Questions
6.1 Why is using a specific zipper foot or invisible zipper foot necessary?
Using the correct presser foot (zipper foot for standard applications, invisible zipper foot for invisible types) is crucial for precise and safe zipper insertion.
These feet are designed with specific shapes or grooves that guide the needle extremely close to the zipper teeth without hitting them. This allows for accurate stitch placement essential for a professional finish.
Attempting to sew a zipper with a standard presser foot often results in stitches being too far from the teeth, creating a less secure or aesthetically pleasing result.
More importantly, it significantly increases the risk of the needle striking the zipper teeth, leading to needle breakage, potential damage to the sewing machine’s timing, or skipped stitches.
6.2 Which zipper insertion method is generally considered easier for beginners?
For those new to sewing, the standard centered method is often perceived as slightly easier to learn initially. While it requires careful centering, the process of stitching on the outside after basting the zipper in place can feel more straightforward.
The invisible zipper technique demands greater precision from the start, particularly in aligning the coils correctly within the specialized foot’s grooves and ensuring both sides match perfectly when closed.
However, with practice and the correct invisible zipper foot, this method also becomes quite manageable.
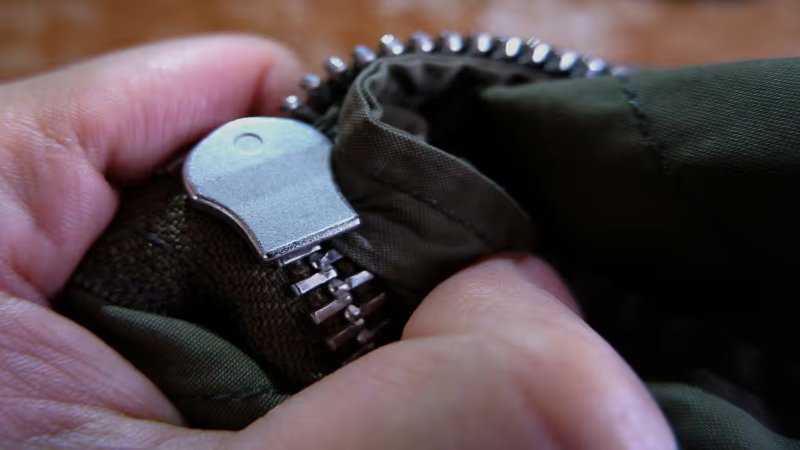
6.3 How can a zipper be shortened if it’s too long for the project?
Yes, zippers can often be shortened. For a non-separating polyester zipper (one that doesn’t come completely apart at the bottom), you typically shorten it from the top.
After insertion, carefully measure where the new top should be. You can remove the excess teeth above this point using pliers (gently rocking them side to side) or by carefully snipping them off without cutting the zipper tape.
Then, create a new secure stop by hand-sewing several stitches (bar tack) across the teeth just below your desired top edge, or machine-sewing a dense satin stitch or bar tack across the tape on either side, just above the last remaining teeth.
For coil zippers being shortened from the bottom before insertion, cut the zipper to length and create a strong bar tack across the coils just above the cut end to act as the new bottom stop. Always ensure any new stop is very secure before use.
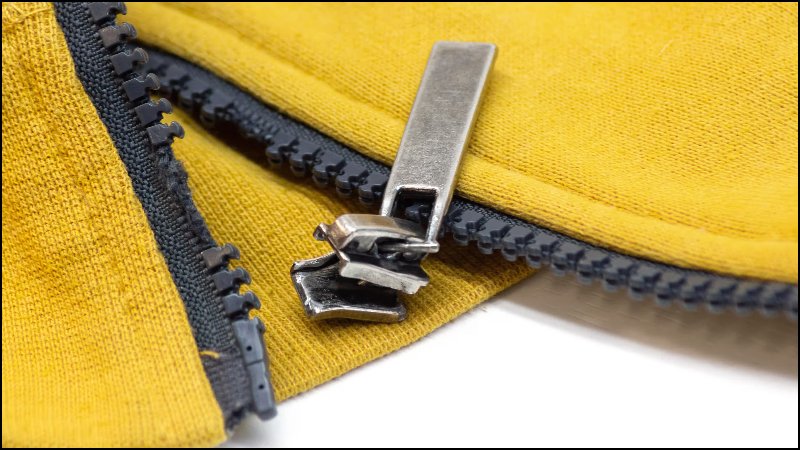
6.4 What causes the fabric around a zipper to pucker or look wavy?
Puckering or waviness along a zipper seam is a common frustration with several potential causes. One frequent reason is stretching either the fabric or the zipper tape (or both) during the sewing process; ensure you guide the fabric gently without pulling.
Incorrect sewing machine fabric tension (either upper thread or bobbin) can also contribute. Lightweight or stretchy fabrics often require stabilization; applying lightweight interfacing along the seam allowance before inserting the zipper can prevent stretching and provide support.
Lastly, a mismatch between the weight of the zipper tape and the garment fabric can sometimes cause issues – a heavy zipper tape on very lightweight fabric might cause distortion. Using basting tape instead of pins can also help minimize fabric shifting during sewing.
Read more:
Mastering zipper insertion is an achievable goal and a fundamental aspect of elevating the quality of your products in garment making. By understanding and practicing effective tailoring methods, such as the standard centered and invisible zipper techniques discussed, businesses can significantly enhance the durability, appearance, and overall professional finish of their creations.
Consistently well-executed zippers contribute greatly to customer perception and satisfaction. As you refine these construction skills, remember that the final presentation extends beyond the stitching; ensuring your branding elements like labels, tags, and packaging match the quality of your garments completes the customer experience.
For high-quality, custom branding solutions tailored to apparel businesses, consider exploring the options available through My Pack Love.