How to Iron On Patches on Denim Securely: Easy Steps
Patches have become more than just a way to mend clothes; They’re a form of self-expression, a way to add personality and flair to your favorite denim pieces. Whether you’re looking to cover a rip, add a vintage vibe, or showcase a unique design, ironing on a patch is a simple and effective technique.
This guide will provide you with everything to know to master the art of ironing on patches, transforming your denim garments into personalized works of art. Businesses specializing in clothing can utilize patches to provide customized items for their customers, too. Through this article, readers will gain a comprehensive understanding of:
- Materials and Preparation: Gathering the necessary tools and ensuring the denim is ready for the patch.
- Step-by-Step Ironing: A detailed walkthrough of the ironing process, from positioning to final checks.
- Optional Reinforcement: Enhancing durability through sewing.
- Troubleshooting: Addressing common issues like peeling or scorching.
- Care Instructions: Maintaining the patch and denim for longevity.
1. Gathering Your Materials & Preparing Your Denim
1.1 Essential Tools and Materials
Before starting, gather all necessary items to make the process smooth and efficient. Here’s a comprehensive list:
Iron-on Patch: These come in various styles, including:
- Embroidered patches: Known for detailed designs and textured surfaces.
- Woven patches: These offer a smoother, flatter look with high durability, great for intricate designs.
- Chenille patches: Easily recognizable by their fuzzy, looped texture, often used for lettering or bold, simple shapes.
- Denim Garment: Jacket, jeans, skirt, or any other denim item you want to customize.
- Household Iron: A standard iron used for clothes.
- Ironing Board: A stable, heat-resistant surface for ironing. A thick, folded towel on a sturdy table can also work.
- Pressing Cloth: A thin piece of fabric, such as a cotton pillowcase, handkerchief, or a piece of parchment paper. This is crucial to protect both the patch and the denim from direct heat, preventing scorching or damage.
- Cotton Towel (Optional): For placing inside the garment, particularly useful for jeans or jacket sleeves, to provide a firmer backing.
- Parchment Paper (Optional): An alternative to a pressing cloth, offering a non-stick surface.
- Sewing Needle and Thread (Optional): For reinforcing the patch, especially recommended for frequently washed items or areas prone to high wear. Choose a thread color that matches the patch border or the denim, depending on the desired look.
- Fabric Marker (Optional): To mark the exact placement of the patch before ironing.
- Scissors (Optional): For trimming any loose threads on the denim or adjusting the patch if needed.
1.2 Preparing Your Denim Garment
Proper preparation is crucial for ensuring the patch adheres correctly and lasts long. Follow these steps:
Wash and Dry (If Applicable): If the denim garment is new, wash and dry to remove any sizing, finishes, or chemicals that might interfere with the adhesive bond. Washing also pre-shrinks the fabric, preventing distortion after the patch is applied. Do not use fabric softener. Fabric softener leaves a residue that can prevent the patch from adhering properly.
Iron the Area: Iron the specific area where you’ll be applying the patch to create a smooth, wrinkle-free surface. Wrinkles or creases can create air pockets, weakening the bond between the patch and the denim. A flat surface ensures maximum contact and a secure hold.
Inspect for Damage: Check the denim for any holes, tears, or weak spots in the area where you’ll place the patch.
Repair (If Necessary): If there’s a hole or tear, it’s best to repair it before applying the patch. This provides a stable base for the patch and prevents further damage.
- For small holes or tears, a few simple hand stitches can reinforce the area. Use a thread that matches the denim color. You can make small, overlapping stitches to close the gap and secure the edges.
- Consider using a small piece of fabric, denim that matches is the best, as a backing for larger holes, stitching it in place before applying the patch.
Expert Advice:
- Always remember, preparing your denim garment is very important. If not carefully prepared, problems may arise when attaching the patch, and durability may not be guaranteed. Therefore, spend time preparing carefully to ensure that the patch is attached most effectively.
- Businesses often overlook this preparation step, so make sure you follow these instructions to have the best quality customized product.

2. Step-by-Step Guide to Ironing On Your Patch
2.1 Positioning Your Patch
Careful placement is key to achieving the desired look. Here’s how to ensure your patch is perfectly positioned:
- Lay the Garment Flat: Place your denim garment on the ironing board or prepared surface, ensuring the area where you’ll apply the patch is smooth and accessible.
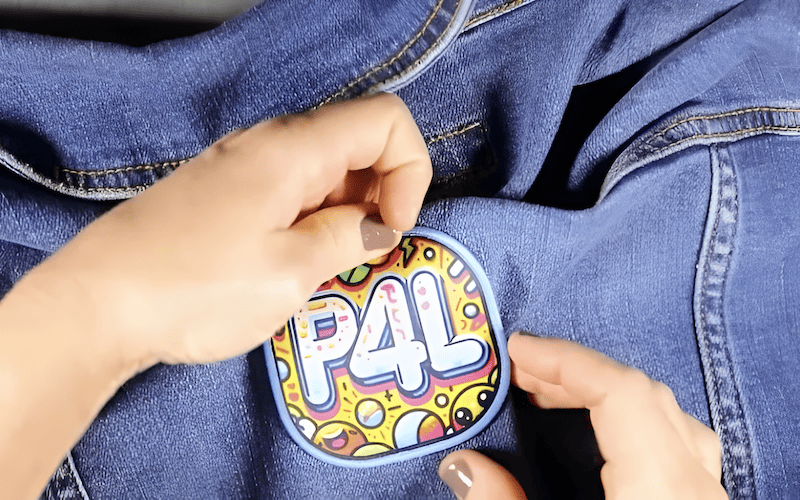
- Position the Patch: Place the patch on the desired location, adhesive side down. The adhesive side is usually the back of the patch and may appear shiny or slightly sticky.
- Visualize and Adjust: Step back and examine the placement. Make any necessary adjustments to ensure the patch is centered, straight, and aesthetically pleasing.
- Marking (Optional): If precise placement is crucial, use a fabric marker to lightly mark the desired position of the patch’s corners or center. This helps maintain accuracy during the ironing process.
- Securing (Optional): For intricate placements or larger patches, consider using a few straight pins to temporarily hold the patch in place. Be sure to place the pins outside the patch’s border, where they won’t interfere with the ironing process. Remove the pins before applying heat.
Expert Advice:
- For young people, placing patches is not just about fixing clothes but also about expressing style and personality. Popular patch placements for young people can include clusters on jacket sleeves, scattered across the front of jeans, or creating a unique design on the back of a jacket. Don’t be afraid to get creative!
- For parents, consider the practicality of the patch placement. Choose locations less prone to wear and tear, such as the upper chest area of a jacket or the thigh area of jeans (avoiding knees). This can extend the life of the patch, especially on children’s clothing.
2.2 Setting Your Iron
Correct iron settings are essential for activating the adhesive without damaging the patch or the denim. Here’s a detailed guide:
- Check Patch Instructions: Always refer to the manufacturer’s instructions provided with your iron-on patch. These instructions may specify the recommended heat setting, ironing time, and other important details.
- Determine Fabric Setting: If the patch instructions are unavailable, determine the appropriate heat setting based on the denim’s weight and composition. Generally:
- Medium to Heavyweight Denim: Use the “Cotton” or “Linen” setting on your iron. This typically corresponds to a temperature range of 275-325°F (135-160°C).
- Lightweight Denim: Start with a slightly lower setting, such as “Synthetic” or a medium heat, and gradually increase if needed.
- Disable Steam: Ensure the steam function on your iron is turned off. Moisture can interfere with the adhesive, preventing a strong bond. Use a completely dry iron.
- Heat Up: Allow the iron to heat up completely to the selected setting before applying it to the patch.
- Test Area (Recommended): If you’re unsure about the heat setting, perform a test on an inconspicuous area of the denim (like the inside of a hem or pocket) to check for any adverse effects, such as discoloration or scorching.
Expert Advice: Using the correct heat setting is crucial; too little heat and the patch won’t adhere, too much heat and risk damaging the patch or denim. When in doubt, always start with a lower heat setting and gradually increase it if necessary.

2.3 Applying Heat and Pressure
This is the core step where the patch bonds to the denim. Precision and care are crucial:
- Cover with Pressing Cloth: Place the pressing cloth (cotton pillowcase, handkerchief, or parchment paper) over the patch. This protects the patch and denim from direct contact with the hot iron, preventing scorching, melting, or discoloration.
- Position the Iron: Carefully place the preheated iron directly over the pressing cloth and patch.
- Apply Firm, Consistent Pressure: Press down firmly on the iron, applying consistent pressure. Do not slide the iron around as you would when ironing wrinkles out of clothing. Instead, maintain steady pressure in one spot.
- Circular Motion: While maintaining pressure, move the iron in small, overlapping circles over the entire surface of the patch. This ensures even heat distribution and activates the adhesive across the entire patch area.
- Maintain Pressure and Time: Continue pressing with firm pressure and the circular motion for the time specified in the patch instructions. If no instructions are available, start with 30-45 seconds for smaller patches and 60 seconds or longer for larger patches.
- Focus on Edges: Pay particular attention to the edges of the patch, ensuring they receive adequate heat and pressure. The edges are the most likely areas to lift or peel if not properly adhered.
- Repeat if Necessary: For very large patches, you may need to repeat the process in sections, overlapping slightly to ensure the entire patch receives sufficient heat and pressure.
Expert Advice:
- The key to success is consistent pressure and even heat distribution. Avoid lifting the iron prematurely or sliding it around too much, as this can disrupt the bonding process. Businesses often have heat presses, which can provide greater, more even heat distribution, but you, as an end user, can get good results at home with an iron by using correct technique.
- For thicker denim or patches, you may need to increase the ironing time slightly. Monitor the patch closely and adjust the time as needed, but always err on the side of caution to avoid scorching.
2.4 Checking for Adhesion
After applying heat, it’s crucial to check if the patch has properly adhered to the denim:
- Remove the Iron and Pressing Cloth: Carefully lift the iron and set it aside. Remove the pressing cloth.
- Visual Inspection: Examine the patch closely. Look for any areas where the edges are lifting or appear loose. The patch should appear fully integrated with the denim fabric.
- Gentle Test: Gently try to lift a corner or edge of the patch with your fingernail. If it lifts easily, it hasn’t adhered properly.
- Reheat and Reapply Pressure (If Necessary): If any part of the patch is lifting, replace the pressing cloth and reapply heat and pressure to that specific area for another 10-20 seconds. Use the same circular motion and firm pressure as before.
- Repeat as Needed: Continue checking and reheating until the entire patch is firmly adhered to the denim.
Expert Advice: Don’t be afraid to repeat the heating process multiple times, especially for thicker patches or stubborn areas. It’s better to apply heat in shorter intervals than to overheat the patch and risk damage. Patience and thoroughness are key to a secure bond.

2.5 Cooling and Final Check
This final step is often overlooked but is essential for a long-lasting bond:
- Allow to Cool Completely: Once you’re satisfied that the patch is fully adhered, allow the denim and patch to cool down completely before handling or wearing the garment. This is crucial because the adhesive needs time to set and harden properly. Disturbing the patch while it’s still warm can weaken the bond.
- Final Inspection: After cooling, perform a final check to ensure the patch is securely attached. Gently tug on the edges and look for any signs of lifting. The patch should feel like an integral part of the denim fabric.
- Ready to Wear (or Sew): Once the patch is cool and securely attached, your garment is ready to wear! Or, if you choose to reinforce the patch with sewing, proceed to the next section.
Expert Advice: Resist the temptation to wear the garment immediately after ironing. Allowing the adhesive to cool and set completely will significantly increase the patch’s longevity.
3. Reinforcing Your Patch with Sewing
3.1 Why Sew Your Iron-On Patch?
While iron-on patches are designed to adhere with heat, sewing provides extra security and durability. Here’s why you might consider sewing your patch:
- Increased Durability: Sewing reinforces the bond between the patch and the denim, making it much less likely to peel or detach, even with frequent washing and wear.
- Longevity: Sewing significantly extends the life of the patch, especially on items that are subjected to a lot of stress or friction, like jeans knees or jacket elbows.
- Prevention of Peeling: Even with proper ironing, the edges of a patch can sometimes lift over time. Sewing prevents this by anchoring the edges firmly to the denim.
- Decorative Element: Sewing can also be a decorative element. Using a contrasting thread color can add a visible outline or handcrafted look to the patch.
- Frequently Washed Items: For items that are washed frequently, such as children’s clothing or workwear, sewing is highly recommended.
Expert Advice:
- For parents applying patches to children’s clothing, sewing is almost always a good idea. Kids are tough on their clothes, and sewing ensures the patches stay put through playtime and multiple washes.
- For young people, sewing can be a way to add another layer of customization. Experiment with different stitch types and thread colors to create a unique, personalized look.
- For businesses creating customized clothing, sewing can be offered as a premium option, ensuring the highest quality and longest-lasting results for their customers. Consider showing examples of sewn patches to demonstrate the value and aesthetic appeal.
3.2 Simple Sewing Techniques
You don’t need to be a sewing expert to reinforce a patch. Here are two basic stitches that are easy to learn and effective:
Running Stitch: This is the simplest and most common stitch.
- Thread a needle with a thread color that matches the patch border or the denim.
- Knot the end of the thread.
- Starting from the inside of the garment (to hide the knot), bring the needle up through the denim and the edge of the patch.
- Make a small stitch (about 1/8 to 1/4 inch) forward, then bring the needle back down through the patch and denim.
- Continue making evenly spaced stitches around the entire perimeter of the patch.
- Tie off the thread on the inside of the garment with a secure knot.
Whip Stitch: This stitch creates a more secure edge and is good for patches that might fray.
- Follow steps 1-3 for the running stitch.
- Instead of going straight down, bring the needle up around the edge of the patch and then back down through the denim, creating a diagonal stitch that wraps around the edge.
- Continue this wrapping stitch around the entire perimeter of the patch.
- Tie off the thread on the inside of the garment.
Expert Advice:
- If you’re new to sewing, practice on a scrap piece of fabric first to get comfortable with the stitches.
- Use a thimble to protect your finger while pushing the needle through the fabric.
- Keep your stitches small and consistent for the best results.
- Don’t pull the thread too tight, as this can cause the fabric to pucker.
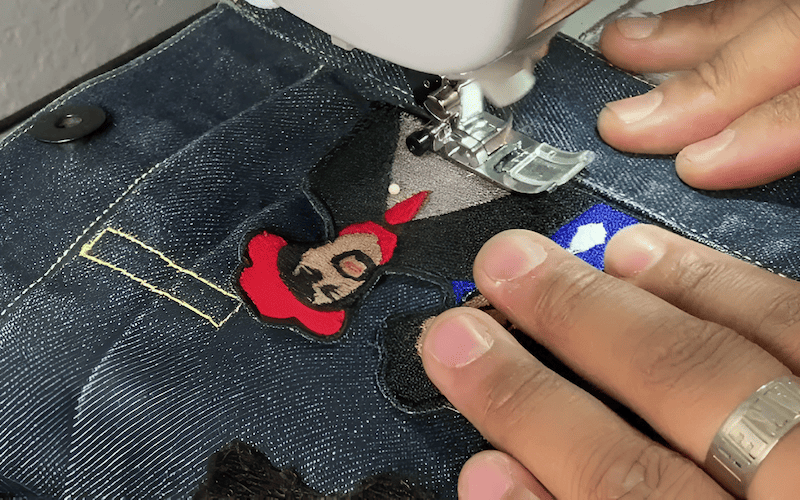
- For best results and a professional look, businesses can use a sewing machine, a zigzag stitch is often used to secure patch edges.

4. Troubleshooting Common Problems
4.1 Patch Peeling or Not Sticking
If your patch is peeling or not sticking, here are the potential causes and solutions:
Insufficient Heat: The iron wasn’t hot enough to fully melt the adhesive.
- Solution: Reheat the area with the pressing cloth in place, using the correct heat setting and applying firm, consistent pressure for the recommended time.
Uneven Heating: Some areas of the patch didn’t receive enough heat.
- Solution: Reheat the affected areas, focusing on the edges and using small, overlapping circular motions to ensure even heat distribution.
Steam Used: Moisture interfered with the adhesive bond.
- Solution: Ensure the iron is completely dry (no steam) and reheat the patch, applying firm pressure.
Fabric Softener Residue: Fabric softener left a coating on the denim, preventing adhesion.
- Solution: If possible, rewash the garment without fabric softener. If that’s not possible, try to gently wipe the area with a damp cloth to remove any residue, then let it dry completely before reapplying heat.
Poor Quality Adhesive: The patch may have a low-quality or old adhesive.
- Solution: If reheating doesn’t work, consider sewing the patch on for a secure hold. If you are a business, consider sourcing patches with high-quality adhesive for consistent results.
Incorrect Fabric Type: Some fabrics, like synthetics or those with special finishes, may not be suitable for iron-on patches.
- Solution: sewing is recommended
Expert Advice: Prevention is always better than cure. Ensure you’re using the correct heat setting, applying even pressure, and preparing the denim properly to avoid sticking issues.
4.2 Denim Scorching or Damage
If you’ve scorched or damaged the denim, here are the possible causes and solutions:
Iron Too Hot: The iron’s temperature was too high for the denim or the patch.
- Solution: Unfortunately, scorching is often irreversible. For minor scorching, you might try gently rubbing the area with a damp cloth or a mild detergent solution, but this may not be effective. For significant scorching, consider covering the area with another patch or decorative element.
Pressing Cloth Too Thin or Not Used: The pressing cloth didn’t provide enough protection from the direct heat.
- Solution: Always use a thick enough pressing cloth, such as a cotton pillowcase or multiple layers of fabric.
Iron Left on Too Long: The iron was held in one place for too long, causing the denim to overheat.
- Solution: Similar to scorching, damage from excessive heat is often irreversible. Prevention is key.
Incorrect Iron Setting: Using a setting too high for synthetic or delicate denim blends.
- Advise: Avoid direct contact of iron with denim.
Expert Advice:
- Always test the iron on an inconspicuous area of the denim first to check for any adverse effects.
- Use a lower heat setting and shorter ironing times if you’re unsure. It’s better to gradually increase the heat than to risk scorching.
- Prevention is crucial. Always use a pressing cloth, the correct heat setting, and avoid leaving the iron on the fabric for too long.
4.3 Patch Placement Mistakes
If you’ve made a mistake in placing the patch, such as positioning it crookedly or not centered, here are the causes and solutions:
Cause:
- Inaccurate Marking: The initial marking for the patch was incorrect.
- Patch Shifted: The patch moved during the ironing process.
- Not Centered: The patch wasn’t properly aligned before applying heat.
Solutions:
- If the patch is still hot: Very carefully try to peel up the corner of the patch while the adhesive is still warm and reposition it. Be extremely cautious, as the adhesive will be hot, and you could damage the patch or the denim. This is only possible if the patch hasn’t fully adhered yet.
- If the patch has cooled: It’s much more difficult to remove and reposition a patch after it has cooled and the adhesive has set. Attempting to force it off could damage the denim or the patch.
- Option 1 (Minor Misalignment): If the misalignment is minor, you might consider leaving it as is, especially if it’s not too noticeable.
- Option 2 (Cover-Up): Consider covering the misplaced patch with a larger patch or another decorative element.
- Option 3 (Removal – Risky): You can try to remove the patch using methods described for removing iron-on patches (which often involve reheating and using an adhesive solvent), but this is risky and could damage the denim.
Expert Advice:
- Before placing the patch, spend time positioning it and making sure it looks correct.
- Using a fabric marker to make placement guidelines can be very helpful.
- Use pins to keep the patch in place.
5. Caring for Your Denim with Iron-On Patches
5.1 Washing Instructions
To maximize the lifespan of your patched denim, proper washing is crucial:
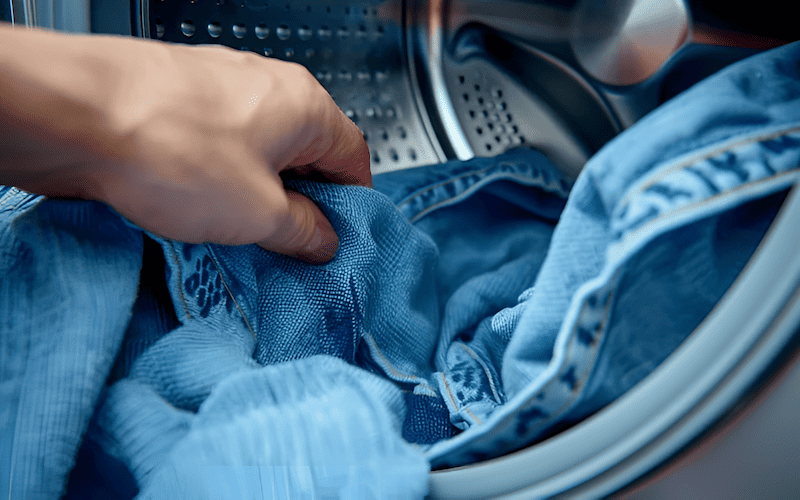
- Turn Inside Out: Before washing, turn the garment inside out. This protects the patch from direct abrasion against other clothes or the washing machine drum.
- Use a Gentle Cycle: Select a gentle or delicate wash cycle. This minimizes agitation and reduces stress on the patch adhesive.
- Cold Water: Wash in cold water. Hot water can weaken the adhesive and cause the patch to detach or fade.
- Mild Detergent: Use a mild detergent. Harsh detergents or bleach can damage the patch, the adhesive, and the denim.
- Avoid Fabric Softener: Do not use fabric softener, as it can leave a residue that weakens the adhesive bond.
- Air Dry Preferred: Air drying is the best option. Hang the garment or lay it flat to dry, avoiding direct sunlight, which can fade the colors.
- Tumble Dry Low (If Necessary): If you must use a dryer, choose a low heat setting. High heat can melt the adhesive and damage the patch. Remove the garment promptly when it’s slightly damp.
- Limit wash times: Frequent washing can cause the patch to peel, so only wash when necessary
Expert Advice: For the longest possible patch life, hand-washing in cold water and air-drying is the most gentle approach.

5.2 Avoiding Damage
Beyond washing, here are some additional tips to prevent damage to your patches:
- Avoid Direct Ironing: Never iron directly on top of the patch after it’s been applied. The heat can melt the adhesive or damage the patch material. If you need to iron the garment, turn it inside out and iron around the patch, or use a pressing cloth over the patched area.
- Minimize Rubbing/Abrasion: Be mindful of areas where the patch might experience excessive rubbing or abrasion, such as under backpack straps or against rough surfaces.
- Protect from Sharp Objects: Avoid contact with sharp objects that could snag or tear the patch.
6. Related Questions
6.1 Can I iron a patch onto any type of fabric?
Iron-on patches work best on fabrics that can withstand high heat, such as cotton, denim, and canvas. Avoid ironing patches onto delicate fabrics like silk, rayon, nylon, or leather, as the heat can damage them. For these materials, sewing is the recommended application method.
6.2 How long do iron-on patches last?
The lifespan of an iron-on patch depends on several factors, including the quality of the adhesive, the frequency of washing, and the amount of wear and tear. With proper application and care, an iron-on patch can last for many years. Sewing the patch on significantly increases its longevity.
6.3 Can I re-iron a patch that’s starting to peel?
Yes, you can often re-iron a patch that’s starting to peel. Place a pressing cloth over the patch and reheat it with firm, consistent pressure, focusing on the lifting edges.
6.4 Can you put iron on patches in the wash?
While you can wash items that have iron-on patches properly attached, care must be taken. Only wash in cold to lukewarm water and where possible, hand wash the item. If washing in the machine, only use the gentle cycle. Always turn the garment with the iron-on patch inside out when washing
Read more:
Ironing on patches is a fantastic way to customize denim, express individual style, and breathe new life into old clothes. By following these steps and taking the necessary precautions, you can successfully apply patches that will last.
Don’t be afraid to experiment with different patch designs, placements, and sewing techniques to create unique and personalized pieces. Remember to always check the patch manufacturer’s instructions and prioritize proper care to ensure your creations stay looking their best. Now go forth and customize!


